Thank you soo much i was looking for a pic of the guts, im gonna try and put a wii classic controller guts into this as well, i have 2 classic controllers and 2 t6 sticks, so if i mess them up then i have spares… i just want to stick for the 360 and the wii…
anyone have any advice or precautions for me before i open them up… i will post pics
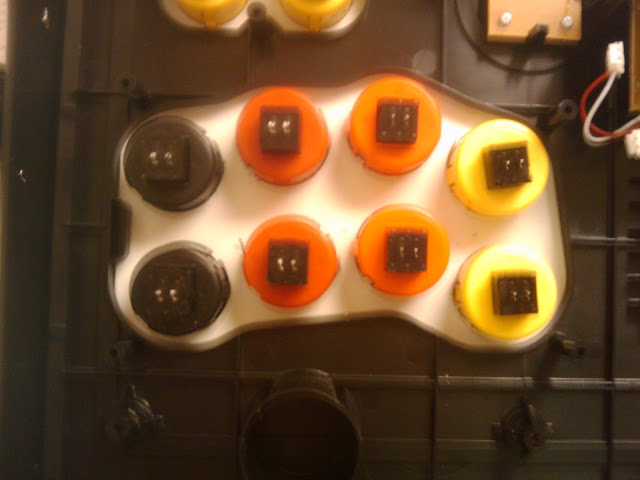
I didn’t get a pic of before… I was anxious to fix it The button PCBs are useless and easily desoldered… just keep a chunk of the wires on it so you can trace the leads to the buttons.
Here is the original order for the 360 stick button board in case you lose it…
The board has exposed copper and removable spots for the buttons so you can easily add any board that uses common ground and expand the capabilities of the controller I would imagine. Easier to just remove altogether though.
Not hard to mod, just go to wally world and get some 5 min epoxy and carefully epoxy the stick STRAIGHTLY in place. Don’t use too much either. This involves dremeling the mounting posts off and the end of the shaft that rubs with the bottom… also the rib and some material needs to come off the bottom plate, but it’s not too much to cause any weakness or distortion as long as your careful… i used sandpaper so it took me awhile, but it’s not too bad. I’m gonna end up putting a chimp board in and completely replace the electronics. I might just build another with a chimp board in it instead and keep this one as is because I’m growing kinda fond of it.
This post has more information. He did it first so I can’t take all the credit:
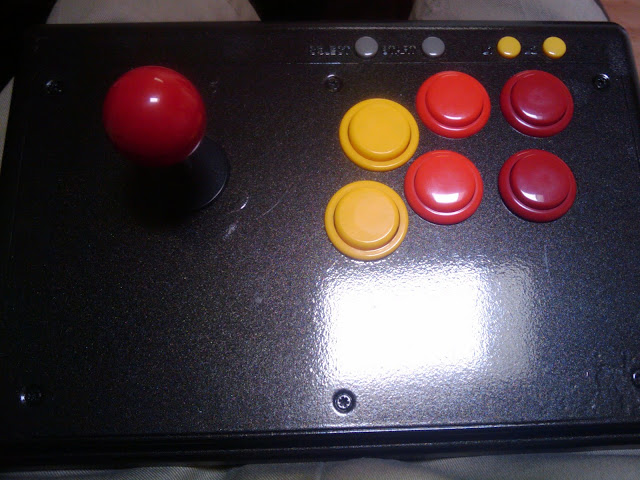
You might want to change the default Hori button layout to this since it will work with the SFIV defaults without having to re-map anything. It won’t match the button labels on the Hori artwork but who cares since most people will be changing it or don’t care for it anyways.
(X) (Y) (RB) (LB)
(A) (B) (RT) (LT)
I’m not sure if the RT LT combo should be for punch or kick but I can confirm this later or else check in the SFIV controller options. ** Corrected now **
This has worked great for me and I just used it last night to mod my Tekken wireless stick and swapped in Sanwa buttons and a JLF with octogate. I didn’t bother desoldering the button and just literally ripped the PCB apart and then easily removed the buttons. Then with my dremel I shaved off the little tabs for each button hole and the Sanwas dropped in nicely. For the JLF that is a different story and involved quite a bit of shaving and drilling to get the black mounting plate to fit on the existing mounting holes. I made the mistake of drilling right through and realized this after but I found a solution that works quite well. I still managed to use the existing stock Hori mounting screws but I threaded them through two of the Omron switch holes which lined up with the mounting holes and then shaved two small nubs on my octogate and it clipped in perfectly after this. I will take pictures later because it was getting late last night when I got all the wiring done and at tested at 1am to be grinding away with my dremel to clear the JLF shaft. I might do this or else use the stock Hori shaft and not bother since I have read in an earlier post someone doing that.
Now for the joystick wiring mapping, refer to the image above and it will be the harness on the top right on the main PCB with the 4 pairs of colored wires. Here is the mapping from left to right look at it from top.
1-Ground (yellow)
2-Right (yellow)
3-Ground (blue)
4-Down (blue)
5-Ground (white) <-- make sure you cut this pair of white wires as close to the microswitch as possible cause it is short to begin with.
6-Left (white)
7-Ground (red)
8-Up (red)
These wire mappings have been very helpful to me for the last two weeks in not only modding my Tekken stick last night which I was planning to sell but I also made two wireless HAPP sticks from scratch using the guts from two other Tekken wireless sticks two weekends ago. I will take pictures and show you guys later on, just trying to finish off the bottom cover for the battery compartment but yesterday my friend had a brand new set of red, white, and blue Sanwas and a JLF with Octogate and new harness that he didn’t need and he gave me a price I simple couldn’t refuse. I am very biased towards HAPP/iL when it comes to my arcade stuff and never did like and still not crazy for japanese parts like Sanwa/Seimitsu or SFIV to be honest. I am old school from back in the day as you have probably seen from my other projects that I love playing the older versions of Street Fighter.
Here is my showcase style arcade cabinet I started last summer and only about 60% done but 100% functional and entertained many guests for hours in my game room. Right now it just sits on that stand but if you are familar with the Dynamo showcase style cabinets that is what my end result will be like. It has made a few trips to some get togethers and hooked up to plasmas and LCDs via HDMI for some good old school fun in MAME. I will probably finish it this summer as I am kept quite busy with my 1 year old daughter.
Anyways, back on topic and now I have the best of both worlds for my arcade fight sticks. I do like how small and light my new Tekken wireless stick is but I still prefer the feel of HAPP/iL parts. Another really nice thing I like about this wireless tekken stick for the 360 is it can also be paired with my HTPC using Micro$oft’s 360 wireless receiver so I can play MAME from any couch in my living room
ps… have you figured out the wires to the group of wires to the left of the joystick?
i have a usb cable from a madcatz that im going to put it in to make it wired… (i know that its still going to be wireless, but i hate the wireless… how many times have i died in a g1 battle cuz of a “please reconnect controller” T____T)
i would appreciate it…
also, i transferred all of the parts to a separate MDF box that is 10x heavier so i have a hole for a wire in it already…
Sorry, all the info I have for those group of wires are:
The group of wires to the left of the joystick wires:
(from right to left)
1-Vcc (3 volts)
2-?
3-?
4-?
5-Ground
(note: pins 2-5 go to a 4 pin header inside the battery compartment. I have no idea what its used for, maybe usb?)
Here are some pics in case some of you don’t check the dedicate fight stick picture thread.
Still don’t know what the wires are. You do run the risk of frying the pcb if you try hooking up the 5v line of the usb to one of those unknown spots since after-all they might not even be usb lines.
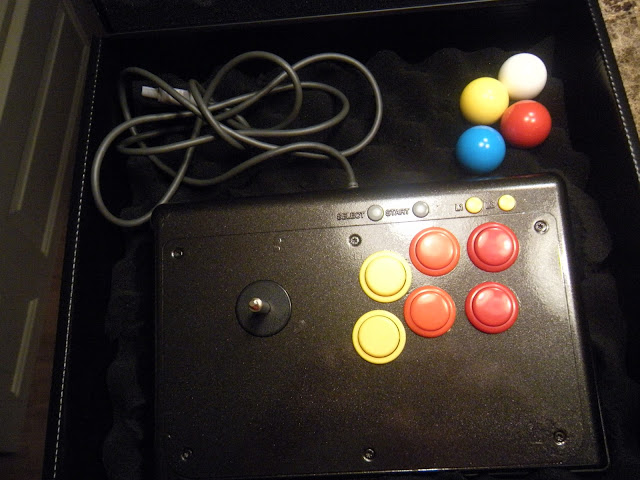
:razzy:My 2nd ever mod; Hori-Namco T6. Love this for home use as it is wireless out of the box. Didn’t care for the faceplate art but the weight and design are definite pro.'s so I modified it to match my Hori-Namco T1;
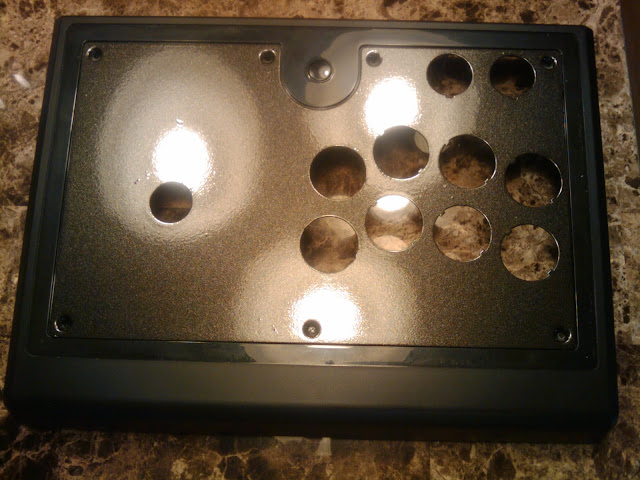
Test fit after Prep/Prime/Paint/Clear/Wetsand/etc
** Final Fit under side, w/Anti-Rust Primered Face Plate (Rustoleom White)**
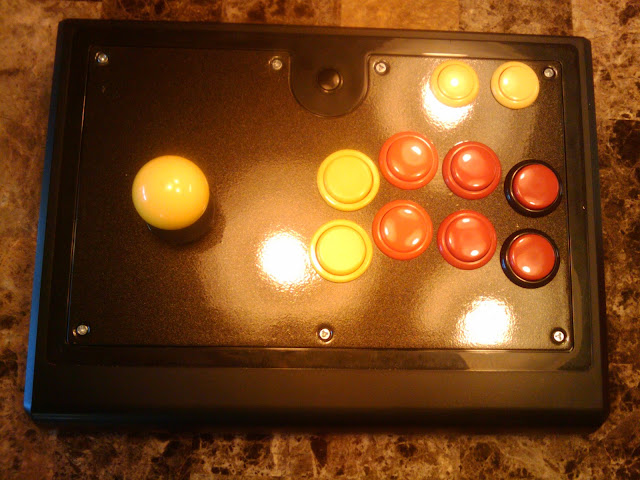
Final Fitment w/Hori T1 Ball, Hori T5 Joystick Assembly, w/30mm Hori NOPB’s/Plungers from Hori/Namco T1, T5 & T6 w/OMRON SW.'s & Original T6 Hori 24mm NOPBs/Plungers & Shell
30mm Snap-in buttons were direct swaps for me. However I did have to file a key on the Yellow Hori-Namco T1 buttons. Are these North or South Korean buttons? Find out what size/style they are as well.
While Hori buttons are 30mm, the sides have room for the tabs to fit in. “Real” 30mm buttons don’t have room for the tabs that are sticking out in the button hole which is why the tabs have to be grinded down. Korean buttons are 28mm so in theory they should fit without any modification to the case because each tab is about 1mm and there’s two on opposite sides.
 The button PCBs are useless and easily desoldered… just keep a chunk of the wires on it so you can trace the leads to the buttons.