hmmmm… never thought about that, ha!! shows you what a amatuer I am at these things!! I don’t even have the can of spray paint coz its all used up. Need to check out what they are next time I go to home depot or use the proper one for the next project, thanks for the advice man.
Good luck with finish thou, I see your other project have great finish so I think this one shouldn’t be a problem, however, the other ones where all black and this is the first white one I see you posted so be careful with it!!
What material are you using above and below the television to frame the monitor? I am building a similar cabinet and I really like whatever material you used. It almost looks like some kind of black metal. Thanks ahead of time.
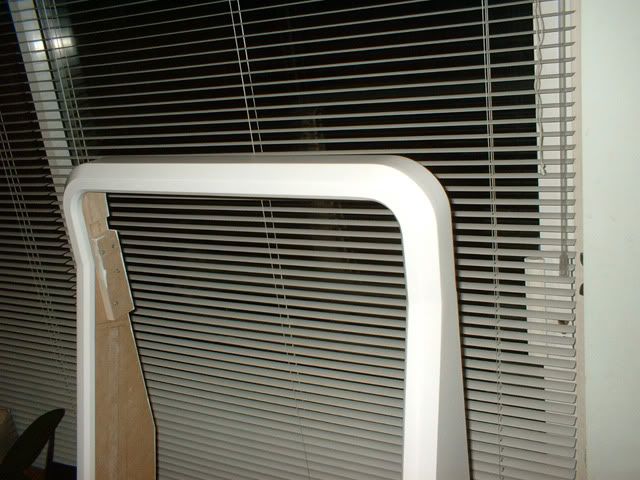
It’s actualy self adhesive vinyl. I have it on a control panel on my MAME cabinet and it still looks like new after 3 years. Mind you, I have taken care not to abuse it although my kids have tried hard to. The trick to applying the stuff is to prime the wood underneath so that it adheres better. This may require the wood to be sanded back down flat as it can raise the grain or inconsistences in material such as MDF. It also needs to be pulled taut around the edges to keep it sticking to the edges. The back may not look pretty but the front looks great. The bars around the monitor were pre shaped wood strips I picked up at the harware store. You just have to make sure that these are good, smooth pieces and nice and flat.
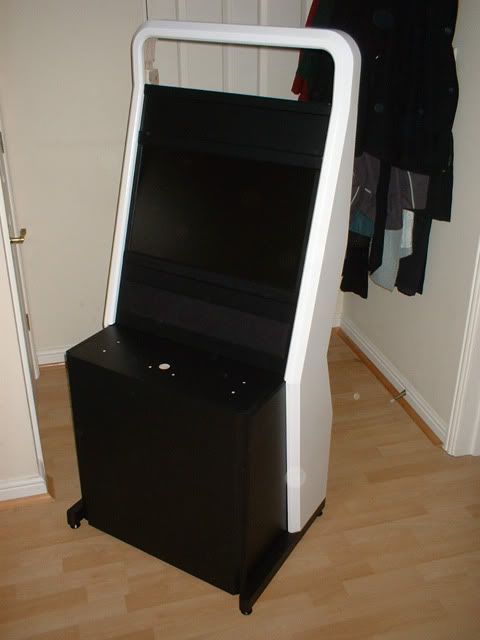
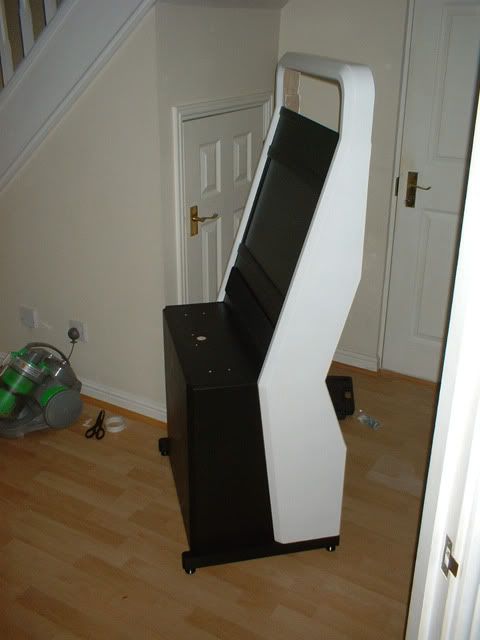
It’s a speaker grill I made myself from 6mm MDF. The sides are bevelled with a router and it has cut outs in the middle section to line up with the speakes placed behind them. I also wrapped this unprimed in vinyl before using some ebay sourced speaker cloth. I glued 6mm thick squares of MDF to the back of the panel, cut out correponding sections of the black vinyl from the board behind it and then glued it in place. It stands proud from the panel rather than being flush as I think it looks better. I did this as behind it there will be 3 speakers rather than 2 (for 5.1 PC surround sound purposes) and I figured it would look better than 3 metal speaker grills. Had there been only 2 speakers, I would probably have gone for the grills.
man looking at your worklog you have made me even more excited to start building my parents a mame cab. i should hopefully be starting in about 2 to 3 weeks when i can get myself a router. haha i kno its a stupid question but how necessary is the router table. i am going to get a router but should i also get a router table.
I didn’t use a router table for my first cabinet and it came out pretty well but it was comparatively basic (just used it for cutting the slots for the T Molding). If you are doing more intricate work, curved pieces of wood with lots of bevels etc, it would be worth investing in one. This is only the fourth time/project that I’ve used a router and I’d say I would have struggled to do this without a table due to lack of experience. I made sure I practiced a bit (not that much really) on scrap pieces before starting to get to use it proper.
Whether you buy a plunge or fixed based router would also make a difference as well. The plunge one I have is quite heavy with highish handles and I woud imagine would take practice to keep it level, particularly whilst working on the top pieces. Fixed based would be easier as the handles are lower down. I’m sure there are a lot of people out there that can give better advice than I can but the table was worth every penny for me.
thanks thats exactly what i thought. the only reason i want a router is for the tmolding seeing as this is my first cab it not going to be anything too fancy just a christmas present for my parents. I was just going to use a jigsaw or a handsaw for the pieces for the cab. by the way if i havent told you, your cab is looking amazing and cant wait to see it finished.
Awesome!!! Looking very nice indeed!!! I must ask you then, what brand of polyurethane are you using and how are you applying it? I mush say, that white is spectacular!! :wow:
Here are the pics of where my joystick went from white to yellow
BTW, here are a couple of pics of my racepod base from yours. It’s not anywhere nearly as good as yours. I have a small room and that is only place I can put it and it is sitting on some heavy duty rollers so I can roll it out of the way to play other games.
Must try that sometime and start looking into how the profesionals do it. I assume it’s oil based?
Ok :xeye: Does that include water based polyurethane as well? I have it on my white hand rails at home and after 3 years it’s showing no signs of yellowing.
Got concerned so I did some Googling on this. The general consensus seems to be that water based doesn’t yellow. The product I have says non-yellowing on the can. I’ll have to wait (maybe a long time) and see!
The oil base is more durable but as I won’t be walking all over it, I’m not too concerned about this. The stuff I’ve made are showing no signs of wear, even the racing pod which I’m always scuffing with my feet getting in and out.
Edit: Anyway, I’ve just applied the final coat to the top and I want to get this thing assembled …