Craving some more updates…
When you finish can we get some measurements? I wanna build one to house a 19’’ monitor and TE stick.
his measurements are for a 24"
One of the last few threads I’m still enjoying in Tech Talk nowadays.
Good luck for the rest of the build. How did you bevel the control panel ? My router bits are not deep enough for doing this kind of stuff…
No danger of that not happening!
I’ve not really looked into this but let me know if you find anything.
I’m in two minds, either gloss white sides/satin black base or the stealth version, gloss black sides and satin black cabinet. I’ll probably go for the white.
here you go! The CP s taking longer than expected so it will accommodate a swapable panel.
Yup, no problem.
Thanks! I’m using a very large 1/2 inch chamfer bit, the largest one I could find.
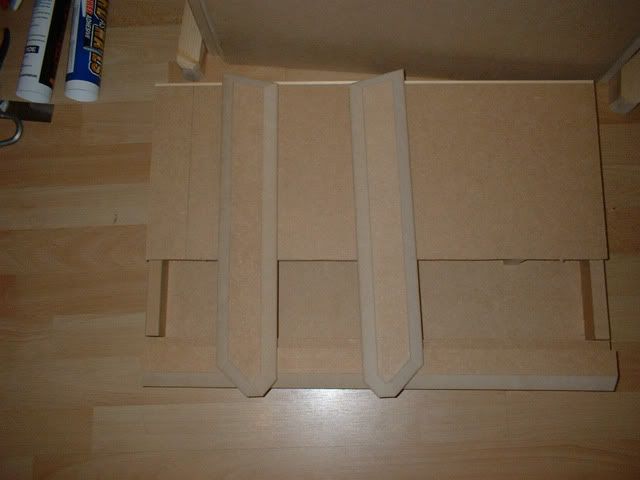
Some progress on the CP:
This shows the internal supports and the sides, the front parts of which are lower to be able to support the main panel when it’s built.
http://i218.photobucket.com/albums/cc26/SpaceHedgehog/VewlixSlimCP3.jpg
This shows the CP with the lid on. It will be removable to allow access to the insides and probably held in place by strong magnets (unless anyone can think of an issue with this). It will be trimmed to size at the front once I have my acrylic.
http://i218.photobucket.com/albums/cc26/SpaceHedgehog/VewlixSlimCP4.jpg
This shows the back of the CP with a finger hole cut out to help remove the top panel.
http://i218.photobucket.com/albums/cc26/SpaceHedgehog/VewlixSlimCP5.jpg
This may give an indication why it is taking so long. I’ve had to get all the pieces to line up correctly. If you’re making a single piece CP, it probably won’t be so complicated.
http://i218.photobucket.com/albums/cc26/SpaceHedgehog/VewlixSlimCP6.jpg
One thing I forgot to mention was that I hooked it up last night and wasn’t happy with the height of the monitor or the relative positioning of the monitor inside the frame I’ve dropped it down a few cms and this is now much better from both a usability and asthetic/balance point of view. The only problem was that I had to rip out the monitor and speaker shelves. These are now back in place in their new positions. Extra delay but definitely worth it. I need to make a new lower front panel as well as the old one is no longer suitable.
Also just rough cut the template for the CP sides.

I’ve finished cutting the pieces for the CP edges and have routed the first one:
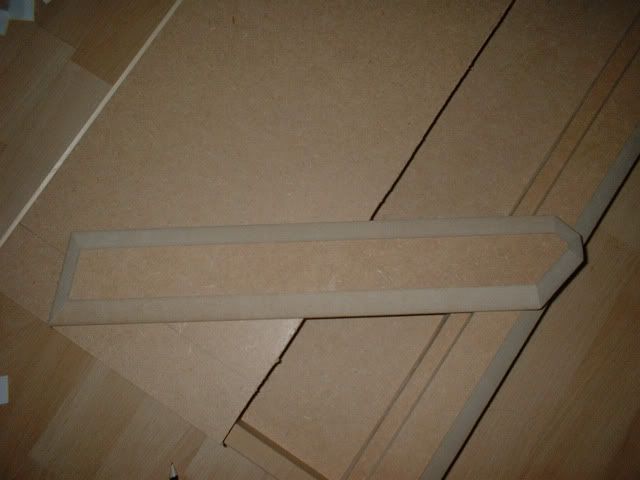
These things came out as well as I could have hoped for considering my novice router skills.
That’ll be it for today, I’m knackered…
looks sharp, and alot of work
great work, I am looking forward to seeing this project completed.
Have been reading this for awhile and have been following your work for awhile. Great work on the racepod (I actually based mine on what you did with a few changes) and this arcade cab is looking fantastic. Didn’t even realize your the same person that did the rpod until you posted a link here. We have a few things in common: racing games, SF4, and wood working!!! Sad thou after building my race pod, there’s no room for a cabinet like this but anxiously for your project to finish. Now that the weekend is just over, another 5 days for an update is too long to wait!!! :shake:
Thanks again dosu!
Me too! Hopefully I’ve completed the hardest parts now.
That’s great about the racepod and I’d be interested to see how it turned out. I’ve got a few ideas for mkII but I’ll probably enjoy the new cab for a while before I start on it. I only recently acquired the space to do this so I know how you feel about lack of room.
I actually have the next 3 days off work as well so expect updates!
Still not sure about the colour scheme I should go for and whether I should put an illuminated moveslist slot on the CP now (still thinking about how best to do this) or make another with it in later. I’m glad I went through the hassle of making it accessble/moddable.
Awesome!!! Looking forward to those updates 
Great job so far ericleroi. Look forward to seeing what color scheme you go with. Truly inspiring mate 
yes, I realize that. But his measurements are way closer than a full-size cab.
Thank you Tomatous!
After lowering the monitor I had to re cut the bottom panel with its speaker cut outs and redo the vinyl. Finished the top section and the remaining bezels to hide the monitor (currently just stuck on). I’ll hopefully get the CP bolted on today. Once the fitting is complete, I’ll be strting on the paint job. I’m fancying the idea of gloss black sides more and more now.

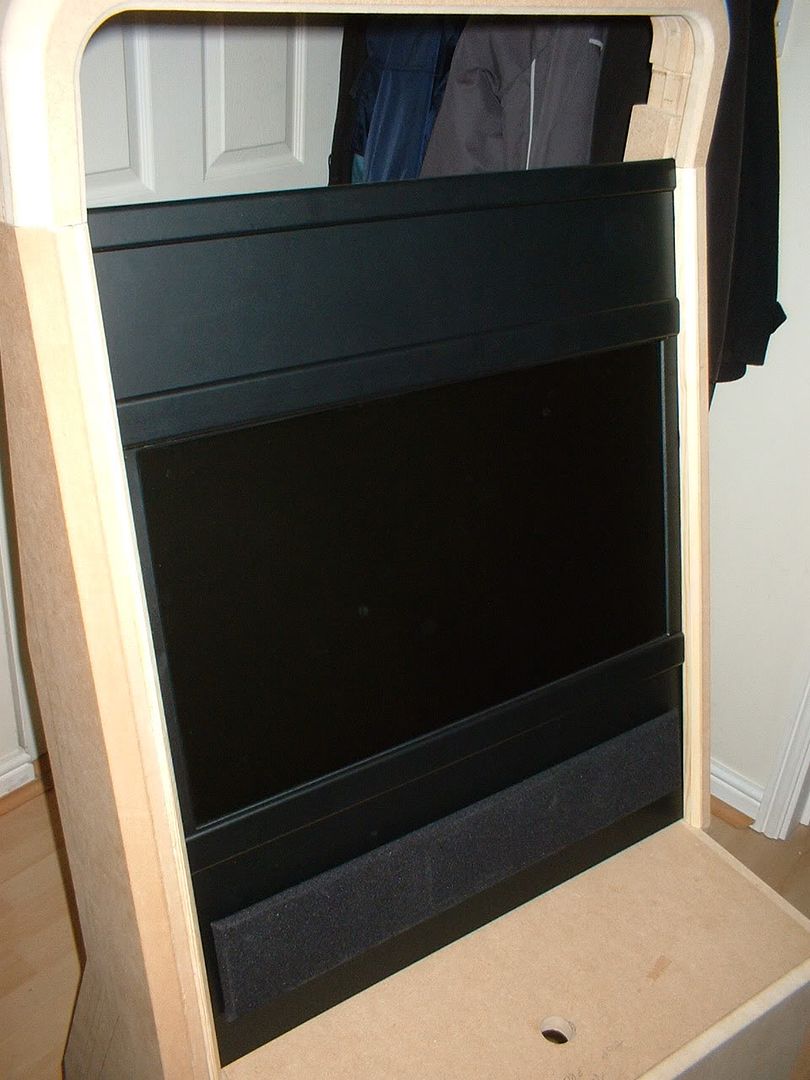
It looks a lot better in real life but nevermind.
sweeeeeeeeeeeeeeeeeeeeeeeet
no really… sweeeeeeeeeeeeeeeeeeeet
its coming together nicely, awaiting the final product, keep it up
This is cool!!!
love to see when it’s done :rock:
Thanks for all the positive comments, it’s helping to keep me motivated! I’ve bolted the CP in place (ran out of washers for the sixth one). The CP edges line up really well thankfully.

