Been a while since I been in an arcade to be fair so… Im thinking of doing a cab myslef and limiting myself to less than 200mm protrusion from the wal l ( IE GF safe). Obviously, panel will be removable, thinking MATX and brutal graphics card.
doomy mentioned a process called thermoforming but I’m tight on funds now which is a shame judging by how some of his work has come out. I have a spray gun (a contibuting factor to the lack of funds) and I’ll be painting the base satin black and the sides gloss white both with a polyurethane varnish (or similar) finish. I’ve had good results before just using a roller but hopefully the gun will be a step up again. Here’s a previous attempt The picture is from the nose cone on my racing pod.

Funds are a bitch on a project like that, you always spend more than youd like but dont mind anyway. Trouble with painting MDF on that scale is the whole sanding thing, it leaves a texture unless you spend months sanding/painting it. It’s why I suggested thermoforming it piece by piece in its flat state, gives you an instant perfect coat. You can even get silk/satin thermoform sheets so you can see your face in them. Do look into it tho, costly or not…
I’d love to take a week off work right now and complete it but I do have 3 days off next week so hope to brake the back of it then. I can’t work on the constuction side of things during the week as I get home fairly late and try to be power tool friendly to my neighbours!
So do I! Can’t wait until I finish it.
Sounds like a design challenge! Another reason I’m skint atm is because I bought myself a GTX285 black Edition about 3 months ago. Having withdrawl symptoms because I can’t really use it while I’m building this. That’s why I want to make swapable CP’s.
this one looks pretty nice for spray painted, i didnt expect you could paint something of that size so good…
and are you gonna paint it all together? also sanding sounds pita but i guess you ll have to bear with that if you want it to come out that good…
googling the thermoforming thingie 
I think the google search for thermoforming will double at this rate! The nose section is actually painted with a roller and lovingly sanded down between coats:lovin: It took ages:sweat:
The side/ top section still comes off so it will be sprayed seperately.
Thanks for your answer  Yes, if you want something to be perfect it takes time hehe:) I will be looking here often to see if theres any updates, that for sure. Is it in any way possible that you will post some sketches/blueprints with measurements of your cabinet in the future??
I will put some plans together. I did some for my racing pod but these were only drawings. I’ve looked into Google sketchup but haven’t had enough time to get to grips with it yet. A sample of my previous hand drawn plans are here :
http://www.thewayiplay.com/mainforum/index.php?topic=443.0
Quite a few people have made them. One person even made 4 of them and has taken them to race events where the race drivers have used them (money made on them went to charity)! I had some really thoughtful feedback from him which was great.
The pod was build before I had a router. It really helps to get all the edges straight and accurate.
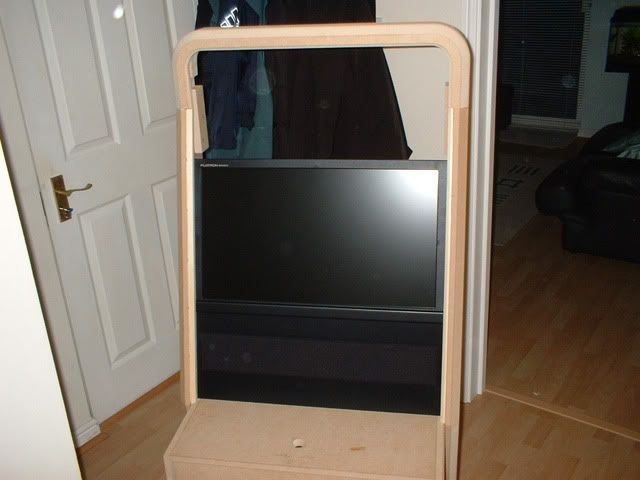
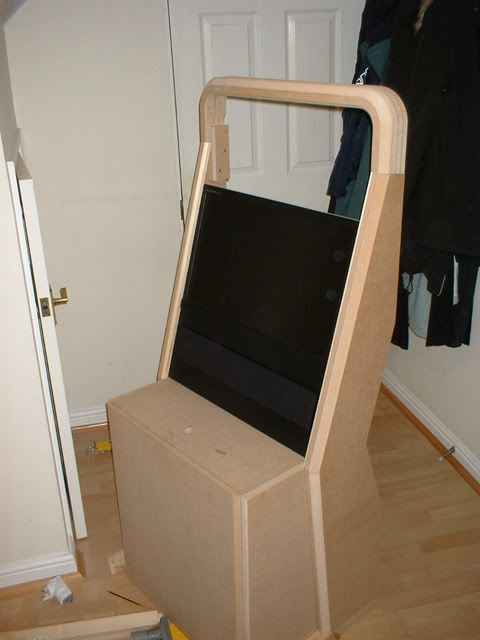
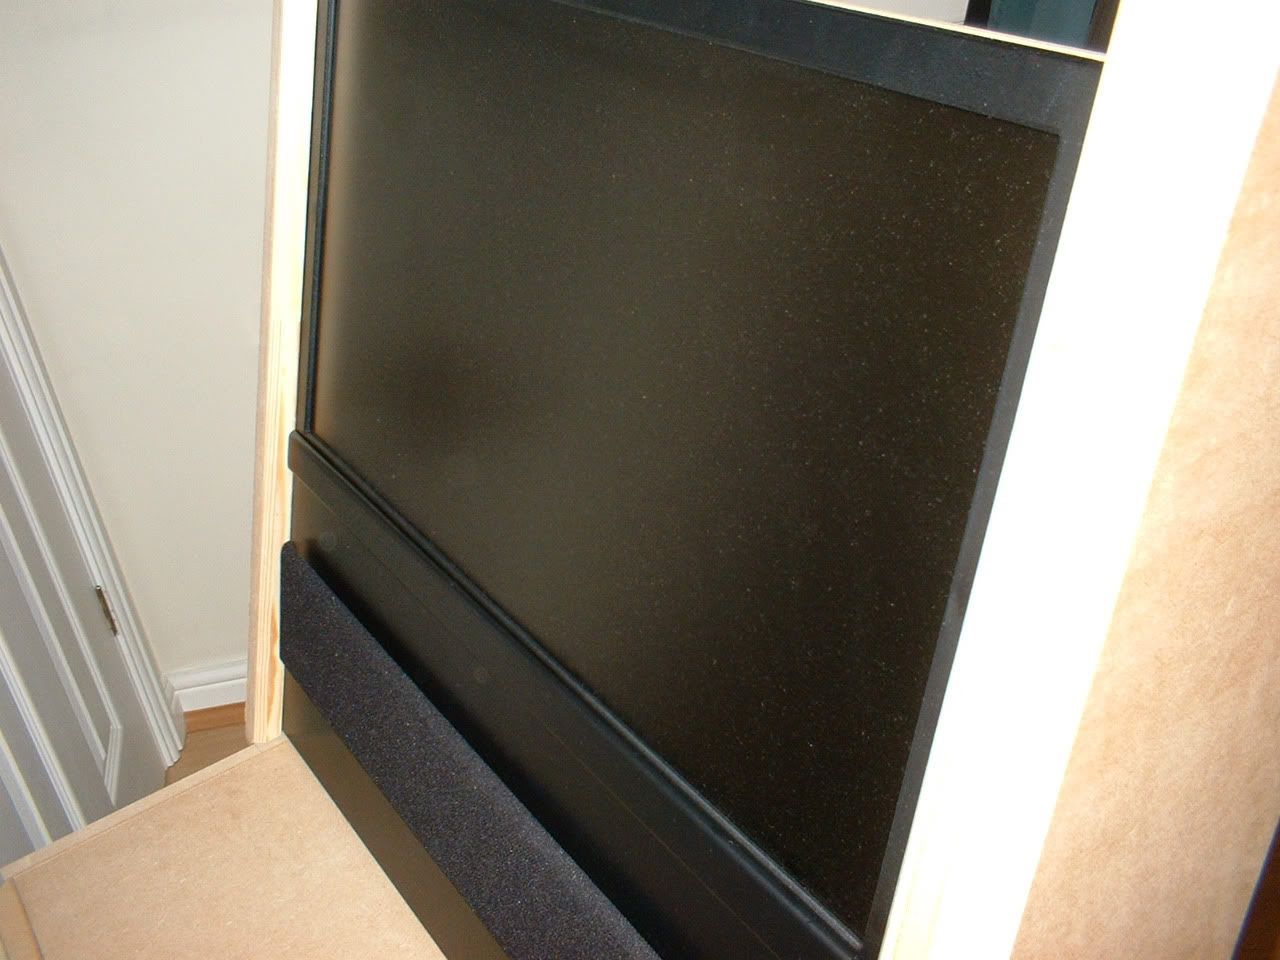
Some more pictures of the progress assembling everything into the front panel. I’ve attached the monitor and a lower bezel to the bottom of the monitor to hide the logo and controls etc. It’s stuck on with double sided tape at the moment but I’ll be making it detachable so I an still get access to the controls at the front if necessary. Sorry about the size of the last picture, it needs to show the detail.
flush and awesome!
This is so awesome, you’re doing a great job.
What speakers you putting in there? 2.1 would be nice.
Thanks! I’m trying to get everythig to fit as precicely as possible taking into acount the thickness of the paint and varnish etc when it’s applied.
Thank you! I’m putting into practice all the techniques I’ve learned from previous projects. I still have a lot to improve on, particularly with my router which I’ve recently invested in.
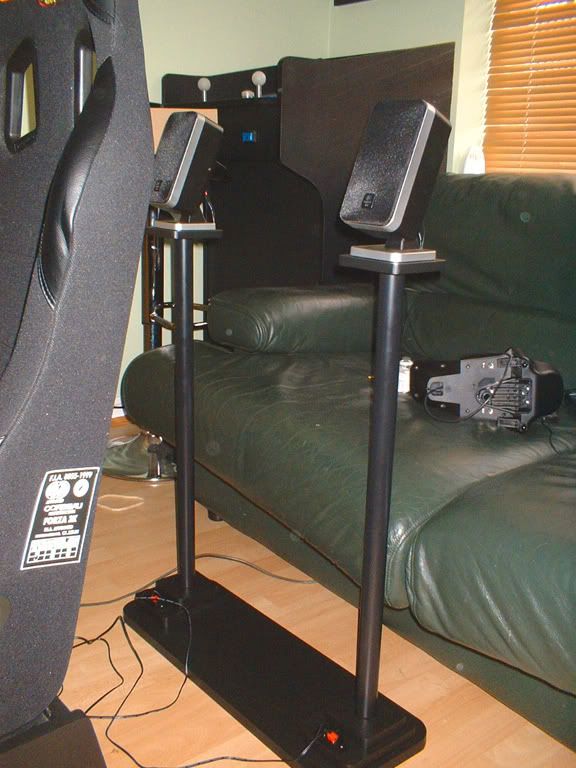
It’ll be a Logitech Z-5400 5.1 system which I bought some time ago. I don’t think I’ll integrate the sub into the cabinet (although I will give it a try for fun) as it’ll probably adversely affect the sound quality. I’ll be making some rear speaker mounts but I’ll probably use these that I made previously to start with:
My wife has recently accepted my addiction to building things and has given over one of the rooms in our house for them (very lucky I know). I’m planning the layout at the moment. I know what you meant about the GF factor you mentioned earlier. I’m sure my wife wouldn’t be quite as understanding if the things looked like Frankenstein’s monsters. It’s further incentive to build things to look as good as I can make them.
It’s looking nice so far. GJ!
Looks great man!
Can’t Wait to Start Mine
Does SF4 have a surround mix then? I got to be honest I’ve never noticed it if there was… If there isn’t, I wouldnt bother.
- The Xbox360 version does have limited use of it’s surrounds. Some ambience music, some sound effects, etc. It’s not notable.
Great job on the cabinet so far. I have an enormous deck that I’ve been painting and some brutal deadlines at work, so I haven’t found time to start my Vewlix project other than ordering the TV and keyboard.
How are you mounting the TV? Can you take a picture of the back of the cabinet if you have a chance?
Looking good!
I’m using a monitor rather than a TV so it’s a lot easier to work with. The principles would be the same I guess though. Basically I made a board with a VESA style mount (posted previously), glued and screwed some wood strip to the outside edges and then screwed the whole panel into the back, keeping it flush with the wood trim on the front for a tight fit. The back of the panel in the picture also shows a VESA style cut out very similar to the one on the other side. This piece was to get the mounting screws to fit properly (the screws I had were either too long or too short). The monitor is also resting on one of the supporting bars.
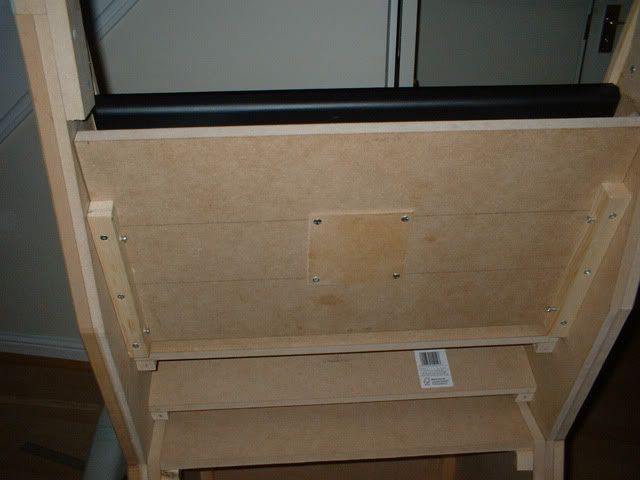
I still need to cut out a recess at the bottom to allow access to the ports and the power.