You should update the main post with the latest pictures, for ease of access.
But man, this is extremely nice. Honestly one of the best home projects I’ve seen, if not THE best, ever.
I would really love if you had some blueprints or something for how you cut every piece. I would build one of these tomorrow if I knew all of the exact dimensions. With all the extra wood lying around (my family owns a cabinet company, not arcade cabinets, but kitchen cabinets.) and tools, I’ve been wanted to start on one lately, but man… this one is just too nice.
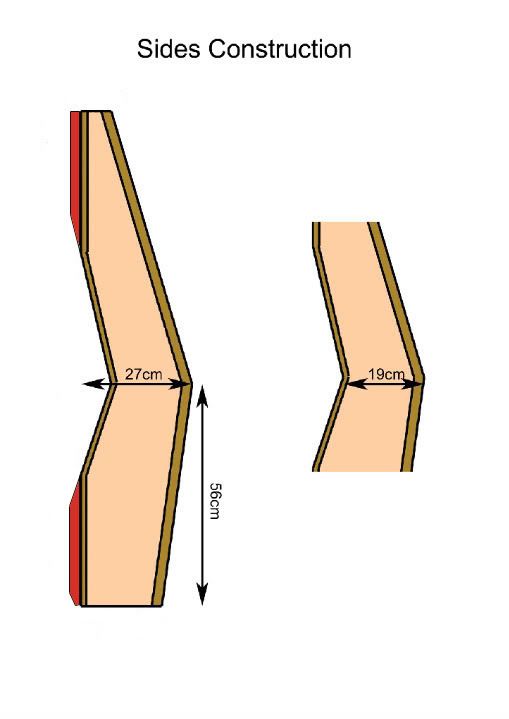
@Uchiha Madara, I built the back out by approximately 2.5cm. The red parts below show where I added the extra width on the side pieces. Let me know it this isn’t what you meant!
NB mesurements are from the original plans so the width is now 29.5 cm.
The sides are then covered with my diy laminate.
@sponge Thanks mate. Yours rocks too (plus you have a bigger monitor)!
Already thinking about some additional enhancements. As I play SFIV on the PC a lot, I was thinking about how to integrate a trackball without it ruining the appearance. I’ve decided to get a mini version.
I’m going to hide it when not in use by making some of the ‘enclosures’ like the original. I may even try and mount a keyboard and a couple of USB ports in one of them.
The acrylic holder was from ebay. I was going to make one but I came across this and thought it would be ideal particuarly as it had holes already drilled:
The white plastic I got from a hardware store. Not sure what it’s called (edging of some kind?). It’s basically an L shape in cross section. I had to cut to the right length, trim one of the sides and drilll some holes. Took about 20 minutes to do.
As this is a Slim Version and only has a 24" monitor, the balance between the bottom and the top is not as slick as the full size. To break this up and to give a better balance to the bottom front section, I had some TE logos printed at the same time as the side art. Here it is with it temporariy in place:
Damn, I really want to make one of these Wish you lived close i understand the wood work but nothing about the wiring, Anyways that thing looks sexy as hell!
Looks great, this is on par with the one the french guy made but better cause its complete. I appreciate the posting of where you got the parts, artwork holder, legs, thank you very handy stuff. :tup:
Thanks undamned. Thinking about making a .5mm metal skin for the control panel section and having it powder coated. Got so many projects on the go at the moment it’s difficult to get the time and finances to get this done …
 I’d do that if I were to make a dual player verion as it looks great.
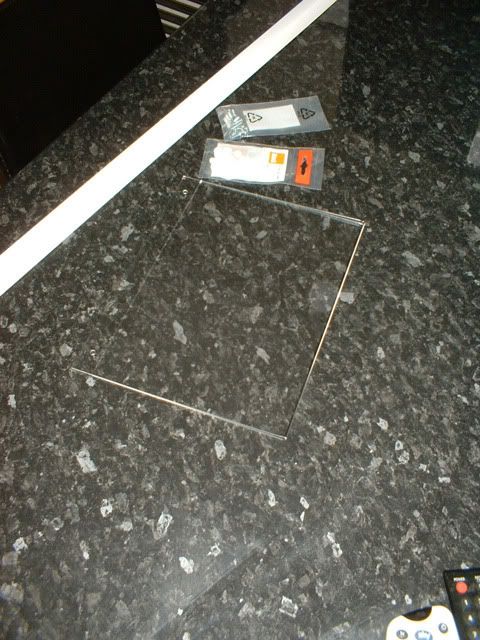

 Wish you lived close i understand the wood work but nothing about the wiring, Anyways that thing looks sexy as hell!