Thanks 028!
The plans for the sides have been added to post #2
Thanks 028!
The plans for the sides have been added to post #2
Ironically since you are from England all of your measurements are in metric, but us Yanks are stuck with English measurements and english sized materials.
Good job though.
Occasionally we seem to have a crazy mixture of imperial and metric. The MDF sometimes comes in imperial length/breadth (4’ x 2’) with metric thickness!
EDIT: I may put some plans with imperial measurements together later.
Added some detail for the top section. This still needs some work doing to clarify and complete. The plan also need adding.
do you think you could add the amount it cost you to make all this? With details leading on where all the money went to? And the amount of time it had taken you. It would be nice for people that are interested in getting this project started.
I just saw the light!!!
I’ll update the miscellaneous section with a breakdown on this.
Now I just need to get it wired up and have my XBOX replaced/repaired
gdlk.
Thanks! I’m typing at it at the moment.
Updated the Miscellaneous Section with project materials.
Got a quick question for you that I can’t quite tell from the pictures.
The legs on the bottom: Are they flush with the bottom of the cabinet, or are they raised slightly to allow for the leveling feet?
Basically is the cabinet standing ONLY on the leveling feet, or what? Your drawing suggests so, but the pics appear to have the legs slightly higher than flush from the bottom cabinet.
Thanks and I love your project!
The legs are flush with the bottom of the cab so the cabinet is only standing on the feet. The levelling feet really make it stable particularly on a flat floor.
Nice.
Last question, about the chamfer bit you used. You said it was a big one, how long is the cut on it? 1"?
The cut is 25mm or so on the angled edge (about 1 inch). It cuts the depth of the 18mm MDF if that makes sense. There’s a link to the bit in the Miscellaneous section.
Duh… I’m sorry I didn’t notice the update to that section.
Also forget you’re in metric. Maybe one day the US will go metric.
Thanks for your help! Really great looking cab.
waiting on the update on the amount of $$ it cost you for all this.
sexy as well looks great
can you go more into debth in how you mounted the marquee. I am currentlyhaving my marquee made. I have heard of hte use of a screen door track. Could you possibly post a link of what you used. THanks
I may include some updated plans with imperial measurements as well at some point.
I’ll sort this out as soon as I can.
Thanks!
Because of the overlap at the front that the acrylic sits behind, I’ve been able to attach the artwork to the acrylic by using tape as it doesn’t show at all. By design, the marquee/acrylic is resting on the top of the upper black panel so I’ve not needed to use any sort of track. The upper black bar hides the join between the panel and the acrylic. Fot the moment I’ve used card to secure this in place but will make a backing board for it and attach this to the sides of the cabint just to finish it off properly. I’s actually pretty secure as it is at the moment but I can’t leave it unfinished. Here’s a picture for clarification:
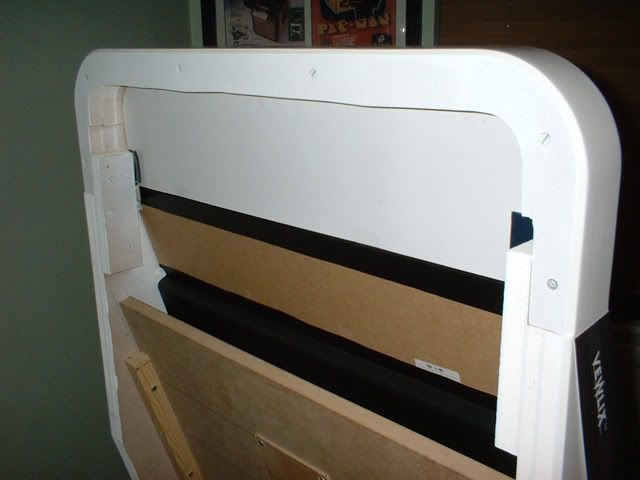
The backing board will cover the white paper that you can see in the picture and attach to the struts at the sides. I may get glossy prints of the artwork done at some point so I’m going to leave it for the moment. I’m also considering making a proper back for it with cooling fans for the monitor and connectors for the power, usb sockets and various monitor connections.
Here’s some pictures of the CP section. This has been tidied upsomewhat now:

Basically the are 3 pieces. The acrylic, a piece of 3mm board and apiece of 12mm MDF. The 3mm piece has a cutout for the stick and holes for the buttons.The MDF has cutouts for the stick and main buttons with holes for the small buttons. The 3mm section is glued onto the 12mm MDF board:
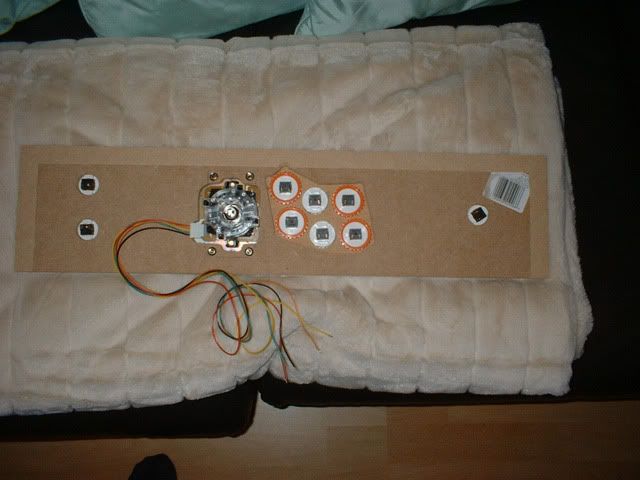
As you can see I’ve used snap ins for the middle buttons as I was concerned about the tightening rings interfering wih each other as mentioned on Slagcoins great site.
Here’s a picture of the speakers in place:
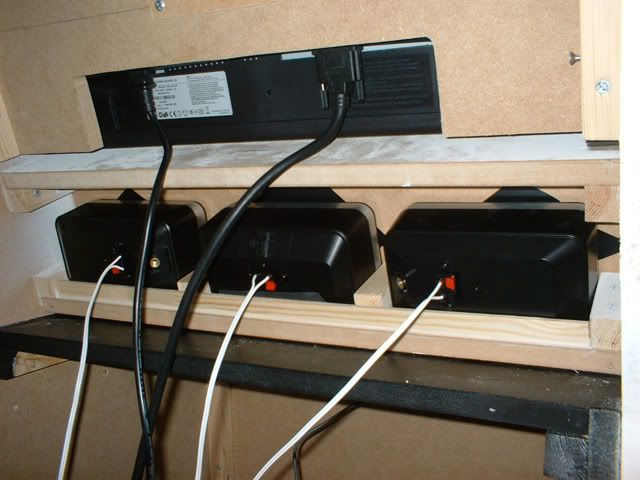
I’ll need to tidy all the cables up soon.
Looks amazin man
Thanks Beaps!
I’ve updated the miscellaneous section with some of the costs if anyone is interested. Some of these are from memory. I’ve also added some more pictures to the control panel section.