So I read through this thread but I didn’t come across a definite answer. For those that plan on painting the sides and bezels on the TE stick, how do you plan on painting it? I’m pretty sure that you can remove the bezel and just paint it, but what method, spray paint? With a brush?
I’m not an expert at this but I believe most plan to use some sort of Vinyl Dye spray paint which is absorbed by the plastic, giving it a cleaner look.
Yea I guess that works, but wat about the sides. You can’t remove the sides like you can with the bezel correct? It’d be kind of hard, to make sure that you don’t accidentally go too far.
Here are some tips I’ve picked up from other boards. I would definitely say use spray paint. To do so you’re gonna need more than just a can of your favorite color, so here’s what you need.
-
Fine grit sandpaper. Like super fine. Something like 1500-2000 grit. Just ask anyone at your local hardware store. You’ll also need a sanding block which is kinda like a sponge or piece of foam rubber. You don’t want gouges in your bezels, but you want a surface for the paint to stick to.
-
I would go with an enamel primer and color coat. A lot of customizers I’ve read say not to use enamel on plastic, but this is for the sake of an action figure. Enamel supposedly can degrade the quality of softer plastics over time, but the TE stick’s bezels are made of an abs plastic. They should be fine with an enamel.
-
Do you want a darker color or a lighter color? The lighter the color you want the lighter color primer you’re gonna need, and vice versa for a darker color.
-
Your desired color of enamel spray paint.
-
A clear enamel coat if desired, but isn’t necessary.
Here are the steps you need to follow.
-
Sand the bezels. You might even want to do a wet sand. If you’re gonna do this make sure you have a bucket of water and the sanding block I mentioned earlier. You’re gonna want to frequently dip the paper and block into the water as you go. It might also help to soak the sandpaper before hand. When you sand the bezels you want just enough to change the texture of the bezels so that the primer sticks well.
-
After give your bezels an even sanding you’re gonna need to clean them with a lint free cloth and maybe some rubbing alcohol or paint thinner. Make sure they dry completely before applying your primer.
-
Find a place that’s well ventilated and without a bunch of dirt or dust. You can either hang the bezel or place on the ground with something under it so you don’t make a mess. I would prefer to hang about chest/head level so you can get a good look at what you’re doing as you’re going along. If you hang it you might want to fashion something out of a heavy gauge wire so it isn’t swinging about, you want to make sure you get an even coat so your finish comes out nicely.
-
Make even strokes with the spray paint along the length of the bezel. You don’t want to go back and forth like you would with a marker, think of the can as a brush and make one even stroke down the bezel from about a foot to sixteen inches away. Then return the opposite direction to continue painting the untouched portions of the bezel. Try your best not to overlap as this can cause texture problems.
-
After you’ve primered the bezel make sure it has plenty of time to dry, and make sure nothing touches it. Lightly sand the primered bezel so there are no texture problems that will appear in the final product.
-
Make sure the primered bezel is nice and clean, a can of compressed air will be really handy. Now it’s time to begin with your color of choice. Hang it just like you did before and apply the color coat with nice and even strokes along the length of the bezel. Be sure to keep overlap to a minimum as it will come out in the final product if you’re not careful. Also, try to avoid taking too much time in applying the paint to avoid flashing. Flashing happens when the paint dries unevenly and can cause splotches and uneven coloring to appear when dried.
-
If you want to apply a second color coat you may want to sand the bezel lightly before spraying a second time.
-
If you want you can spray a clear coat of enamel over the painted bezel, but you probably won’t need it as enamel tends to be pretty tough.
I hope this helps.
Clear scotch tape works wonders for edging. It would also be wise to use butcher’s paper or some sort of plastic to wrap the areas you don’t want sprayed.
^ +1
Shidoshi has posted a good description on the materials he used and how he mounted it in the other thread called “Show us your SFIV stick’s custom art.” Check that thread out. There’s some good info on there too.
Awesome info in this thread! :wgrin:
mind sharing that sweet template? highest res you have if possible:)
Speaking of number “IV”…
Here’s mine,

Even much better IV :wgrin:
http://home.comcast.net/~damonhr/web_images/abelstickcopy.jpg
Lemme know if you think it’s ready for me to upload the high-res
Hi Likkuid,
The SF4 Template art you made is terrific! I was wondering if you could point me in the right direction to download the original high resolution art of the SF4 characters that you used. I found a few hi res images (~3MB) on la.gg but not all quite as good as the ones you used. Particularly, I am looking for Akuma’s image that is 7MB+ in file size. Thanks!
That’s a good one Virsago_MK2.
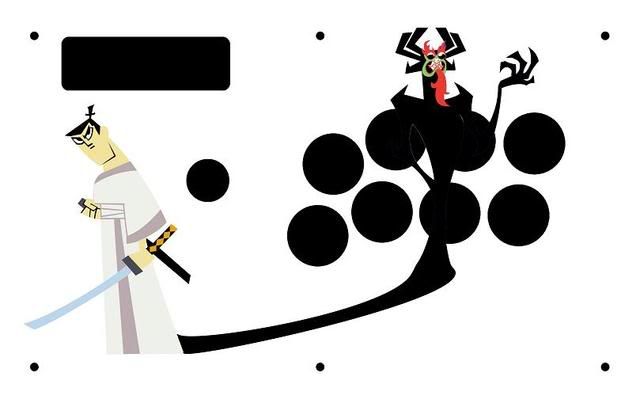
Can’t believe I didn’t think of this one earlier. It could probably use a little more, but I’m kinda tired. Though, I do kinda like the simplicity and clean factor of it. I’m gonna have a tough time deciding on the templates I’ve made. All it needs is one extra black button and then do some swapping with the white ones. Wish I had to dough to put a stick underneath each one. Anyways, Samurai Jack muh-muggas!
Anyone know where I can get the character pictures without the holes for the buttons.
Whachoo talkin’ bout K? You mean just like a source image before being applied to a template? Dunno if these are big enough, but it’s everyone in one place.
I like the Template of Minotaur64 =D
can anyone load up a full charcterlist? would make something similar just with other characters ;D
http://img371.imageshack.us/img371/4687/cammy1bl7.jpg
http://cache.g4tv.com/images/blog/2009/01/06/633668471987948714.jpg

ok sorry if i post to much image but basically can someone put the cannon spike cammy on the right and the standing cammy on the left and the street fight 4 logo in the bottom middle or something like that and with the ink splatter button i saw like on some SF4 pictures on this forum post please? make it all blend in. thank you very much!!!
MAKE THIS FOR THE MADCATZ STREET FIGHTER 4 TOURNAMENT EDITION STICK!!
sorry for saying like that, didnt mean to be rude but just a heads up so u know wat stick to make it for. again THANK YOU MUCH FOR DOING THIS!
^ I like cammy and want to put her on my stick as well (no pun intended), but IDK, the whole green/yellow buttons kinda kill it for me, and if u leave the buttons/bezel/sides the original color, it looks bland, like something is missing…hmm, catch 22.