Here’s a run down on everything you would need to run CPS2 ST:
1. Cab or supergun: Any decent JP cab (e.g. Astro City, Egret II, Blast City) will have everything you need but is hard to transport. Plus, you need 2 cabs to support head-to-head. A supergun can come one of 2 ways: They’re may be integrated with dual controls (e.g. Sigma Raijin, Pana Twin, Sega Boardmaster), which is cheaper and more stable but a bit awkward because the 2 players have to sit so close together and can watch opponents’ hands in peripheral vision. Or they can be a single control box and rely on you to supply the controls (e.g. Sigma AV7000, Mas Super Nova, most custom-built superguns). Any cab or supergun will play ST just fine although cabs will naturally feel the best, Sigma’s AV series is known for its portability and quality amongst boxes, while the higher end integrated superguns are also well-constructed.
If you’re thinking of buying a candy cab (the normal stand-up styles seen in Japan), get in touch with folks on the Neo-Geo.com marketplace. Depending on if you find a local cab or have to fish in Japan, as well as the cab itself and its condition, you’re looking at $500-1500 total to have it fully functioning.
If you want a US Dynamo cab (the US cabs you played on as a kid), you can probably get one fully functioning for $300-700 total from eBay.
If you’re thinking of buying a new Mas Super Nova, I think they only operate business in the Tech Talk section of SRK now although I’m not sure if they still sell them (they used to sell the Super Nova plus 2 sticks for $300).
If you’re thinking of buying a new Sigma supergun, a reliable guy I know called Gaijin Punch is offering to pick them up (for reference, expect the base prices to hover around $410 for a Raijin and $425 for an AV7000 and 1 stick): gamengai
2. Controls: On a cab, the sticks and buttons should be built-in. If you’re on a JP cab and don’t have a 6-button layout, you can buy 6-button control panels with either Sanwa or Seimitsu parts for your particular cabinet type. On a single box supergun, you have to work around the controller ports that are given. Super Novas have traditionally used a DB-25 controller port designed for their own Super Pro Sticks (using all-Happ parts). Sigma’s AV5000 and AV6000 use a DB-15 controller port designed for their own 8000TB Super Pro-Sticks (using all-Seimitsu parts, no relation to Mas’s). Sigma’s AV7000 uses an odd 13-pin DIN connector obviously designed for their own 9000TB Super Pro-Sticks (almost identical to Sigma’s earlier efforts).
Now, as I mentioned, superguns with integrated controls are even shorter than your normal JP cab so there’s very little room to play on (esp. if a big player is right next to you). A supergun in box form is nice to have but getting sticks will be expensive and not everyone will like the options. For the vast majority, a Happ stick won’t satisfy in this day and age so the Mas’s default controls are out. Sigma’s Super Pro-Stick uses Seimitsu snap-in buttons, which if you haven’t ever played on them before, means that they’re completely flat, with turbo switches jutting out next to the buttons, and feel pretty strange (on a side note, they’re also ridiculously dangerous to have around with the casing in full metal and the edges razor sharp). Plus, they cost about $150 each.
So if the built-in control options don’t work, then the next step is to build your own. Wiring an existing stick is fairly easy modding work because each switch on a stick connects 1-to-1 with a pin on the connector. As long as you have a pinout, it should be straightforward. But still, I can understand that this is a hassle to make custom controllers that players may still not feel comfortable with. Some custom superguns, like the one krost has, bypass this issue entirely by directly offering PS ports instead.
So the best option we currently have are DB15-to-PS converters from laugh. These accept most PS1/2 controllers and even allow you to configure the buttons. These have been used at MWC, Evo, SBO quals, and SB without issue (besides a couple of custom sticks not working). I don’t feel lag on them and he’s claimed that there’s no lag either. The only difficult part is that with these converters, you must match the pinout on your supergun to the DB-15 pinout of the converter. I believe some have wired together adapters. For me, the pinout of the converter perfectly mirrors the pinout of my Sigma AV6000 so I just just a DB-15 M-F cable with one end connected to the supergun and the other end connected to the converter. You’ll need 2 converters for both players to use these converters and can purchase them at eTokki for $50 each: PSX to JAMMA converter
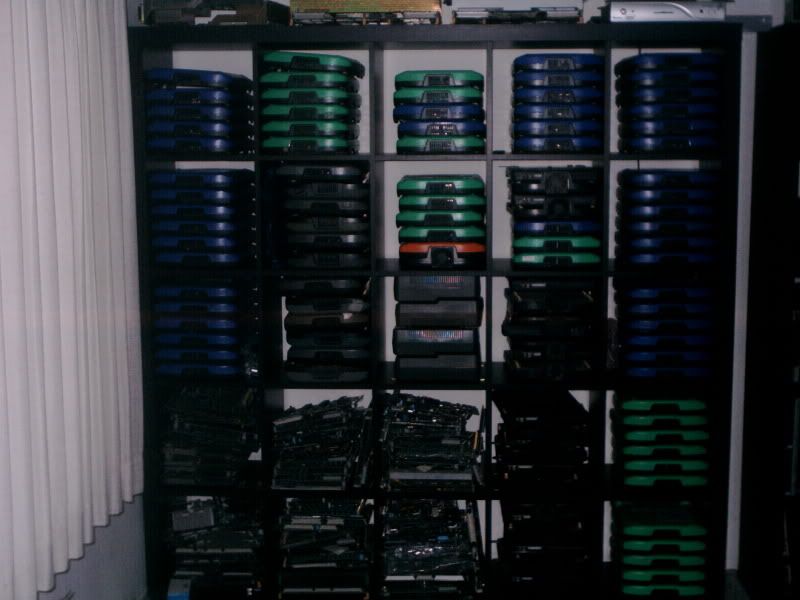
3. CPS2 motherboard: This is referred to as the A board and is what lies underneath the game board itself. You can either get the blue (US or Europe) or green (Japan) variations since they’re interchangeable with blue and green game boards. This can be found for $20-40. And yes, when you hear it, the fan really is that loud.
4. ST game board: This is referred to as the B board and is what goes on top of the A board like a cover. Combined, you’re ready to hook it up and play some ST. You can either get the blue (US or Europe) or green (Japan) variations since they’re interchangeable with blue and green motherboards. The JP version is more common and can often be found for $100-140 nowadays. The US version is rarer and can be found for $140-180.
There are also grey Asian boards that are even cheaper but you’ll need a grey motherboard for that as well and that version isn’t documented (such as the world version having o.Zangief’s 360-HK glitch). I’d suggest searching the avenues jpj mentioned ([?A?[?P?[?h?Q???? ?g?b?v?X is another place to try). If they don’t have the board, you may want to consider Coinopexpress, although the prices are somewhat higher. If you want a phoenixed PCB, I’d suggest asking around Neo-Geo.com.
The main thing to note here is that all CPS2 games have suicide batteries. You can either research and follow instructions to replace the batteries every few years or you can choose to phoenix the game or, better yet, just buy a phoenixed version. The only difference is that the Capcom logo changes slightly; there are no in-game differences. The advantage of phoenixing is that not will you not have to worry about the battery, but you can also switch regions to US or Japan (and others) at your leisure.
5. Jamma harness: Now that you have the A and B boards connected, you need to connect this system with the rest of your hardware. Most arcade games support a common connector format called Jamma. The Jamma harness plus into your game PCB on one end and out to various locations on the cab, or to another connector on the supergun end. On both a cab and supergun, this will already be set up so you normally just have to be concerned about the controls. Jamma only supports 3 buttons (outside of Start) through the harness.
CPS2 games use the CPS2 kick harness to support the extra 3 buttons with an extra connector on the A board. You’ll have to connect the wires coming out of the kick harness to either your buttons on the cab or the supergun’s fingerboard. You can easily find a CPS2 kick harness (not to be confused with a CPS1 kick harness or any other kick harness) on eBay for at most $10. A supergun will come with a Jamma harness that’s matched up to its own fingerboard so if you don’t want to solder, make sure to request that a CPS2 kick harness be added to it (having a Test button and esp. a Service button on the harness itself would be wise too).
6. A/V connections: If you want ST to sound great on a cab, you need a stereo amp in your cab (most candy cabs are dual mono). If you want it to sound excellent on a cab, you’ll get a Q-Sound amp (which really has nothing to do with Q-Sound, which is just the algorithm used whenever you choose to output the sound in stereo). Note that all the cabs I paid attention to in Japan stuck with dual mono (very noticeable when Guile performs a Sonic Boom). For superguns, Jamma connections normally don’t support stereo (and CPS2 isn’t an exception) so if you want stereo, you’ll have to hook up a stereo cable directly from the A board to an amp.
If you want ST to look as pretty as possible, you need a cab for pure RGB goodness. On a supergun, you’ll want video output in order from best to worst depending on what the supergun and your monitor supports: RGB->component->S-Video->composite. If you have a TV that directly supports the signal, that’s all the better. If you’re stuck with a computer monitor and have to use an XRGB conversion to VGA, well, that’s still better than going one step down the ladder.
Sigmas support RGB, S-Video, and composite so I normally have my supergun plugged in to an XRGB2 through RGB21 and have the picture displayed on a computer monitor with audio going straight from the CPS2 A board to stereo speakers. It’s not the ideal but it’s a fair compromise between quality and space/portability.
So overall, here’s the full picture of how my supergun setup works:
Game:
[CPS2 ST game] attached on top of [CPS2 motherboard]
[CPS2 motherboard] connected to [supergun] via a [Jamma-fingerboard harness with attached CPS2 kick harness]
Graphics:
[supergun] connected to an [XRGB] via an [RGB cable]
[XRGB] connected to a [monitor] via a [VGA cable]
Sound:
[CPS2 motherboard] connected to [speakers] via a [stereo-1/8" connector cable]
Controls:
[PS stick 1] connected to [supergun] via [laugh converter and DB15 cable]
[PS stick 2] connected to [supergun] via [laugh converter and DB15 cable]
If I’m bringing my setup to an outside venue, I’d forgo the XRGB part and just bring:
- supergun (with attached power cord)
- Jamma-fingerboard harness with attached CPS2 kick harness
- S-Video cable with sound cable -or- RCA cable (depending on what sort of monitor would be available)
- 2 laugh converters
- 2 DB-15 cables
- my PS2 stick (with hopefully someone else bringing another stick)
- CPS2 A+B boards
If you leave all the small stuff attached to the supergun, that’s just a supergun, stick, and CPS2 case to carry.

