I was only asking around because I was not sure if Laugh was still in business. Givin the chance to choose between another seller or Laugh, I will gladly choose Laugh, just to help someone from SRK make a lil extra cash and get my quality parts at the same time. I sent a PM already so I am anxiously awaiting a response.
So i recieved my TaeYoung Fanta and Crown 203 C’s just now and I am in the process of modding my stick and I’m stuck with two things.
1 ) I installed the stick but it’s not registering the input from it. Is there a up down order to the install of the stick? Like is it possible to screw the stick in upside down ?
2 ) I’m still in dout on the whole button install. Am I just gonna solder 2 wires to every button then stick the wires through the bottom of the PCB and solder the tip of the wires at the top ?
And how do I know which wire goes though which hole ? Plus is there some way of securing the PCB once I have everything solderd. I really would not like for it to hang
I guess #2 is three things heheh.
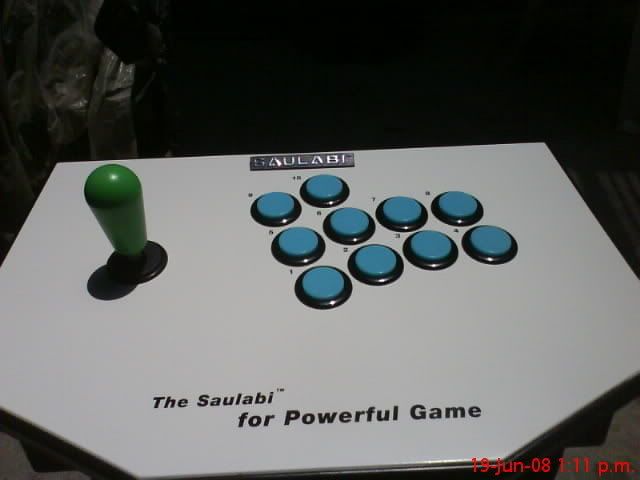
Any ways here are the picts ( because everyone loves picts haha )
Maybe you have the ground wires wrong for the joy stick.
I think you will have to switch the yellow and white one,
not with each other but with the ground wire.
Wire up the buttons with two wires each.
When you can read Saulabi straight on the printed circuit board,
the lower holes are ground.
The “L” on the button is the ground.
The printed circuit boards I have seen are marked.
Gawe = Cross
Dong = Circle
Nemo = Square
Semo = Triangle
This is also your chance to change the button placement if you wish.
Too much PlayStation in my head.
But in your case I think there might numbers somewhere.
My printed circuit board is screwed to a thin piece of MDF wood of the same size
that is currently glued to the metal plate.
I wonder how many atmosphere you create when slamming.
This went from an awsome ( highly waited for day ) into a horrible day. I forgot to mention that I was getting an usb error when I would plug in the stick. Now I don’t even get that.
I tried all maner of combinations of connecting the QD’s and it wouldn’t register. I switched the old stick back in to check but nothing happened either. Now that one wont register.
Neither will the buttons. Crown or stock =(
I fear the worst. I think the PCB is fried. What are some ways that I could have accidently fucked it up ? Is there a way I can be sure it is fried ?
I will take picts of the PCB but I don’t have access to a high res. camera. I will try to take a few upclose.
This feels so horrible. I went from broken buttons to no stik with quality parts in it. Aint that a bitch?
edit
If it turns out to be the PCB, is their a way to buy the PCB only or should I just order another Saulabi ? I seriously love these sticks. They fit me perfect except I have a heavy hand. Spinning fools gets me hype I guess
Get a pre-wired PS PCB and use adapters. At least that way your Saulabi will be more flexible as far as what you can use it on. I got rid of the Saulabi PCB the very day I got the Saulabi.
I don’t have access to a high res camera so I guess I am screwed. I looked at the board and nothing seems to be missing or burnt looking. Thanks to everyone who helped. Guess it’s back to pad in the mean time. :sad:
I was thinking about getting a 4K stick as my first one. I play on the PC mostly and will be buying a PS3 (Europe so the lack of backwards compatibility isn’t an issue) so I figured this stick would be optimal for me.
the wooden one. I want to sell mine for 40 + shipping (12-15 more). It comes with a taeyoung fanta (not the stock myongshin one) I bought it from laugh awhile ago.
I’m cool off the stick I wanted just a pretty much stock one. And yes you did sell Arcana Heart to me, I brought it up in the Wrestling Thread too heh.
I was thinking of that and it is still on on-hold status.
On the official Saulabi site the measurements
are stated differently here and there.
We need someone that can measure it perfectly.
I am still studying brassiere sizes.
(I still want those for the SNK NeoGeo controller NEO-AEC by the way.)
Idea number one:
Print on high quality glossy paper and laminate it.
Put it on the top panel and cut it out with a knife,
because I do not know the exact measurements.
Then use glue spray on the top panel and stick the paper carefully on it.
Put the joy stick back together.
Peel it of when you want something else and clean the surface with ethanol.
Idea number two:
Print on high quality glossy paper and laminate it.
Put it on the top panel and cut it out with a knife.
Invent a Plexiglas contraption to put the art in between.
(We so need the correct measurements.)
I think you need screw-in buttons for this idea.
Put the joy stick back together.
Remove the Plexiglas when you want something else.
I wont be trying to put art on it for a loooooooong while because that would mean desoldering all 20 wires unscrewing the stick removeing everything etc. etc. etc. uuuugh. Took me about two and a half hours to finish this and I’m not trying to go through all that again.


