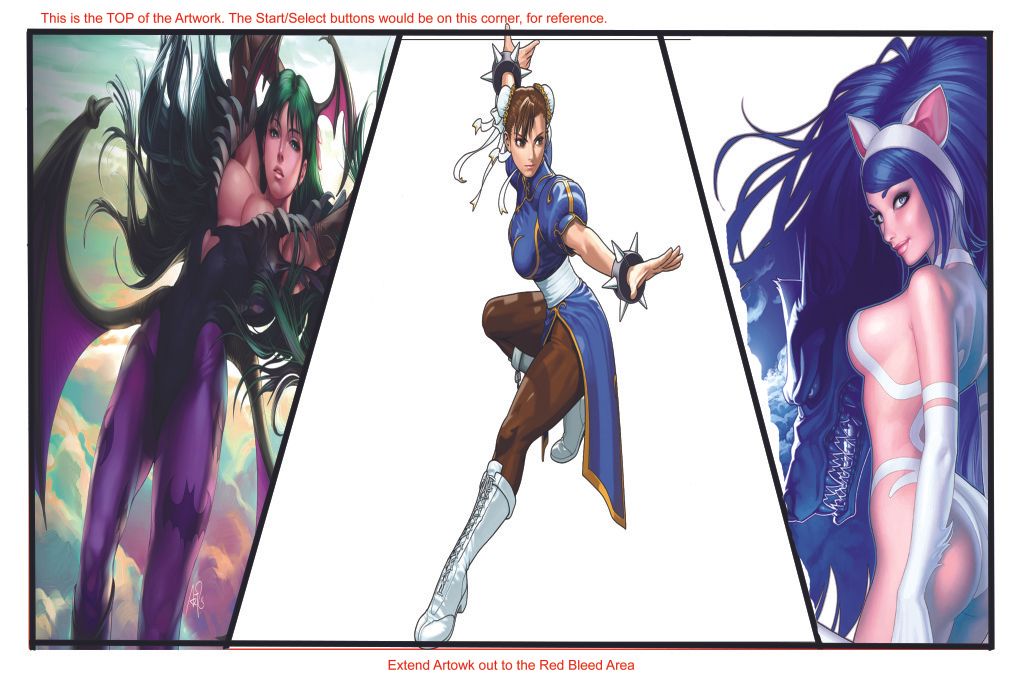
I’m trying to make a three character TE back template artwork (Template credit goes to Tek-Innovations.com) but the problems I am facing with is I want to create neat black borders separating all three characters in a trio style and then cutting the excess image off from the border.
Very much similar to what I am trying to achieve. Another issue is 2 (Chun-Li and Felicia) of my pictures when resized came out nicely. The last one (Morrigan) came out nicely too. I zoom in to show what it would look like on my TE stick in actual size. The last picture was quite distorted but the other two pictures looked fine zoomed in. Please help!
I know D3V made a tutorial but I’m not too sure if he covered on what I am trying to ask.
to clip out characters make a new path in the path tab and manual with the pen tool make a vector outline to the area you want to separate.
Then make that a selection and then ad it to a new layer.
You can make outer borders by filling a blank layer with your colour then use the pen tool on a new path and extract middle or mask it out. There are so many ways to do it, PM me if you want a more in depth explanation. Im a little busy atm putting the kids to bed to type any more but its simple once you do it once
I just used the line tool for those “borders” then used layer masks to make it so that each piece of art only appeared in the spot I wanted them to appear in, giving the impression of “borders.”
For proper borders though, right click on the layer, go to “Blending Options” and then tick “stroke,” I’ll leave you to figure out all the settings (IMO, you learn better that way, and it’s more fun too).
I usually use the mask tool to cut out photos. If I fuck up I can paint things back in. For stroke, I like to use the “fx” button below the layers and can adjust the layer style. I can then right click and copy the layer style to paste to other layers I want to have the same stroke.
You can’t really enlarge a photo or image without losing pixel quality. Although Photoshop supposedly does a pretty good job by using the image size menu…
Click on “image” on the top, should be File, Edit, then “Image”.
Image
-Image Size
-Input the image size you want
-(at the bottom underneath resample image, click on Bicubic. And use Bicubic Smoother)
I have used this a few times, but I generally never tend to enlarge images by too much. I recommend finding good source material, if you find a high resolution or high Megapixel images or photos you probably won’t even need to enlarge them unless you’re trying to create posters or something.
Alienskin also make a plugin for Photoshop which enlarges images, but I haven’t tried it.
Pictures are very larger size. When I drag them onto to the back TE template they just shrink into a small picture and I have to enlarge them with ctrl+t
That’s because of the DPI setting of your template, it’s probably 300. More than likely you’re using JPGs from the internet or a camera, which use a 75 dpi setting. So when you put the images into the template they’re of course going to be smaller as they’re using less dots per inch setting. If you trying to get images off the internet use images which are very high resolution. I tend to use google images, and on the left hand side bar, you will see “ANY SIZE” option, click on “larger Than” and put “2 megapixel”. This way google images filters all the low resolution images.
Hey D3V how do you make the template background appear translucent on the layers so I know where the border lines are rather than having the layers cover it up?
http://i235.photobucket.com/albums/ee319/DeathOfBlades/BottomTemplateTEroughdraft.jpg That’s just a rough draft I’d like some advice in how to touch it up and if anyone notices blur that Tek/Arthong might find when printing the art, please notify :). Also what I noticed was whenever I saved the file as a JPEG or anything else the color of the artwork changes to a bright neon color. Any solutions?
