On the left you have the 2007 PCB. On the right is the 2009 PCB revision. You can tell this by looking at the year printed on the PCB or by the PS2/PS3 button layout.
If it says 2007 and uses this button layout, then it is common ground, allowing you to use a wire harness to wire the JLF PCB as seen in the image on the left.
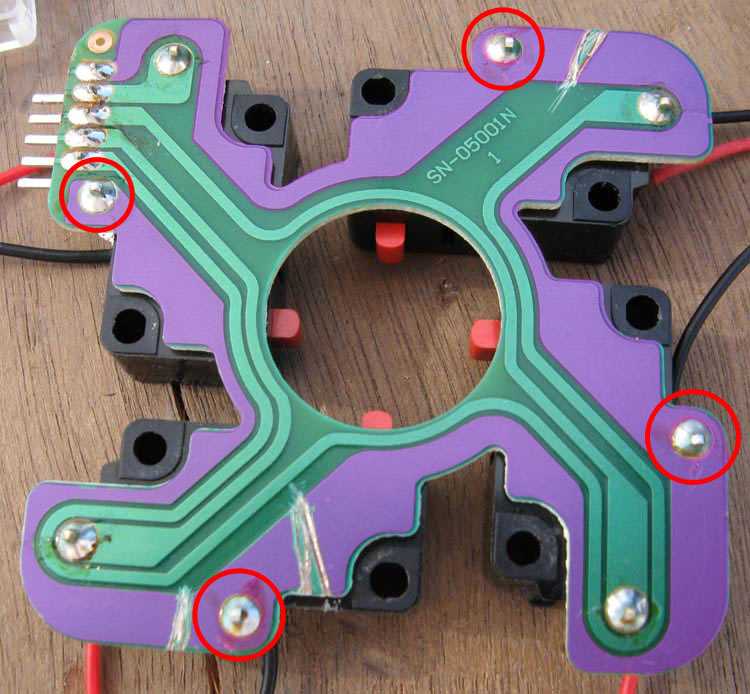
If it says 2009 and uses this button layout, then it is non-common ground. Your choices in wiring the JLF with this PCB include:
1 - Using the stock Mayflash switches. This is the easiest method but the switches are slightly shorter and engage later than the JLF switches. I suggest trying these switches and then the JLF switches to figure out which ones you prefer or if you can even tell the difference between the two.
2 - Cutting the ground traces on the JLF PCB and soldering the wires directly to the switches. This is the method seen in the image on the right. I recommend this method for the authentic JLF feel.
3 - Buy your own switches. Whether it’s replacement JLF-TM-8 switches or soft Cherry switches, this option will cost more money but will allow you to wire directly to the switches with quick disconnects.
Of course, if your joystick is not a JLF and does not use a PCB then you can just use QDs on the switches.
Is it absolutely necessary for the '09 build? It looks like it was put in for the ground wires to go through the wire harness and become one simple wire to solder onto the ground connection.
Will a Seimitsu LS-32-01 fit/work/be compatible with the PCB? The buttons are Sanwa OBSF-30 push buttons, so those should be fine too, right?
Not needed.
Just for cleanliness.
Person did not use Terminal Strip to make all Ground wires into one; it was different reason.
Have to cut Traces on PCB of Seimitsu LS-32-01 to have work with non-Common Ground Mayflash PCB.
Or get Seimitsu LS-32 and wire directly to Joystick Microswitches.
Thanks. One more question about grounding: What is the best way to join all the ground wires into one? From what it looks like, it’s a viable method to join them all into one signal and then solder it to the ground on the mayflash pcb.
Also, are there any major differences between the Seimitsu LS-32 and the LS-32-01?
The art is something I threw together myself and is printed on lamilabel. Unfortunately, this being my first mod, I made some small mistakes when doing the cuts on the art so there are one or two minor problems but overall I’m very happy!
Now modded for PC/PS/PS2/PS3/360 (switch on the front selects between the Playstation and 360 cables), 8x Sanwa OSBF-30 buttons, JLW w/ bat top, 3x Sanwa OSBN-24 for Start/Select/Guide.
Unfortunately I was stupid and the 360 PCB I bought wasn’t common ground, so the two PCBs have to be completely separated from each other, a switch such at this allows this to work quite easily. Oh well, all lessons learned for my next mod…
If you already have the tools to mod it then yes. It requires a some soldering for the wiring and sanding the button holes to 30mm to fit Japanese buttons.
Otherwise save another 20-$30 and get a Madcatz SE for easy modding with no soldering and sanding/dremeling.
It’s possible to remove the ball top, but it’ll require A LOT of force because of the glue used. You could use some pliers and a clamp.
But I say just pull out the E-clip with a small flat-head screwdriver. At 0:27 of this video:
[media=youtube]L67fUfH3S5o[/media]
It’s a video of the Sanwa JLF but I’d imagine the method being the same for the E-clip on the Mayflash stick. The stick should then just come right out.