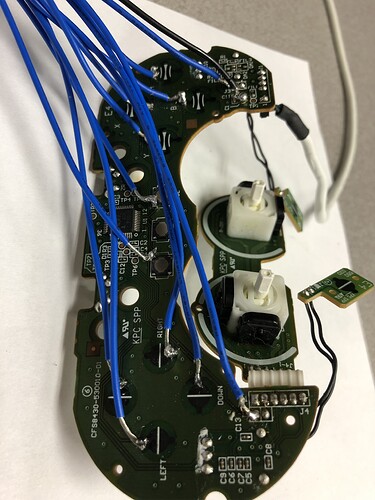
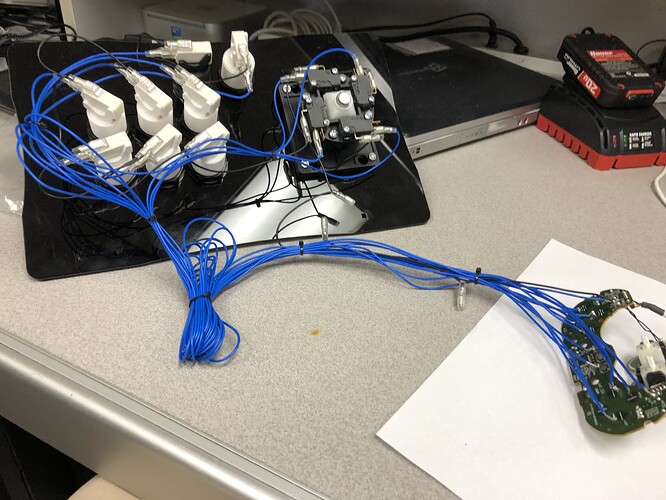
ah… maybe because I saw so many youtube videos when padhacking did this… I’ll just keep trying to make a more solid joint! so solder iron on board, bring in the solder, pull the solder away, then pull the iron out quickly (hoping the solder doesn’t follow the iron up!)
Ifvyou can do a ps2 pcb, ornan rj45 multiconsole with ps2, just addba non-mayflash PS2-> wii classic adapter. Just keeo your unauthorized transcoding to one change from one system to the other. Like certain puzzle game you could mess up when you “set up” a 10 way combo One garbage dump by an opponent, and your chain set up is the dirt over your grave.
this will strictly only be for the SNES classic, as I have other sticks for everything else! So I’ve seen a ton of vids on creating good solder joints. I should invest in a 3rd arm so it’ll help me solder better!
okay so far, so good. It’s taken me a good 1.5 hrs to solder the pad up, but I’m having the worst time with the select and start buttons! There’s nothing for me to solder to? Any ideas for those?
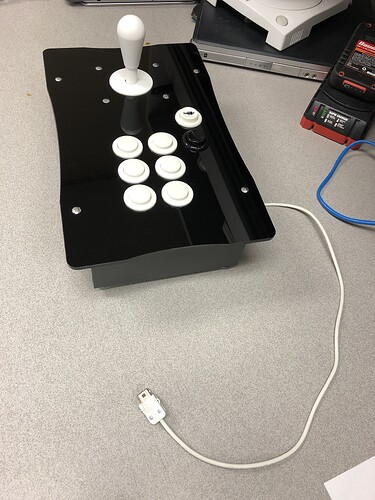
my pad hack for my snes classic. Works great! Problem is, when I tried to mount it in the box, the ground broke off… so I gotta resolder it again… this seems to be very… easy to break off solder joints… so as soon as the pad is mounted, I’ll resolder the ground, and hope that the other wires doesn’t come off! Then, it’ll be a permanent thing! Was thinking about hot gluing my solder joints, but was advised against it. Thinking about cutting off the middle analog wires off, and the shoulder wires… but I don’t want it to mess it up! It works as is!
(Can I cut those off?)
Nice work!
Your soldering technique could be a little cleaner (especially if things are breaking off), but that’ll just come with practice.
Don’t hot glue the solder joints, hot glue the wires down, a little away from the solder joints.
The shoulder button PCBs are safe to cut off, because there’s nothing actually on there.
The analog sub-PCB is fine but you’ll want to neutralize the signals first with some 10kOhm resistors.
Thanks! Yeah, I appreciate it! My soldering skills suck, but I always avoided anything with a soldering iron because I was scared of it. Because I’m electronically dumb except the most basic things, (like your explanation of the resistor above starts to make a little sense to me) I’m proud that I was able to get this done, and have it working! I REALLY appreciate your help and input for everyone on this project of mine, and now to solder pad #2, and get the second stick done!
I just wish someone made a box as cheap as these ebay boxes ($40usd including shipping) made out of wood or something with a 1" slant, and no paint work required!!
But yes, this will be permanently reside inside this box, and I will never use this on anything else but the SNES classic (maybe NES classic) because I don’t have a Wii! I do have a switch though, but that doesn’t matter!
Oh yeah, I decided not to hot glue gun down any wires (I don’t have a hot glue gun) because I have mounted the Controller PCB to 2 points to hold it in place, so that it shouldn’t be moving around in the box at all, so the joints should be G2G!!!
Again, major thanks for all the help!!! Couldn’t have done it without the community! Now on to my second stick, and then my MAIN joystick project ![]()
Hey I’m planning on doing a similar thing to this but wanna remove the analogs since they’re not a pain in the ass to desolder.
Where do I need to run the 10k ohm resistors between?
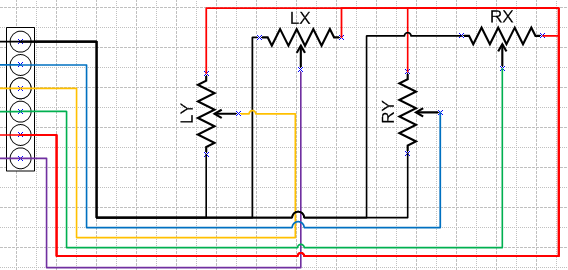
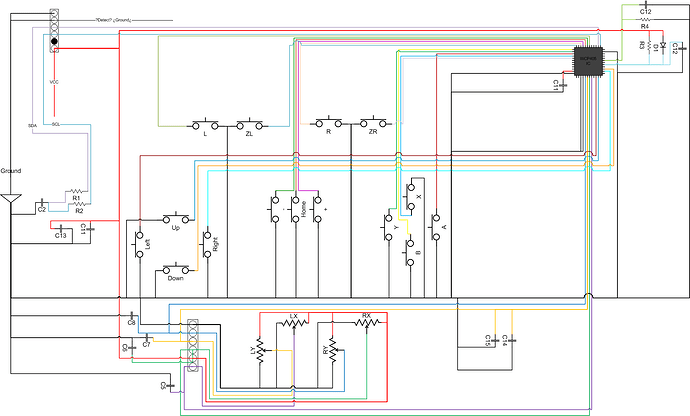
Put up my wip circuit diagram if it helps haha
You will need 8 resistors.
Run them from the EACH of the 4 colored terminals to BOTH of the RED(Vcc)/BLACK(Gnd) lines.
So Blue-to-Black, Blue-to-Red. Yellow-to-Black, Yellow-to-Red. etc etc.
Thanks @FreedomGundam <3
Also, not sure if it’ll be of benefit to anyone (either now or in the future), I was trying to map the circuits on a Wii Classic Pro controller, think this will be about as far as I get since I can’t find a datasheet for the WCP405 and don’t wanna risk removing the caps/resistors to measure them.
The trace was a little different than the Classic so I started mapping it and just went as far as I could.
Doesn’t the NES Mini and SNES mini use the same port that fits the Wii Classic Controller? If it does out of the box, why mod?
… Other than the main reason of fight stick hacking? Is this just as good on the Wii Classic directly in the Wii and Wii U.
Also I assume the hack is easier if you have the ,“front and back”, all digital shoulders?
