Must see so I can proceed with modding mine.:lovin:
Im looking for a 9/32 drill bit or the Metric equivalent, 1/4" is too small, 5/16" is too big…
Hopefully Ill (find one and) pick one up tonight.
Ok. Here’s a quick run-down.
Things needed:
-Dremmel with grinding stone (could work around it).
-Tri-wing screwdriver or bit.
-Soldering Iron
-De-soldering Iron
-Extra wires
-Heatshrink tubes (not necessary, just thought it’d be cleaner looking).
-Seimitsu ls-33 stick
-Any 30 mm buttons
-Epoxy/Super Glue
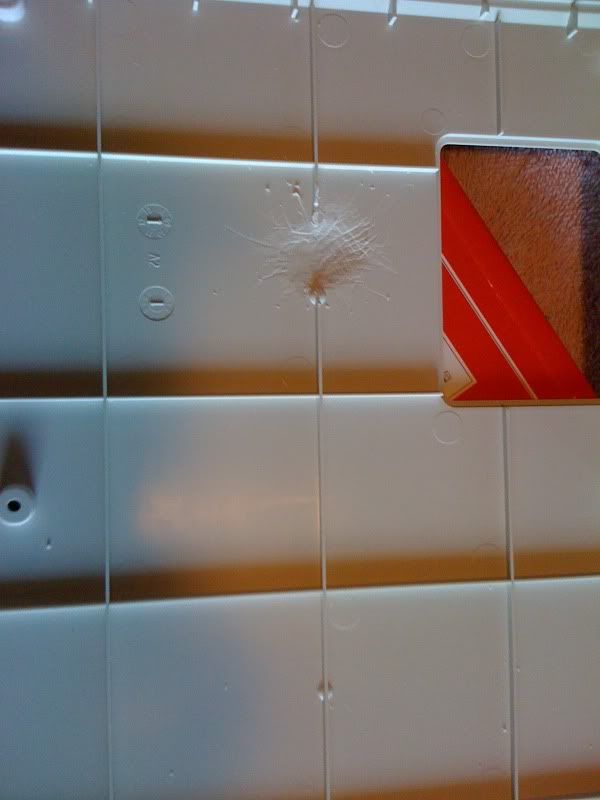
First I got rid of the bigger pcb on top of the buttons by snipping the wires (will explain what I did later) because it’s useless and I needed to make room for taller buttons. Then I removed the hori buttons and grinded the tabs off (with a dremmel) that you’ll see in this picture.
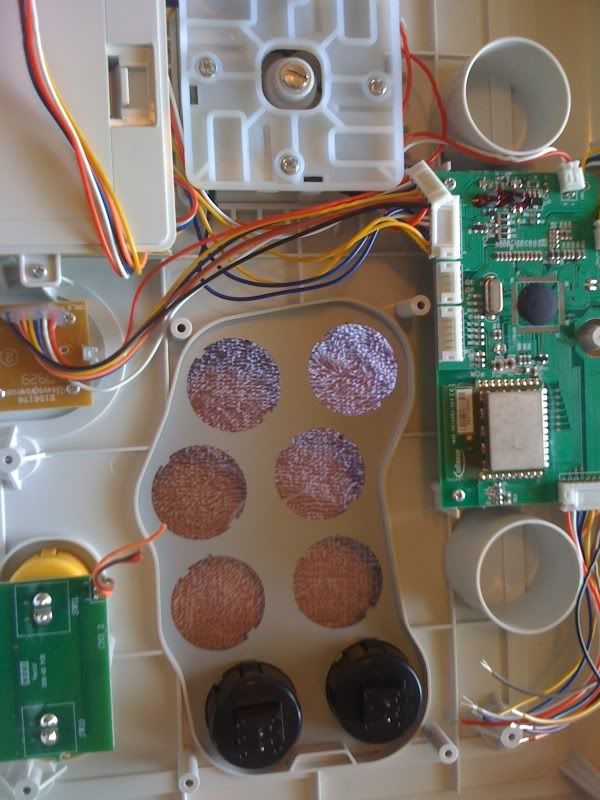
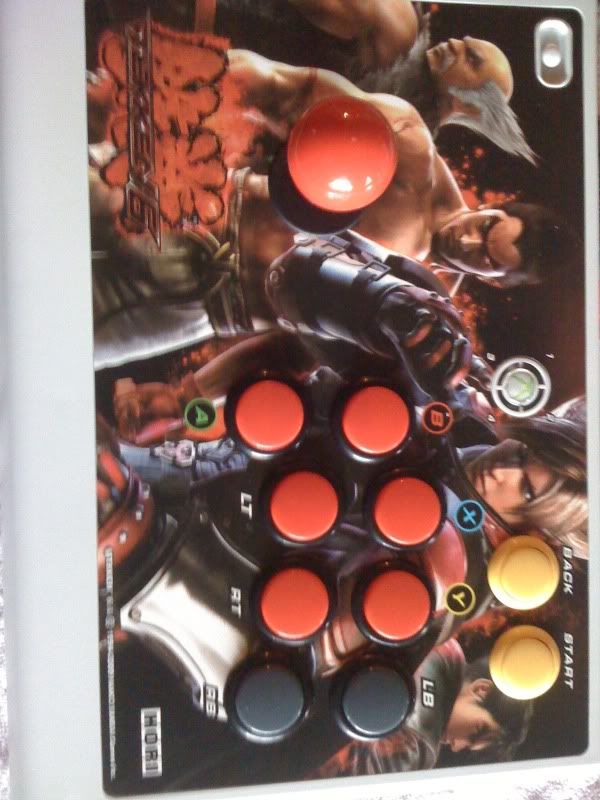
Then I screwed/popped in the new buttons and bent the contact points because they probably wouldn’t have fit.
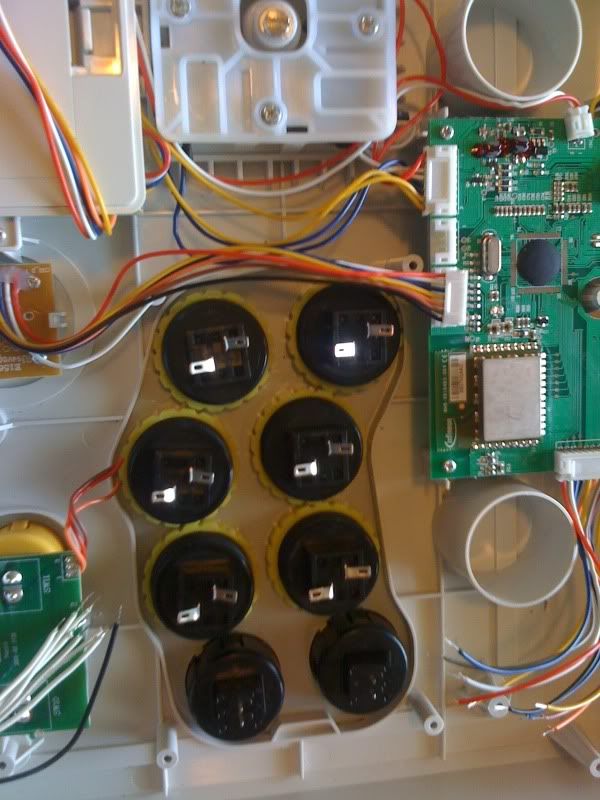
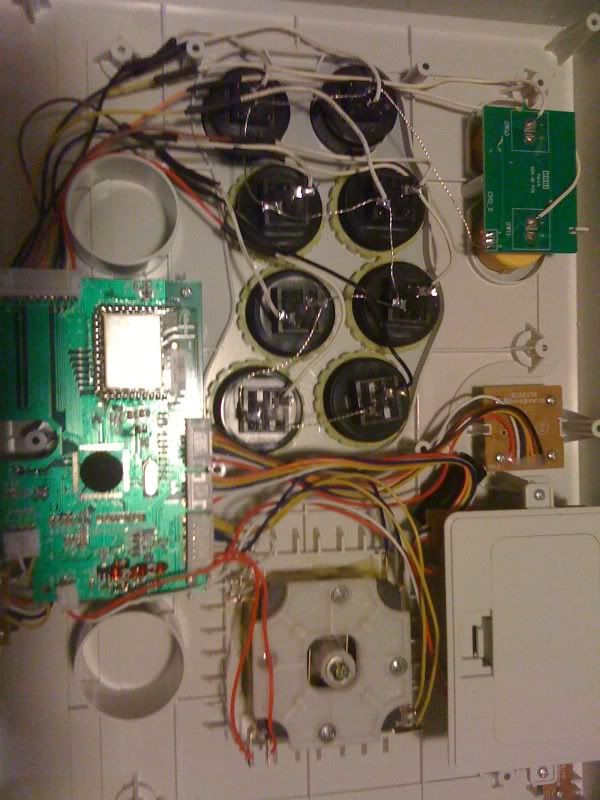
Then I wired and soldered the buttons to the main PCB by looking at the useless one. You only need one ground wire going across all the buttons. (I’m assuming you all know how to solder and wire stuff) To make it easier to see, I used stripped bare wire and used that as the ground wire (it’s the chrome/silver/shiny one running across the buttons)
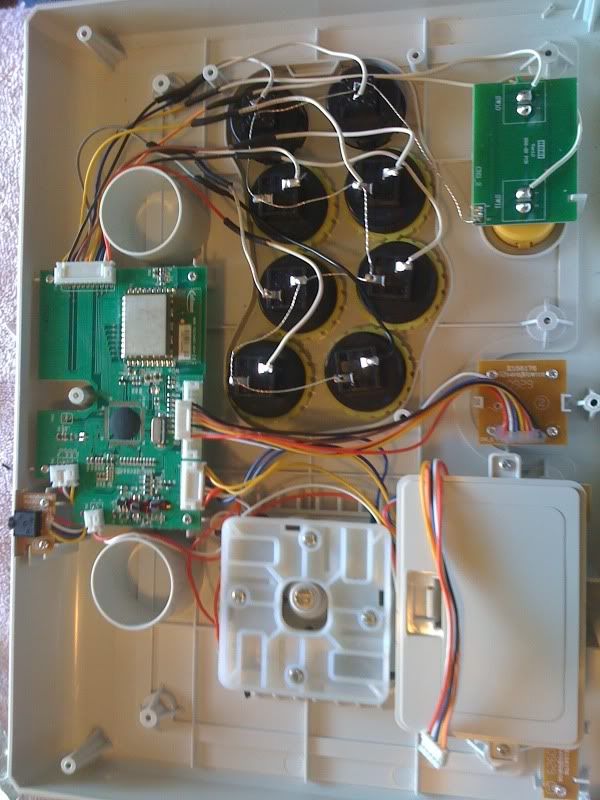
Then the old joystick, base and all, was removed by snipping the wires and (I didn’t get to take pictures of it, but there were four protruding screw holes that the hori stick was mounted on) dremmeled off the protruding screw holes. Then just used epoxy to stick the ls-33 on. After it dried, I soldered the wires back onto the microswitches.
Here is a picture incase you want to see what colors go where. Keep in mind this is at a position where the joystick is under the batteries and to the right.
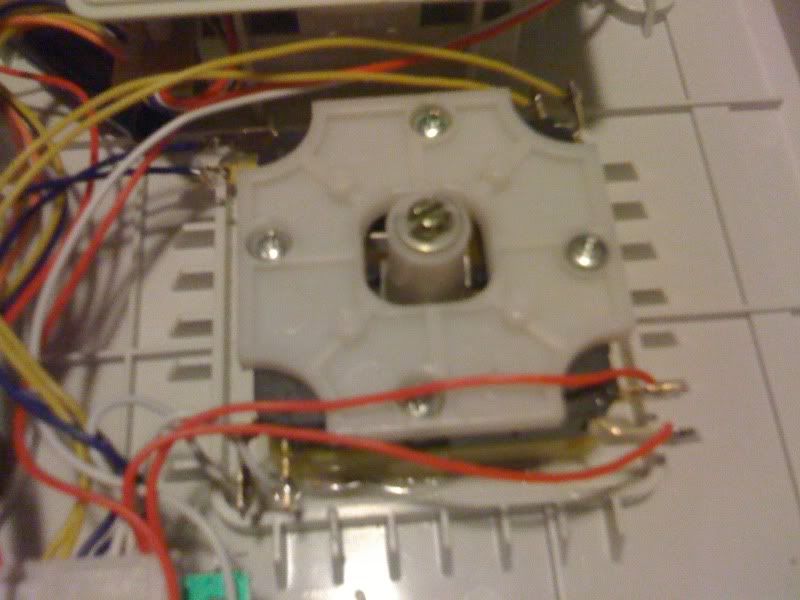
And then I ran into a really small problem- the stick was scratching and getting stuck by just a mm or two so I scratched the spot down (didn’t have dremmel anymore  )and it’s no longer a problem.
Voila!
Thanks for the explaining and pictures. I’m going to give this a try pretty soon whenever I get the chance. I’m learning about modding little by little.
Don’t quote the images. It kills bandwidth. Just remove the image tags and leave the links. This is a forum rule and I’m just telling you before a mod does.
It was cool to see the images twice.
Laugh.
Looks like a nightmare…after that ex2 mod, no way I’d even bother.
good shit on the LS33, i might do that to mine if it doesnt sell
if anyone wants to do a quick summary of which wire color goes to which button that would be appreciated! if not ill post one if/when i do this mod.
I used that big useless PCB as a reference to which wire color goes where because snippets of the wires were still attached to it and I just followed the paths, so to say. (I guess it’s not so useless after all!)
Crap, even an LS-33 hits the bottom of the stick?
My review of the TEKKEN 6 wireless arcade stick: http://sdtekken.com/tech-area/arcade-sticks/review-tekken-6-wireless-fighting-stick/
Recommend for sex.
Sorry for the dumb question but will this same process work for the PS3 version?
It should. I haven’t seen the inside of the ps3 version. 
From the pictures I have seen, it would take a little extra work for the PS3 due to the fact that the Controller PCB is on the same board as the buttons where as the 360 Controller PCB is a separate board from the PCB that the buttons are attached to.
All depends on the room in the case in the end.
Damn… still no one with a PS3 one in my area.
So…
What about that art-template?
I’m almost ready to pay little money for the effort if someone makes one.
quick update on my jlf mod, got the drill bit I needed, stick mounts beautifully, alas we are still a few mm too tall, but just a few. Next step, make the clearance. There are a couple options here, grind the shaft bottom down or remove some material from the bottom of the case. Shafts are easier to replace than case bottoms if u screw up, so Im inclined to work on the shaft first. The jlf has just over an 1/8" or about 3.5mm between the shaft top and the retention clip notch but you’ve gotta leave some material to maintain the integrity of the clip. The case bottom is surprising thick at about 1/4" or just over 6mm. Between the 2, that is over 9mm of material to work with.
Unfortunately I dont have the grinder for the shaft and need to seek that out and pick of a better bit for my dremmel for removing some of the case material.
I can say this is not a beginners mod, but very easy for anyone with some experience or the adequate skills, I wont say this is a 100% working solution until I have it 100% working, but Im about 85% done and 92.8% sure its gunna work beautifully.
Again pictures, details and work log coming when its done.
Ever heard that a JLF should be mounted so that the shaft sticks out 24mm?
I just got all the parts to start my mod today on this stick, and I think I’m going to try and sand down the original mount the the length of the new PCB board. So I can just set the board on top of the original mount. I’m thinking this will work if not I’ll be making a new mount XD
I want to dual wireless mod this stick so badly. I know how I would do both the 360 and ps3 versions. I just need the stick.