Hi, I bought a xbox 360 and SF4 intending to relive my misspent youth in the arcades :wgrin:. I then remembered that a LONG time ago, I bought this joystick with a SNES and dug it out. I’ve been looking around but it doesn’t seem like anyone has done a mod for this.
I’m looking to convert it to xbox360 and don’t know if its better to mod it to wireless or wired controller. My stick is the CPS Fighter-A CPS-A10CA model. Had a google around but only a few hits showing various adaptors to plug into other (old) consoles, but no-one seems to have modded it.
Ideally I’d like to know if the buttons can be replaced with sanwa etc, and can the battery compartment be utilised if I go wireless. The doesn’t seem to be a lot of room inside, but if I just wire up a pcb from a controller it might just fit. Any sugggestions, links to previously done mods? I would be most grateful.
You would have to check exactly how much clearance you have inside the case before you could actually see how mod able that stick is. It does look fairly slim, so I’m not 100% on button upgrading unless you have some exact measurements. However it should be entirely possible to get an xbox PCB inside of that thing; though space concerns my cause you to remove unnecessary parts like the analogue sticks. From a glance though I would say most if not all of what you’re wanting to do will work.
It will definitely be possible to use this stick with an Xbox 360 if you use a project box.
You will need to open up the power stick and find out how it is wired up first. My guess is that it will be buttons soldered to a pcb, or even worse rubber pads fitted to a pcb. You will need to solder wires to the connection points of the pcb.
The stick is probably a generic Japanese style. It will have 4 microswitches you will also need to solder wires to.
After you have all your wires you will need to cut out a small space for new connector on the case of the stick somewhere, install the connector, and solder the wires to it.
After that you will need to wire up an Xbox 360 controller inside a small plastic or wooden box with another connector on the outside of it. Link the box and your stick and your finished.
It’s not the slickest approach, but I guarantee 100% that this would work.
Looks like there will be room for the PCB inside the stick.
If your stick looks anything like this one on the inside, then I bet your could fit Sanwa buttons in there. You would have to remove the pcb and possibly make the holes bigger though. I don’t know about a Sanwa stick though, maybe if you took out a dremel and made some modifications to the mounting bracket. Might be easier to put in a Sanwa JLW or Seimitsu LS-32 than the standard JLF.
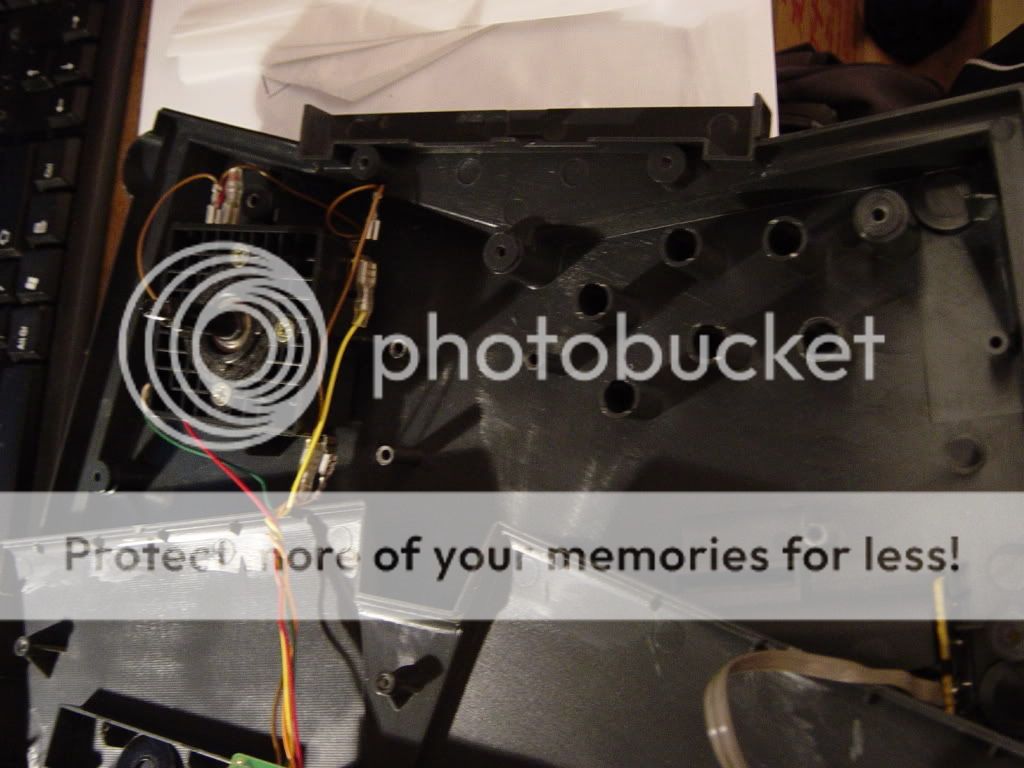
I opened it up, and its very easy to dismantle. The actual pcb is held on by 2 screws, and the pcb is huge. Lots of empty space on it. I think I could stick the xbox360 pcb on there somewhere! The button for punch/kick are actually big plastic plugs that press down on switches on the pcb, if I were to replace them I’d need to dremel out the big columns that guide the buttons down to the switches and the casing of this stick is quite thin so don’t know if theres enough to hold the buttons. I’ve taken some pics, but I’ll have to read up on the forum rules to see if I can post them. I reckon I could mod this quite easily now, but whats the best to go for, wired or wireless? I was thinking wired as its easier and would keep the stick light, no need for batteries.
Hmmm, that is very very weird the way microswitches set on the pcb.
You might want to try just switching the microswitches for Sanwa microswitches and using the existing buttons. It won’t be quite as good as a full sanwa button, but it should be noticably better (or perhaps worse).
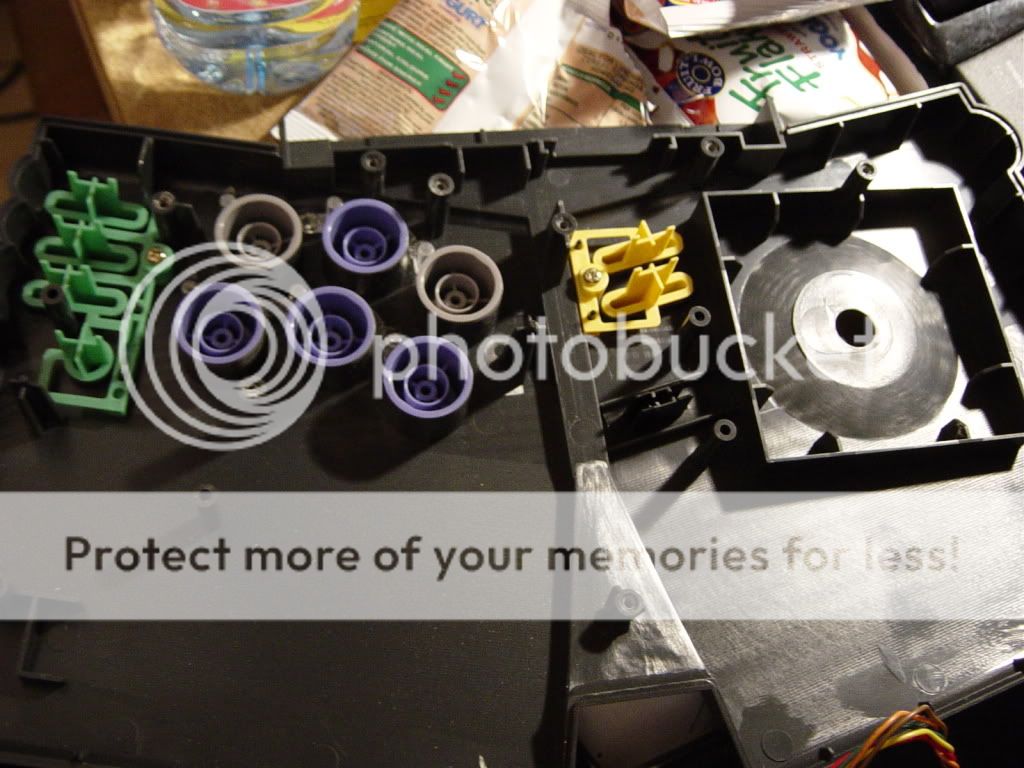
Are those stock parts in those pictures? The joystick looks like a JLW and the microswitches look Sanwa-ish. Just wondering what kind of factory stick came with these kinds of parts.
I am not an expert on sticks but what i have noticed is that the round piece of plastic (the gate i assume) is Sanwa (and square), and the plastic on the joystick itself also has sanwa labeling. The 4 switches on the stick are the same as what ive seen in the NES Zapper (its really clicky) and everything else is unlabeled.
Correct me if im wrong but the way to go about this is to solder wires from the switches on the PCB to the 360 controller PCB (and utilize the common ground)? Any cheap 3rd party 360 pad will work?
You should use a Madcatz 360 wired pad, as those are the only fully common ground pads. If you are lucky and find a 2006 or 2007 pad you won’t have to invert the triggers.
Look in the Sticky essential thread on hacking a 2008/2009 model PCB.
I saw that sticky, thanks. I have a hex inverter but i don’t want to spend that effort on this stick. So one more question: If im not mistaken the PCB in the stick will not be used at all right? Only the switches?
If you don’t want the stick to work on SNES anymore, just get some Sanwa 24mm buttons & place the 360 PCB anywhere it fits.
If you do want to keep SNES support, you’ll need to wire up the signals appropriately + link the 360’s 5V to the SNES 3.3V.
Also, that PCB definitely looks common-ground, so I would recommend a Madcatz pad.
I disconnected the chips and it made the resistances normal. I went ahead and soldered it. I will stick with the original buttons. I made the original 4/8 way switch a guide button enable/disable switch (cut the connection of the switch to ground and wired it like a regular switch)
Now whether to use the LEDs for ring of light player icons.
well a switch has 3 prongs, two on the edges for input and one in the middle for output (the easiest way to look at it) you make the button one input, the other input you don’t connect to anything, and the output goes to the PCB.
So all you do is take a switch and put it between the button and PCB, simple as that. With my stick the buttons and switches are all soldered onto the PCB, with one of the 3 prongs of the switch connected to the common ground (bad). So i cut that one and wired the signal to go through the switch.
using the sanwa buttons i believe it goes like this:
these are cool sticks, they are very responsive and the LED’s is a nice touch along with the 4-way or 8-way setting, there are a lot of adapter solutions available, as illustrated by this page…