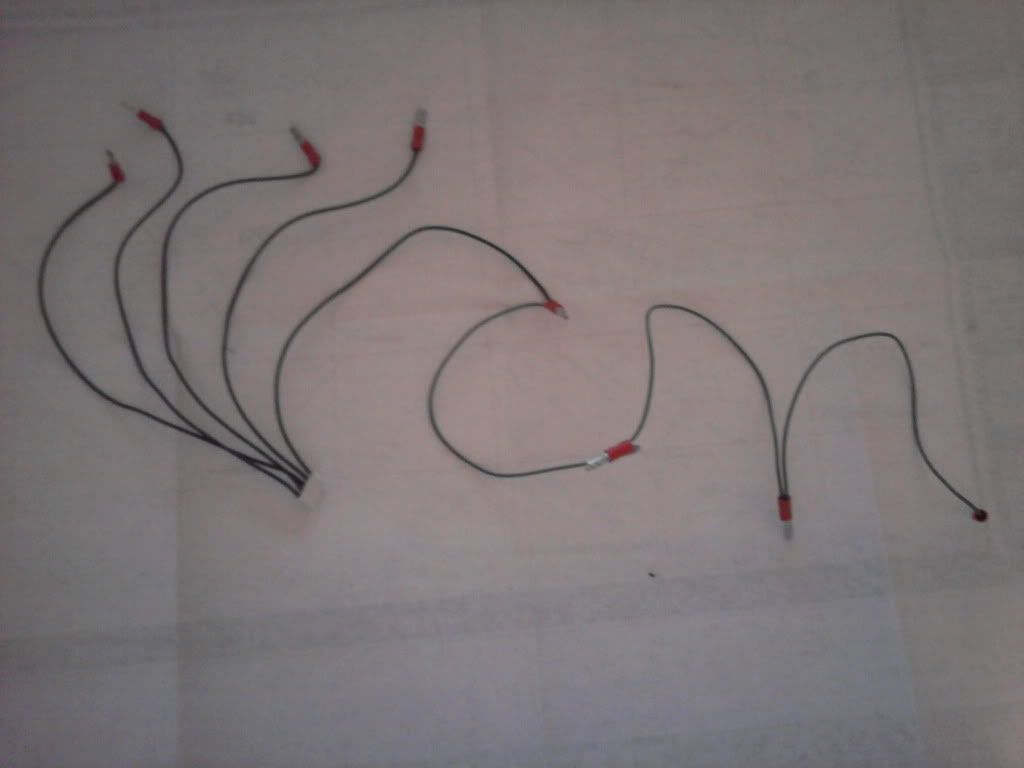
If you have a TE this is what you need to make yourself a fightboard.
The left 4 wires are the directions and the 5th wire is the ground daisy chained. You need 8 quick disconnects one for each direction, and 4 daisy chained to the ground. I believe the order for the wire harness is as follows Down, Left, Up, Right, Ground.
Can you guys please mention which pcbs allow SOCD and which do not;
I really need SOCD. I only play SSF4 so there is no cheating involved but SOCD is very important for execution
It must work properly when you keep LEFT pressed and then press RIGHT or press and hold RIGHT and then press LEFT.
The proper action in SSF4 is second key press will go towards your opponent but it must ALWAYS be registered by the pcb
I don’t think it’s been mentioned anywhere but I noticed something a bit odd… using the PS360 pcb, when pressing up+down in Mvc3 it gives a diagonal jump… I assume this is related to how that particular PCB handles SOCDs?
Yeah, that’s pretty ghetto. In a way, tupper was supposed to be a “place-holder” like that. I kinda thought it would work out where I could keep it and cover it with stickers or something, though. problem is, I play on the couch and my arms rest on my stick. Therefore: bending. I’m looking at stuff to do with wood right now. I’m looking for something simple and cheap, but different.
So I couldn’t get this to picture well, that’s a E. Honda silhouette outlined with black light refractive paint and it’s frosted plexi to capture the light. the hands flash as you use it for a HHS effect.
I was going for a E. Honda themed version of this… Art wise it’s the best I’ve ever done and it’s ticking me off I can get a representative picture. :badboy:
thats a epic honda stick! i’m going to try and get a plexi cover based on the hitbox and get some buttons in around the end of the month and a spare cable to try this
If you have a 5 pin female PC fan cable you can shave it with a razor blade and it’s a perfect fit in to the PCB, or if you have a 5 pin male you can rig it up to the original cable and if your like I am and to impatient to wait on a order. Or cut the original and save the end, it’s easy to repair back to stock.
The only hard is you have to move over the one of the PCB’s (the one under up, some people didn’t seem to need to but I did.) but fortunately their is stands directly to the left of it to screw the PCB down to. 4 screws nothing hard.
Oh sweet doesnt sound to bad then? I’m new to the modding scene, ive added a new stick and buttons and adding artwork but thats the extent of my knowledge, my dad howevers fairly good with electronics as his dad did it for years and used to help him at work, so im sure he could help me sort it out if i cant handle it (i’m fairly confident i could work it out with the knowledge i have and the help here on the fourms) Am i allowed to post links to retailers? if not i’ll remove this but is this what i need? http://gremlinsolutions.co.uk/products/sanwa-jlf-h.htm
That would work perfectly. And the wires are even color coded to a specific direction. All you have to do is add the QD’s (quick disconnects), daisy chain the ground and plug 'em in. Where are you gonna get your plexi from. I recommend checking out Bencao74’s laser cut plexi’s. This is his site www.arcadeforge.de
Thats awesome so i can get that some 24mm buttons and yea thats the site i was gonna get the plexi from i ordered from him last week for my current ibuki artwork for my stick thats great so i need that cable and some 24mm buttons then a plexi and im pretty much good to go ^^ ?
It’s a piece of shit (appearance wise) compared to the other ones but I love it. The layout however is completely custom, I put a lot of work into it to make it suit my needs.
If you can do basic speaker wiring you can build sticks, if your lazy most of it you can twist & tape, personally I solder because I find it less hassle than birds nests and connections coming loose when your packing the box. my plexi top was from a back light out of a old 19 inch monitor. 1/4 inch and up is easy to cut yourself and it gives some wiggle room in the case, the directionals are a tight fit if you don’t raise the deck.
I think if you use 24mm you don’t have to move the PCB over, i’m 30mm all around just because it’s what I had and I’m big handed anyways.
Are you PC or console? I had a quite few problems the builds I tried on old gaming keyboards, nothing positive with the directionals but I would stay away from them.
I have small hands so im gonna get 24mm thanks for the heads up sounds like i should be allrite then. im prob gonna order a plexi off arcade forge when i have some extra cash.
, it didn’t work for fighters because it’s limited to two simultaneous inputs.
(fun thing to find out after the build). You can build a stick around any input device, mouse, pad, keyboard etc. Just make sure you research how many simultaneous inputs it can handle.
Google “DIY keyboard MAME controller” or pad hacking to understand how to do this, generally the info and method is rather universal and one or the other will work for anything.
I recommend something like a macroable/mappable gaming keyboard if you can confirm it has enough simultaneous inputs. The N52 I tried did not, or if you don’t need as much flexibility you can go with one of the Cthulu boards, the nice thing about a real purpose based PCB is it will plug in and work.
That’s awesome, I’m glad you support the modding scene too.
I’ve been on the wait list forever and with two TE’s and a $~300 custom I’m looking more towards a conversion than anything at the moment. I can tell you though if that wait list ends before I’m ready to build then rest assured I’m buying from you guys.
Also do you guys have any templates for artwork? Couldn’t find anything on the site.
Back on topic, anyone have wiring for these things? I mean it seems pretty simple but I’m thinking about something more sleek and I like abandonists idea of a quick convert, in case you’re sharing a stick or are still learning and don’t wanna get bodied.

