Not to get too off topic, but I had heard the Sanwa flashes only had something like 100k operational hours before the leds went out? Which isn’t bad but left plugged in 24 hours a day to a computer that adds up quick.
Here we go. I just finished soldering up a Cthulhu board and connected it to my Button Flash board. If anyone has questions please let me know. All grounds can be connected to each other. This includes the LEDs and the Buttons. In other words the ground from the LED can be connected to the ground on the button.
Kaytirm
Wow, nice work Kaytrim! I have a couple noob questions and request:
-
Can you list the parts that one would need for the led board? I assume most of that stuff can be had at the local Radioshack.
-
No batteries? Cthulhu transfers power from the PS3/PC?
Thank you so much!
Original Mod of the past
Updated Mod with Cthulhu

LOVE the labels on the inside of the screw terminals. I need to see if I can pull that off with my label maker; that would definitely make things nicer since the terminals cover the board labels. Great job!
The VCC screw terminal/solder point is directly connected to the power from the USB, and the board requests that the host provide up to 500mA worth of current, so unless you want the stick to be seen from space or try to power it from a low battery laptop, you should be able to draw as much current as you could possibly want; lighting some LEDs should be no problem.
You may find sourcing the chip a bit difficult at RS. Here is the origonal thread for the button light up mod. http://forums.shoryuken.com/showthread.php?t=149015 You should find all the necessary information there. I am currently working with Chad at LizardLick to get my button flash boards done up nicely like Toodles did with the Cthulhu board.
TTFN
Kaytrim
Thanks for the response! I’m loving how the Cthulhu is so damn adaptable!
I see, I had Tingboys thread in mind, but the battery thing probably had me thinking your setup was different. But dude, since your doing the Lizardlick thing, I think I’ll wait for that. As soon as that happens, I’ll have a TMO/Cthulhu/Kaytrim Custom stick! Thanks for answering my question!
Hehe. Yea. It saves a few seconds and a few neck strains from constantly looking at the welcome doc on the monitor.
I’ve play tested the new mod using both PSX and USB connections (not at the same time). Everything works perfectly. Dual PCB hacking is pretty damn easy. I’m gonna have to pick up some of those Madcatz pads for 360 now. Tri-system support in future builds. Woot.
Thanks for your efforts Kaytrim! This really helps me cause I’m one
of those people who needs to see diagrams and such. For anyone
wanting to do this mod, Kaytrim is easy to work with and ships his
boards quickly. Good luck with your LizardLick venture! I swear,
It seems like right now is the best time to get into stick building/modding.
Picked one up saturday from Lizardlick. Quick question: When I go to wire start and select, to get home , I just press those two together? Or is there something else that I need to be doing?
With the one you have, you don’t have to do anything special. If you have a button for Start, a button for Select, and no Home button, just wire up start and select and you’re done; whenever you press both start and select on a PS3, it will bring up the Home in game menu.
Glad I was able to help. I have to give proper credit to Toodles and TingBoy. Without their help and ideas these boards would not have been created, at least not by me.
I have to agree that things are getting easier as far as the guts of these sticks. Toodles Cthulhu board and Lizardlick make getting the controls a cinch. All a person needs now is some tools, skill and time to make a fine working joystick.
TTFN
Michael
Oh god I just finished a custom with a Cthulu and it was SO. DAMN. EASY! No soldering == double-quick completion.
I love you Toodles!
(pics after art gets done)
TheRealNeoGeo made up a wonderful image with measurements of the Cthulhu. Large image, but well worth checking out.
http://akihabarashop.jp/misc/Cthulhu.jpg
Added to the first post.
quick noob questions…
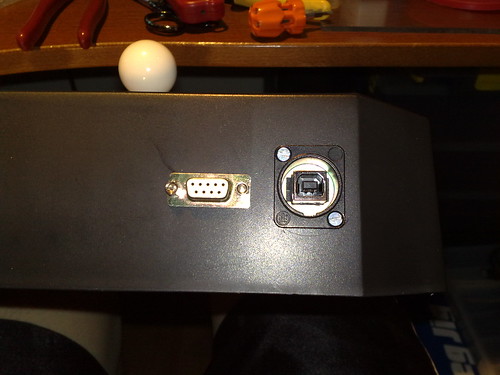
if i go zombie’s route, can i use a db connector instead of a switch? cut the wires that go to the console and hook them up to the db female, and then have each of those cut wires hooked up to a db male? so i can just plug in the wire of the system i want to play, instead of multiple wires hanging out of my stick for cleanliness. if possible, how would the pin layout go (what wires go to what pins)? would this noob diagram somehow work?..

thanks
p.s. anyone know of, um, good small-work electronics books for absolute noobs? like a beginners tutorial of how everything works? this stuff interests me, but i get lost. thanks
Just making a post with pictures embedded so Toodles’ can add it to the already growing list of pictures. Another dual PCB setup.


Damn shinJN, your wiring work is top notch!
Done. God DAMN that is some clean work!
If you want to have all three going to a DB connector, the minimum number of pins you’d need:
2 (power+ground for every system) + 2 (D+/D- for cthulhu) + 2 (D+/D- for 360) + 5 (clock, ack, att, cmd, dat for PSX) = 11, so you’d need a a DB15. But, yeah, it could work, but if you’re willing to deal with the trouble of installing the DB connector on your stick and making individual cables, then the UPCB route might be better for you. With the way your describing, it would require 2 different USB cables, one for Cthulhu and one for the 360, whereas with the UPCB you’d only need one UPCB cable, and you’d have access to all of the other UPCB supported consoles.
Trying to get a generic electronics book is difficult, because a lot of things most books cover are difficult to understand and won’t apply to what you’re trying to do. I’ve read a ton of books and didn’t really grasp capacitors and inductors until the circuits class I’m taking now in college.
The way I learn best is to set a goal of a project, something I want to build, and focus on that. Ask questions on forums, try to understand what’s going on, and be very patient in trying to figure out what went wrong when things do go wrong. I started out with digital electronics because it was the easiest way to make cool shit happen; blinking lights, communication with game consoles, etc.
If I had to start over today to work towards the path I’m on now, here’s what my first initial shopping list would be:
Radio Shack Electronics Learning Lab
Has a breadboard that includes access to different voltages from the batteries (0-6v in 1.5v increments) and a ton of usefull stuff on the case such as buttons, switches, potentiometers, LEDs with built in resistor, a seven segment display, buzzer, etc. Include a vast number of components and chips inside, along with two books, one for analog experiments and one for digital experiments. Good place to learn with a decent selection of included parts and components.
Boarduino (with FTDI cable):
Arduino clone; its a easy to program for microcontroller, similar to the ones used in the UPCB and Cthulhu. Plugs directly into a breadboard, like the one on the RSELL
Another option instead of the Boarduino would be the Arduino start kit:
It can still be connected up with the RSELL, but not quite as nicely, but does come with a few parts for following LadyAda’s tutorials, so getting up to speed on programming the Arduino won’t take long.
and if I was rolling in the money and needed the tools for soldering, LadyAda’s Toolbox
It just depends on what you want to do with the electronics. If you wanted to focus on stereo amplifiers, the tech you’d have to focus on is different.
I can see where design inspiration came from for the UPCB and Cthulhu. =)