Does anyone know the solder points (the ones labled with the prefix “TP”) on the back of an old ver. official xbox 360 wired controller? I checked everywhere for the points but I only found diagrams for the new, common ground version of the controller. I don’t mind having to wire up each button/joystick to a separate ground, I just want to get this controller done! Thanks in advance for your help 
I’ve hacked a new one and I did all my points right where the buttons are. You will see two black contact areas which the button shorts when connected to. Scratch off that stuff and solder the two wires to there.
eh, well the ABXY buttons are easy enough to solder to but for my crappy soldering iron (tip is probably damaged) the directional pad bits are impossible and I probably already damaged them anyway 
Those pads are practically the only things my iron can solder too anymore, which is why I was hoping someone would know them.
it’s my way to connect my stick
lol, that’s pretty useful Max3000. Does that make a good stable connection though?
As long as the solder flows correctly and it holds it should be good. Some hot glue would be a lot better than the tape though.
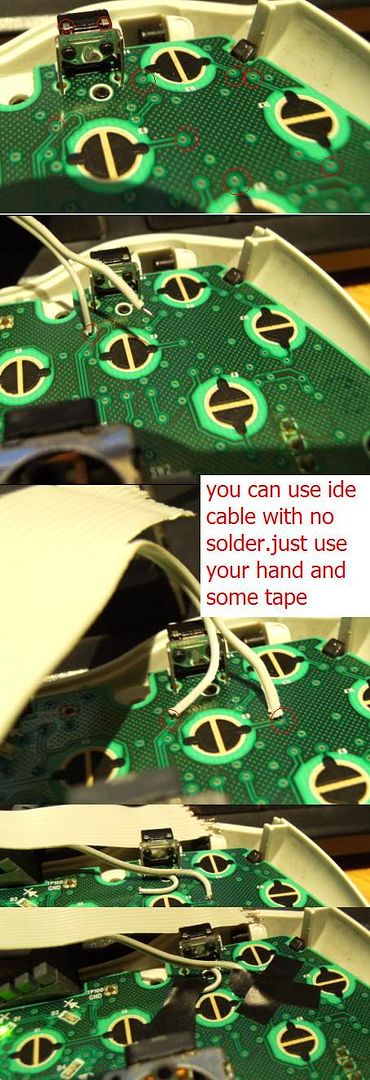
those holes pretty stable for ide cable(just fit)
if you like shake or pull and drag them,you must solder or use more and more tape
but i think you’d better control yourself because you want to play with your stick not your controller’s pcb
right, hot glue also keep pcb with out damaged
but i just have tape,i won’t waste them:wgrin:
nvm im dumb lol
do you have points for the directional pad part though
http://forums.xbox-scene.com/index.php?showtopic=581799
here are old ver x360 wired controller solder points
total 18 wires:
dl2 lb2
dr2 bk2
x2 a2
dd2 du2 rb2
y2 b2
a1
b1
x1
y1
dl1
dr1
du1
dd1
lb1
rb1
st1
st2
bk1