So my custom joystick is almost finished. In fact besides a few details, it’s pretty much done. The only issue I’m dealing with is the top plex.
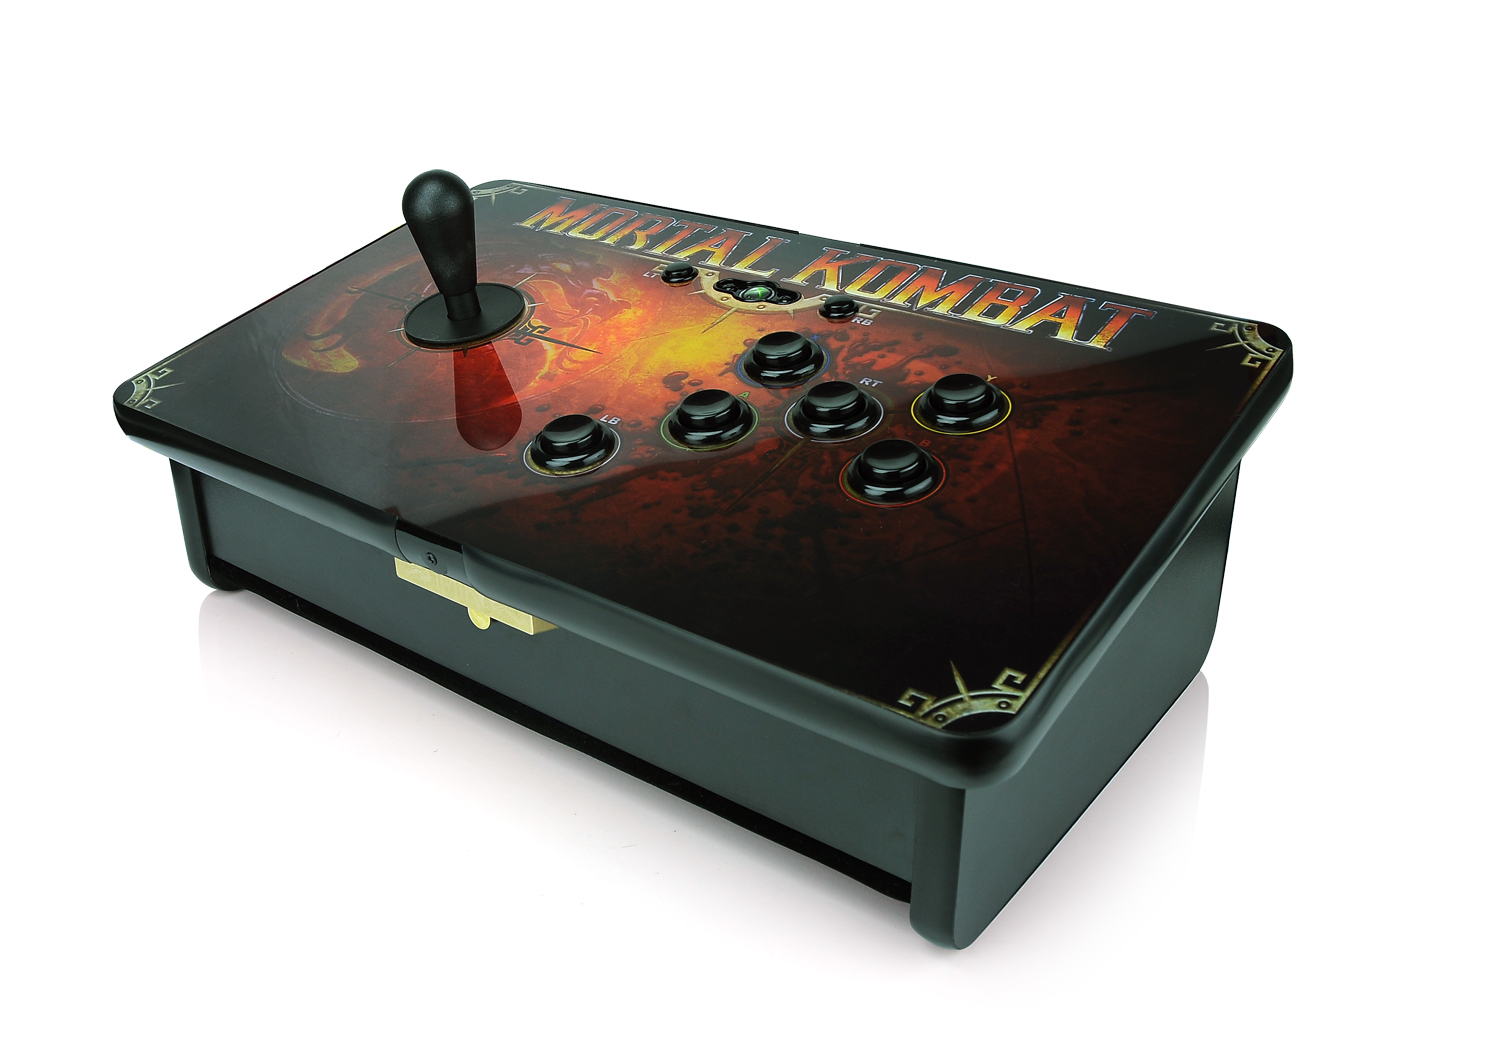
Here’s a picture of what my joystick looks like:
Essentially I’ve got a piece of artwork sandwiched between a piece of MDF and a piece of 1/4" plex. Now I have the plex held down by the four screws that hold the joystick and of course the 11 screw in buttons. While everything is held in pretty tight on the top and sidesw, the bottom “wings” have a gap and can be pulled up easily. Of course I’ve already looked at putting some screws through the plex and through the PDF, I just don’t like how that looks.
So the other day I was looking at a friend’s MK9 stick and noticed it had art and a piece of plex that was solid with no evident gap. Of course it also had one thing mine didn’t: rubber molding on the side.
You fine folks have an idea of how to make something like this work? I just want a clean way to keep the plex down and finish the edge. Any help would be appreciated.
I am currently using the buttons to hold down the plex. The only issue is towards the bottom (near the text “Jedah Doma”) the plex gaps and wants to pucker up a bit. I’m curious how the MK stick has the plex and art seamlessly together with no screws.
You are going to need wider T-molding, which means there is going to be a bit of a “lip” on the underside. It shouldn’t be too noticeable, however if it were me, I would have just gone with a polycarbonate laminated decal for the top side of the stick rather than using plexiglass, since that would not add noticeable height to the unit and you could use the same size T-molding the the stick originally came with.
You know I thought about that, but the folks at Kinkos told me their lami-lable printer does not stick to surfaces. I asked repeatedly and they kept telling me a lami-label would not work. I’m starting to think they were full of it/lazy.
You could try shaving it off with an Exacto Knife or a box cutter, if you are confident that you have steady hands. Just be careful not to cut yourself, above all else!
If you are at all curious about laminated decals for future reference, my recommendation goes to GameOnGraphics.com. I got all of my artwork for my arcade machine printed up by them and I was very pleased with the results.
Thanks for the tip, I might have to go to them in the future.
Though my questions still remains, how do people get a piece of plex to stick on top of artwork with no seems or signs of gaps. As you stated the t-molding itself wouldn’t hold down the plex, so how do they do it on something like the MK9 stick?
Here you can see there is a piece of plex of clear coating on top of the artwork and no visible signs of screws. Any ideas how that is done?
The easiest way in my experience is to use masking tape. Run it around the sides of the panel keeping the edge of the tape flush with the side of the plexiglass overlay, and then run an exacto knife through the slot that the T-molding goes into to trim away the extra. The tape will hold down the plexiglass and make sure it does not “peel” up. It will be invisible when the T molding goes over it, and it will last you a very long time.
So I made a small change to my joystick. I decided to go ahead and bite the bullet by screwing the plex down to the MDF. Originally I had this grand idea to use black flat head screws around the edge of the plex. I drilled a hole big enough for a #4 screw and then used a bigger bit to countersink the head. I figured it would look sleek and inconspicous.
How wrong I was.
It ended up looking cheap and crappy. So I went the opposite way. Two washers (one silver on black) and a silver screw. I think it turned out pretty slick.
Bottom line: Either make the affixing of your plex seamless and unnoticeable or make it blatant and noticeable. In the middle turns out like crap.