Spoiler
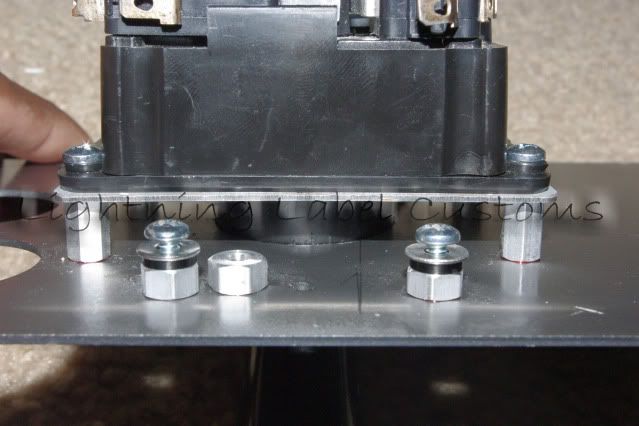
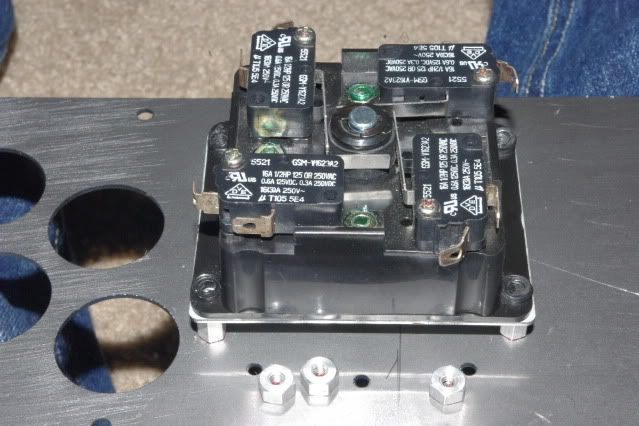
[LEFT]Here is how the plate will be set up when you receive it[/LEFT]
[LEFT]
http://i21.photobucket.com/albums/b284/blklightning21/IMGP3828.jpg
[/LEFT]
[LEFT]You will receive[/LEFT]
[LEFT]4 x jap machine screw[/LEFT]
[LEFT]4 x washer[/LEFT]
[LEFT]4 x 1/16" nylon spacer[/LEFT]
[LEFT]4 x Korean machine screw[/LEFT]
[LEFT]With this setup you are able to mount most if not all different types of japanese joysticks and korean sticks.[/LEFT]
[LEFT]Not only will this setup allow you to mount these many different joysticks but it will allow you to mount them at the correct heights even when using plexiglass covers making for a true universal setup.[/LEFT]
[LEFT]Here is a pic of the Sanwa jlf mount plate mounted[/LEFT]
[LEFT]
http://i21.photobucket.com/albums/b284/blklightning21/IMGP3830.jpg
[/LEFT]
[LEFT]Here is a pic of the Seimitsu LS 32 SS plate mounted[/LEFT]
[LEFT]
http://i21.photobucket.com/albums/b284/blklightning21/IMGP3835.jpg
[/LEFT]
[LEFT]Here is a pic of the Fanta stick mounted[/LEFT]
[LEFT]
http://i21.photobucket.com/albums/b284/blklightning21/IMGP3839.jpg
[/LEFT]
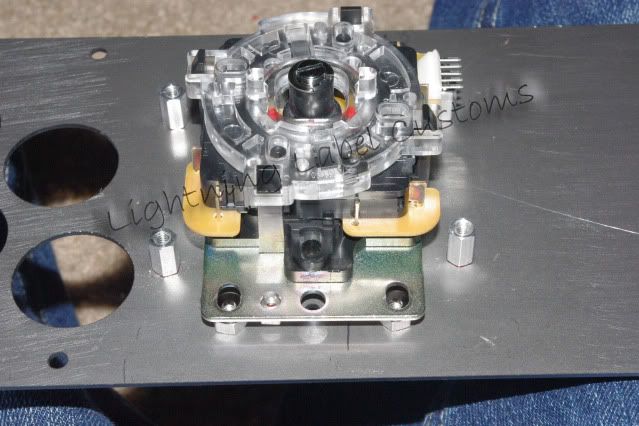
[LEFT]Now that you can see them all mounted Let me explain what i mean by true universal setup.[/LEFT]
[LEFT]
http://i21.photobucket.com/albums/b284/blklightning21/IMGP3865.jpg
[/LEFT]
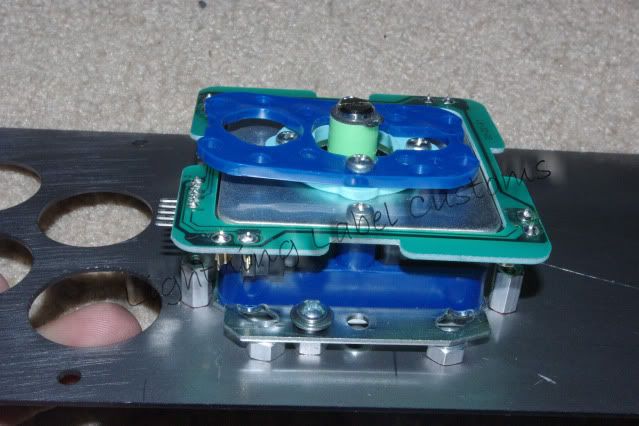
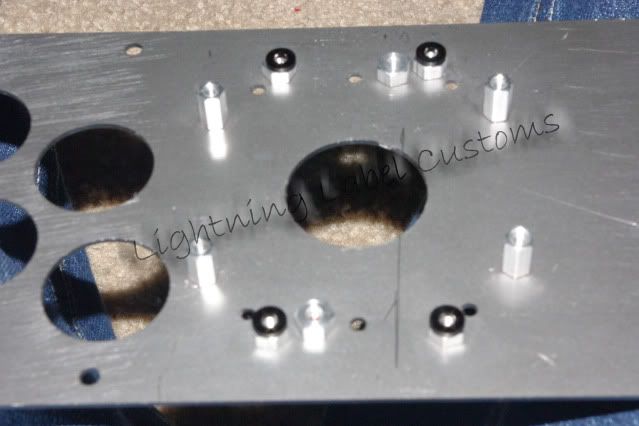
[LEFT]Looking at this pic of the mounting solution, you can see that each of the posts are setup at a length where they will allow for proper mounting height for use with a 1/16" size plexi cover by default.[/LEFT]
[LEFT]So how do we adjust the height to make it sit at the correct height if we want to use just the metal panel without a plexi cover?[/LEFT]
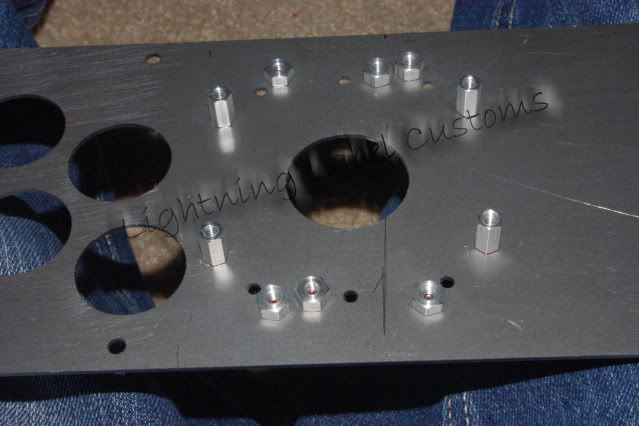
[LEFT]The answer,[/LEFT]
[LEFT]
http://i21.photobucket.com/albums/b284/blklightning21/IMGP3852.jpg
[/LEFT]
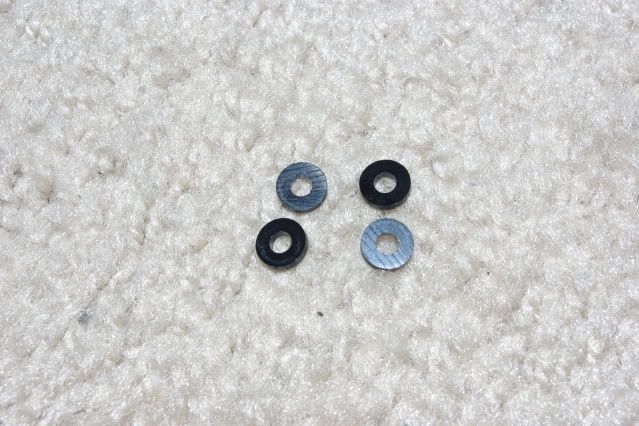
[LEFT]These 1/16" black nylon spacers allow for your sticks to be mounted at the correct heights in different configurations.[/LEFT]
[LEFT]Lets go over mounting the different sticks correctly in the different configurations.[/LEFT]
[LEFT]Important When screwing in the screws into any of the posts there is no need to overtighten them, just screw them in until you feel resistance and then screw just a bit past that and you will have a strong hold.[/LEFT]
[LEFT]Japanese Sticks[/LEFT]
[LEFT]Important - any and all japanese sticks that will be mounted to these panels will need to have the washer and spacer included in order to mount correctly in either configuration, This is because the washer and spacer allow for the correct space for the machine screw to secure the joystick to the panel without complications.[/LEFT]
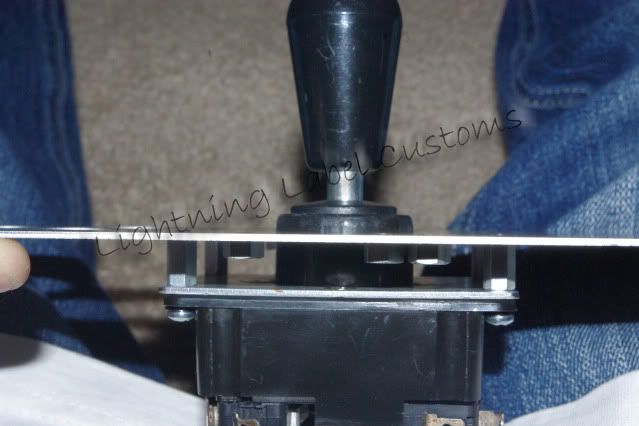
[LEFT]Mounting Japanese sticks for correct mounting height with a 1/16" plexi cover.[/LEFT]
[LEFT]This is extremely simple just flip the panel over in your lap and place the joystick over the bare posts.[/LEFT]
[LEFT]
http://i21.photobucket.com/albums/b284/blklightning21/IMGP3868.jpg
[/LEFT]
[LEFT]then take the machine screw with the washer and black spacer on it and screw it into the screw posts and your done[/LEFT]
[LEFT]
http://i21.photobucket.com/albums/b284/blklightning21/IMGP3858.jpg
[/LEFT]
[LEFT]you can see here that the washer and black spacer are used in the mounting configuration as needed.[/LEFT]
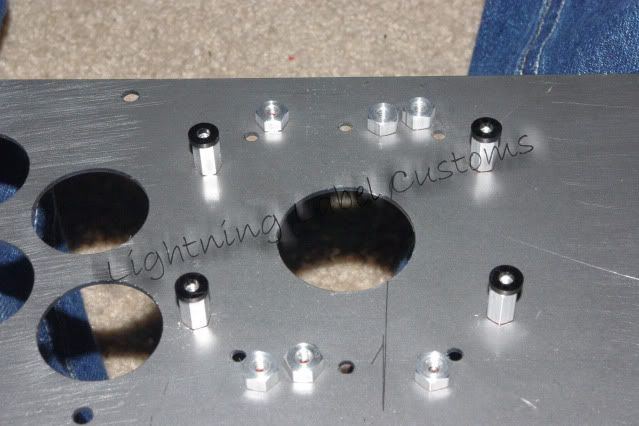
[LEFT]Mounting Japanese sticks for correct mounting height using metal panel only.[/LEFT]
[LEFT]Almost the same as for mounting for 1/16" height except now the you will place the black spacers on the bare post before the joystick.[/LEFT]
[LEFT]
http://i21.photobucket.com/albums/b284/blklightning21/IMGP3869.jpg
[/LEFT]
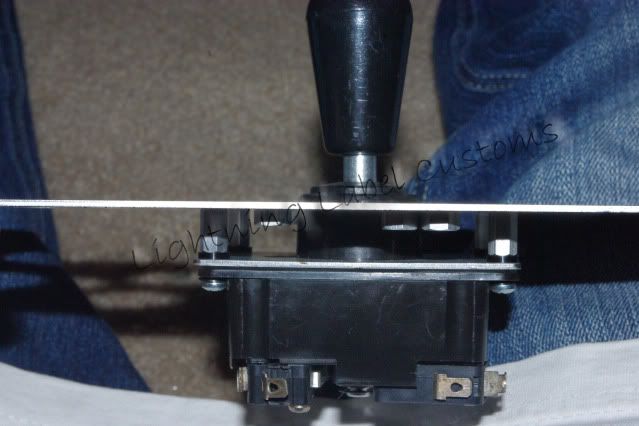
[LEFT]after those are placed on the posts simply place your joystick over them[/LEFT]
[LEFT]
http://i21.photobucket.com/albums/b284/blklightning21/IMGP3870.jpg
[/LEFT]
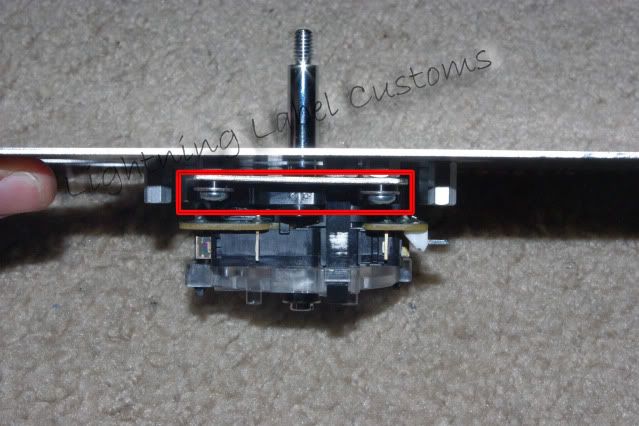
[LEFT]Then simply take your machine screw with the washer on it and screw it into the posts.[/LEFT]
[LEFT]You will have this when you are done[/LEFT]
[LEFT]
http://i21.photobucket.com/albums/b284/blklightning21/IMGP3864.jpg
[/LEFT]
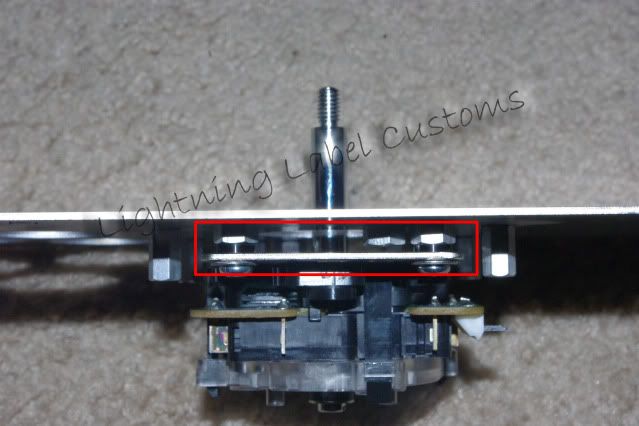
[LEFT]As you can see the washer and spacer are still used, the only difference in this configuration is the mounting plate is in between the spacer and washer.[/LEFT]
[LEFT]What if i am using a 1/32" slim cover?[/LEFT]
[LEFT]Well because the slim cover is so thin it really makes no difference. If you already own one then you know exactly what i mean. However when i am using a 1/32" i use the mounting configuration for the metal only. You can try both ways and see if you can tell a difference, if you can it will be very very minor.[/LEFT]
[LEFT]What about mounting the LS 32 with the ss mounting plate at dfferent heights?[/LEFT]
[LEFT]Ok this one is just a little different because the mounting will be the same for both metal and plexiglass covers because there is no real way to mount the ss plate closer to the metal panel to get a correct height for 1/16" plexi covers. Now this is not too big of a deal but if that is something that bothers you then you can simply get a slim cover as that difference will be minor.[/LEFT]
[LEFT]This is how you should mount the stick to the panel.[/LEFT]
[LEFT]Remember you need to have both the washer and spacer on the screw.[/LEFT]
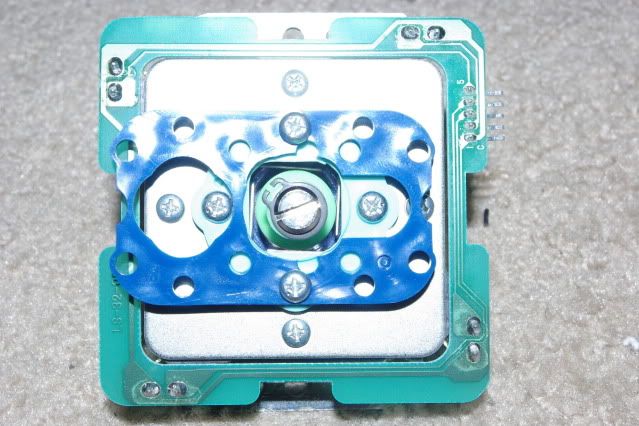
[LEFT]First you need to take apart the bottom of the ls 32. dont worry as it is not hard and takes only a minute or two and all you need is a philips screwdriver[/LEFT]
[LEFT]1st remove the blue gate by unscrewing the two screws[/LEFT]
[LEFT]
http://i21.photobucket.com/albums/b284/blklightning21/IMGP3843.jpg
[/LEFT]
[LEFT]Next you will remove the 4 screws on the metal[/LEFT]
[LEFT]
http://i21.photobucket.com/albums/b284/blklightning21/IMGP3844.jpg
[/LEFT]
[LEFT]and then you are done and can screw the stick into the panel[/LEFT]
[LEFT]
http://i21.photobucket.com/albums/b284/blklightning21/IMGP3845.jpg
[/LEFT]
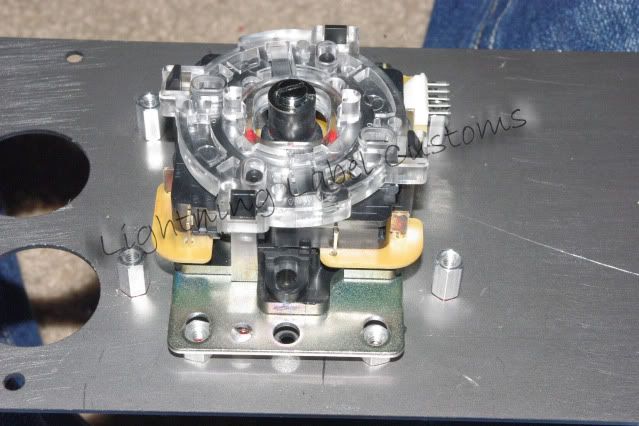
[LEFT]The reason you need to do this is because the screw posts for the ss mount plate are offset and the green pcb gets in the way of screwing the machine screw straight down and you dont not want to be lazy and try to screw it in sideways because you may end up stripping the threading on the screw posts. So better safe than sorry and take the couple extra minutes to do this.[/LEFT]
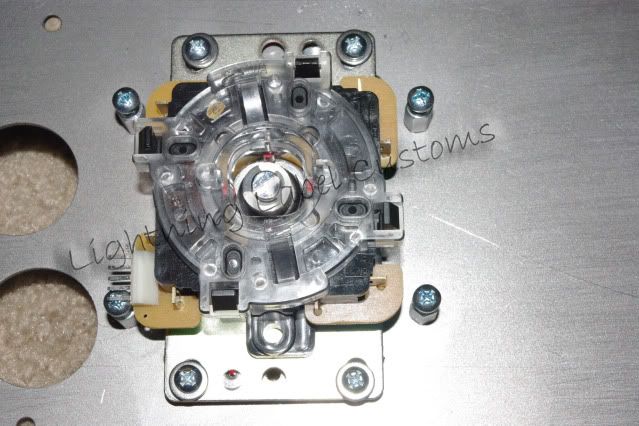
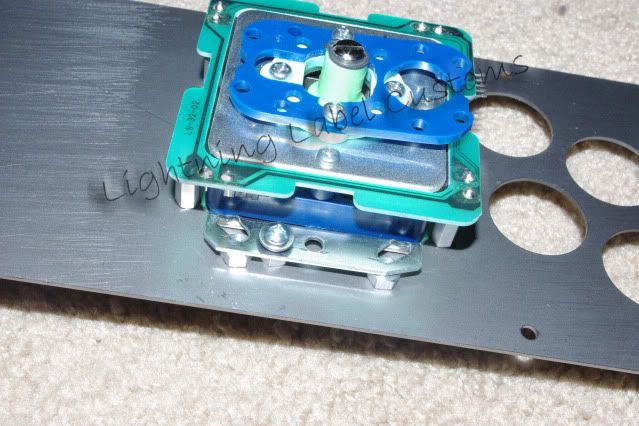
[LEFT]once you have the base of the ss mount plate screwed into the panel you can put it back together and you will have your LS 32 mounted.[/LEFT]
[LEFT]
http://i21.photobucket.com/albums/b284/blklightning21/IMGP3834.jpg
[/LEFT]
[LEFT]Mounting Korean sticks at the correct height for 1/16" Plexi covers.[/LEFT]
[LEFT]The idea is the exact same as for the japanese mounting except you do not need the spacer or washer for this configuration.[/LEFT]
[LEFT]Simply place the K stick on top of the bare posts[/LEFT]
[LEFT]
http://i21.photobucket.com/albums/b284/blklightning21/IMGP3871.jpg
[/LEFT]
[LEFT]Then use the korean stick screws to screw it into the panel.[/LEFT]
[LEFT]
http://i21.photobucket.com/albums/b284/blklightning21/IMGP3847.jpg
[/LEFT]
[LEFT]You can see you need no washer and spacer for mounting the k stick for correct height for 1/16" plexi covers.[/LEFT]
[LEFT]Mounting Korean Sticks at the correct height for metal panel only.[/LEFT]
[LEFT]With this configuration you will need the 1/16" black spacers.[/LEFT]
[LEFT]Place them on top of the bare posts[/LEFT]
[LEFT]
http://i21.photobucket.com/albums/b284/blklightning21/IMGP3872.jpg
[/LEFT]
[LEFT]Then place the k stick on top of them[/LEFT]
[LEFT]
http://i21.photobucket.com/albums/b284/blklightning21/IMGP3873.jpg
[/LEFT]
[LEFT]Use the Korean screws to screw the joystick into the panel and you will have your k stick mounted correctly[/LEFT]
[LEFT]
http://i21.photobucket.com/albums/b284/blklightning21/IMGP3848.jpg
[/LEFT]
[LEFT]Ok guys and gals so that is the jist of how it works, i know like this may seem complicated but it is not at all. it really is as easy as flipping your panel over and screwing it in. Just remember that Japanese sticks need both the washer and spacer at all times to avoid complications.[/LEFT]
[LEFT]One thing that is also nice about these panels is that when mounting every stick except the SS mounting plate you do not have to worry about losing parts.[/LEFT]
[LEFT]
http://i21.photobucket.com/albums/b284/blklightning21/IMGP3842.jpg
[/LEFT]
[LEFT]
http://i21.photobucket.com/albums/b284/blklightning21/IMGP3839.jpg
[/LEFT]
[LEFT]In both of these pictures you can see that all the supplies are in and can be kept in to avoid loss.[/LEFT]
[LEFT]This sadly is not the case with the LS 32 SS mounting plate because on two sides the microswitches are in the way of where the korean screws would go and the mounting plate doesnt allow for but just two of the screws to go in so you can only have the two screws, two spacers and two washers holding the joystick in and just two korean screws in. So just make sure you place the others somewhere safe that you will remember.[/LEFT]
Qanba Q4 and Q3 Mounting.
Spoiler
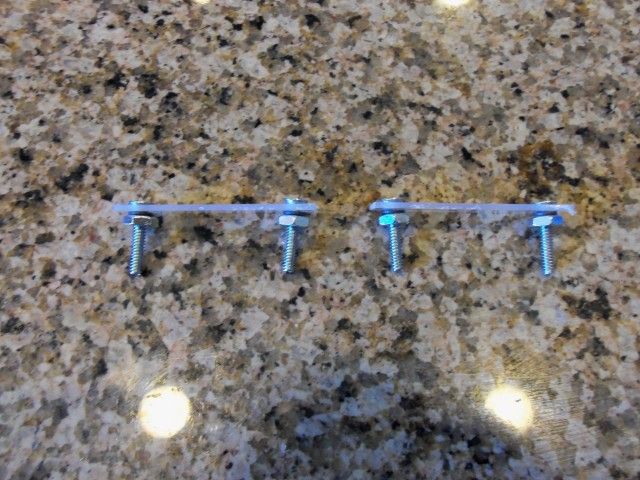
Jap Joysticks
For jap joysticks this is the mounting equipment you will receive.
http://i21.photobucket.com/albums/b284/blklightning21/100_0437.jpg
It consists of
-2 1/16" spacers
-4 flathead 6-32 screws
-4 lock washers
-4 lock nuts
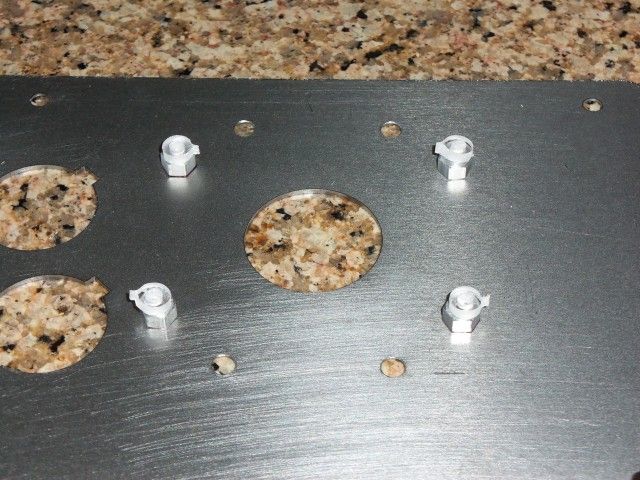
To mount a JLF.
Start by putting the two spacers over the 4 holes.
Make sure that the countersunk side of the spacers is against the metal panel, that way it
allows the flathead screws to sit nice and flush on the other side of the metal panel.
After that simply place the jlf on top of the spacers lining up the holes.
Then place the flathead screws in from the other side of the metal panel and place the lock washer and nut all the way on the screw.
*A little tip when getting the screws in is to start with opposite corners so when you finish two you can flip the panel over and adjust alignment easily.
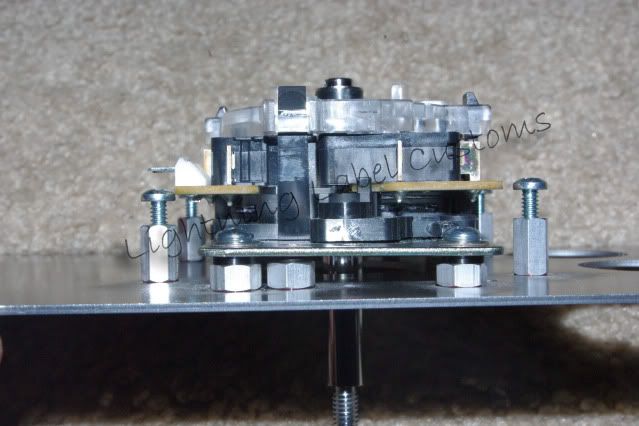
When you have finished you should get this.
http://i21.photobucket.com/albums/b284/blklightning21/100_0430.jpg
the screws should be flush on the other side and you should be ready to mount to mount to the rest of the arcade stick.
It may seem like the height is going to be way off but because the plexi is a massive 1/8" the mounting height will be perfect.
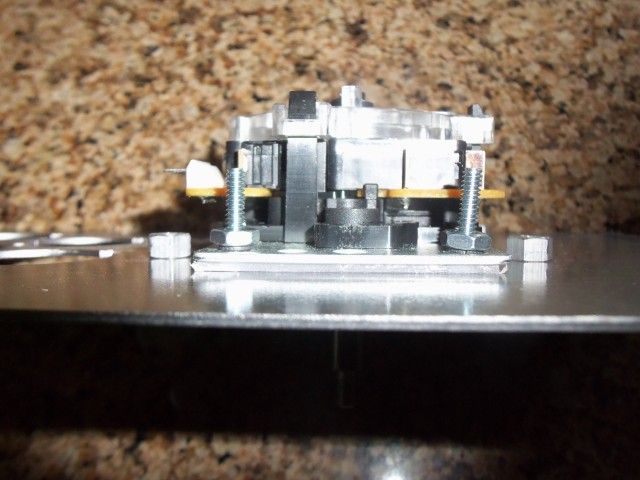
Example.
http://i21.photobucket.com/albums/b284/blklightning21/100_0432.jpg
K-Stick Mounting
If you chose to have your panel mount K-Sticks, this is how you will mount them.
The K-stick mounting equipment will consist of
- 4 6-32 panhead screws with connected lock washers
-4 1/8" spacers.
First start off by putting the 1/8" spacers on the 4 standoffs.
http://i21.photobucket.com/albums/b284/blklightning21/100_0425.jpg
Then place the K-Stick on top of the spacers.
After that simply insert the 4 screws through the K-Stick and spacers into the standoff and tighten(no need to overtighten)
*Tip: once again the easiest way to mount the K-Stick would be to start with opposite corners that way it will have some stability and you can easily get it mounted.
When you are done you should have this.
http://i21.photobucket.com/albums/b284/blklightning21/100_0430.jpg
Once everything is in place simply mount the panel to the case and put the plexi cover on top and the K-Stick will sit nicely at the correct height.