I purchased an HRAP3 a last December but there were a few things I don’t like about the HRAP3:
- Too bulky
- PS button doesn’t turn on PS3
So I wanted another PS3 stick with all Japanese parts but with smaller footprint and a PS button that works.
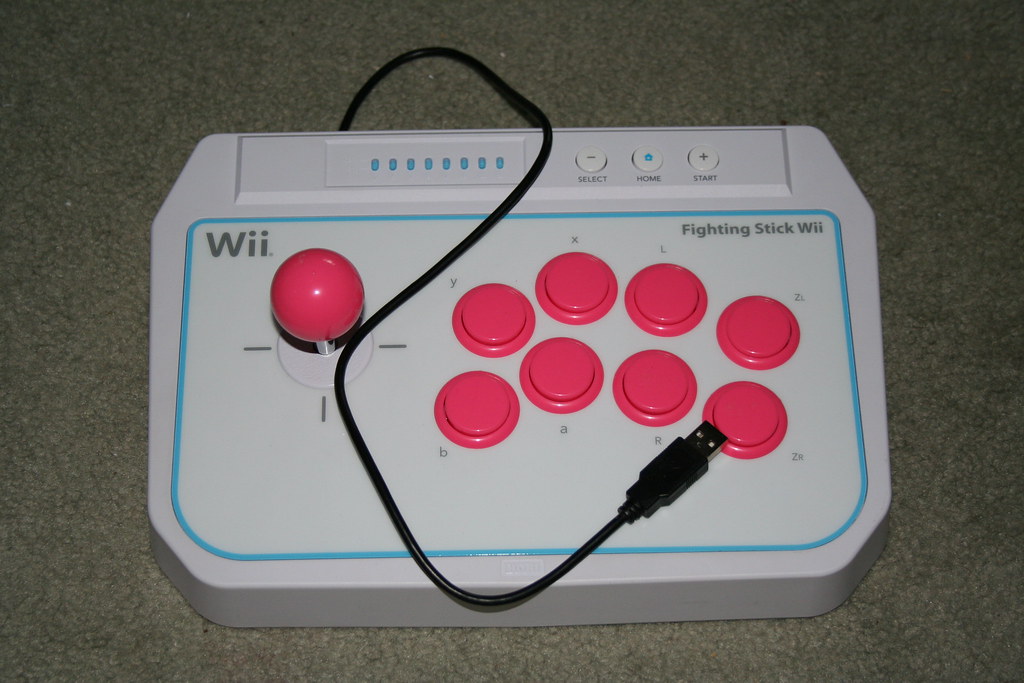
So I purchased 2 fighting sticks couple of months ago also from fellow SRKers 1 Hori EX2 stick for 360 and 1 Wii Fighting Stick. Couple of weeks ago, I ghetto modded my Hori Ex 2 stick with 90% Sanwa Parts (the stick is a hybrid Sanwa/Hori with mostly Sanwa).
It can be seen here:
http://forums.shoryuken.com/showthread.php?t=115479&page=311
I also purchased a very special SixAxis adapter from another fellow SRK tinker.
The thread on SixAxis Adapter is here:
http://forums.shoryuken.com/showthread.php?t=170294
So with all the right parts and equipment in place, I started my Wii fighting stick to PS3 wireless Fighting Stick total conversion.
Tools Needed:
-
Soldering Iron
-
Solder Sucker (to suck out excessive solder used to hold the PCB to the Hori buttons)
-
1/4" or 5/16" drill bit (actual drill not required, can be done by using hand and a cloth towel)
-
Screw drivers, flat and philips
-
24 AWG stranded copper wires
-
Solder
-
Metal File
-
Exacto Knife
-
Electrical Tape
-
Heat Shrink tubing (optional, but good for organizing wires and use as insulation for exposed wires).
-
Quick Disconnects, size .110, need minimum of 16 (optional, good for future tinkering)
-
Super Glue or Hot Glue Gun to glue down PCB/wires/anything dangling inside (optional)
-
Multimeter, used to verify connections and electronics (optional)
Modification Steps:
-
De-solder and remove original Wii PCB and Hori buttons except the top panel where the Home, Start and Select buttons.
-
File down the tabs in the button holes.
-
Modify the Hori Joystick mounting area to fit the JLF Joystick base. I used pliers to cut away 2 areas where the JLF base was protruding so the base can mount flush into the Hori mounting area.
Updated
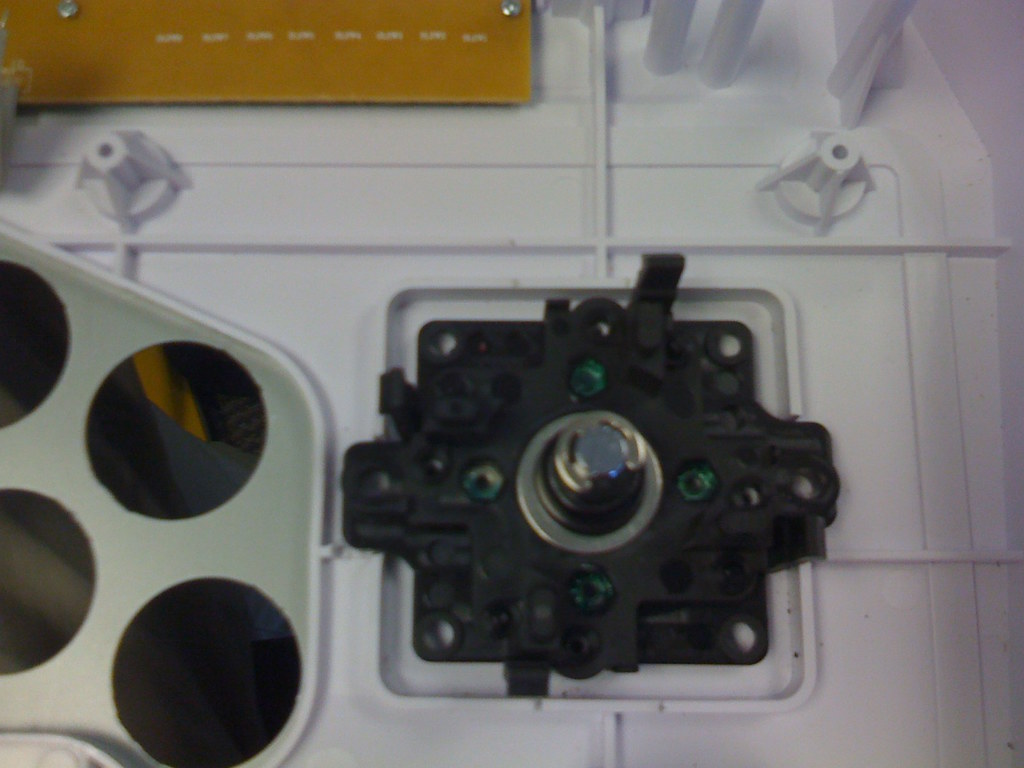
- Modify the JLF joystick assembly to fit Hori Mounting Area:
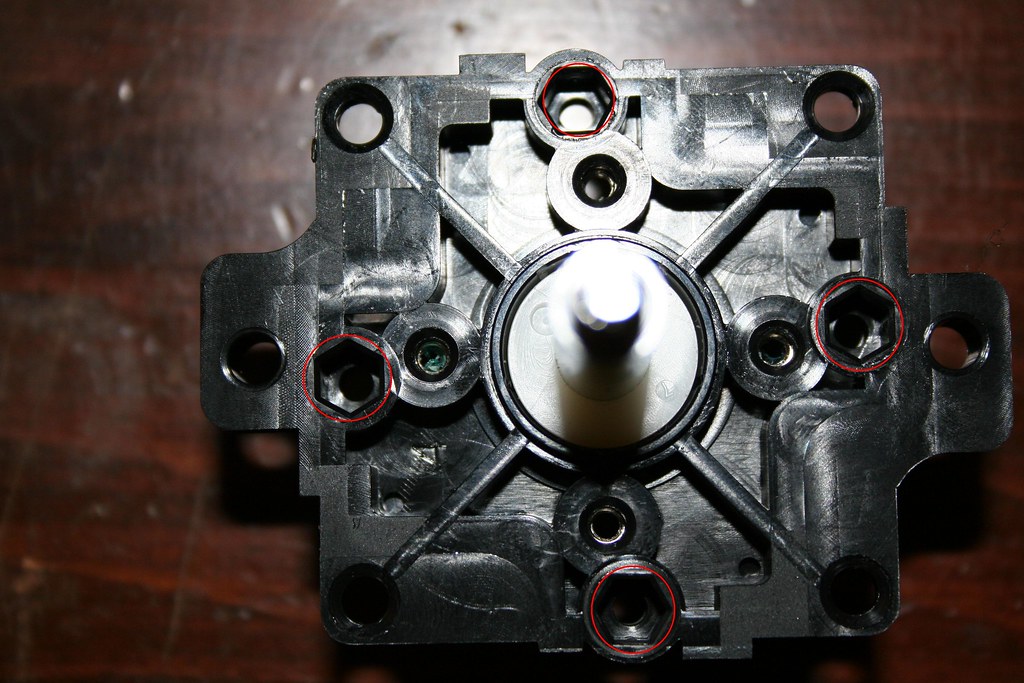
Top of the joystick, this is where the JLF will mate with the Hori base. You will need to drill the holes I highlighted in red with either 1/4" or 5/16" drill. Make sure you don’t drill all the way through!!! You just need to make them big enough so you can put the JLF base flush to the Hori mounting area.
Bottom of the stick, this is where the microswitches and gates mate to the JLF. Use an exacto knife and cut the protruding plastic tab flush to the rest of the base.
bottom view:

Side view show how to cut it.

- In the step 2 you will see I simply put the JLF mounting assembly in the mounting area of the Hori fight stick but I didn’t actually screw anything down. I found some #6 1/2 inch metal screws @ home depot and now I have the JLF mounting assembly securely screwed to the Hori Fighting Stick Case.

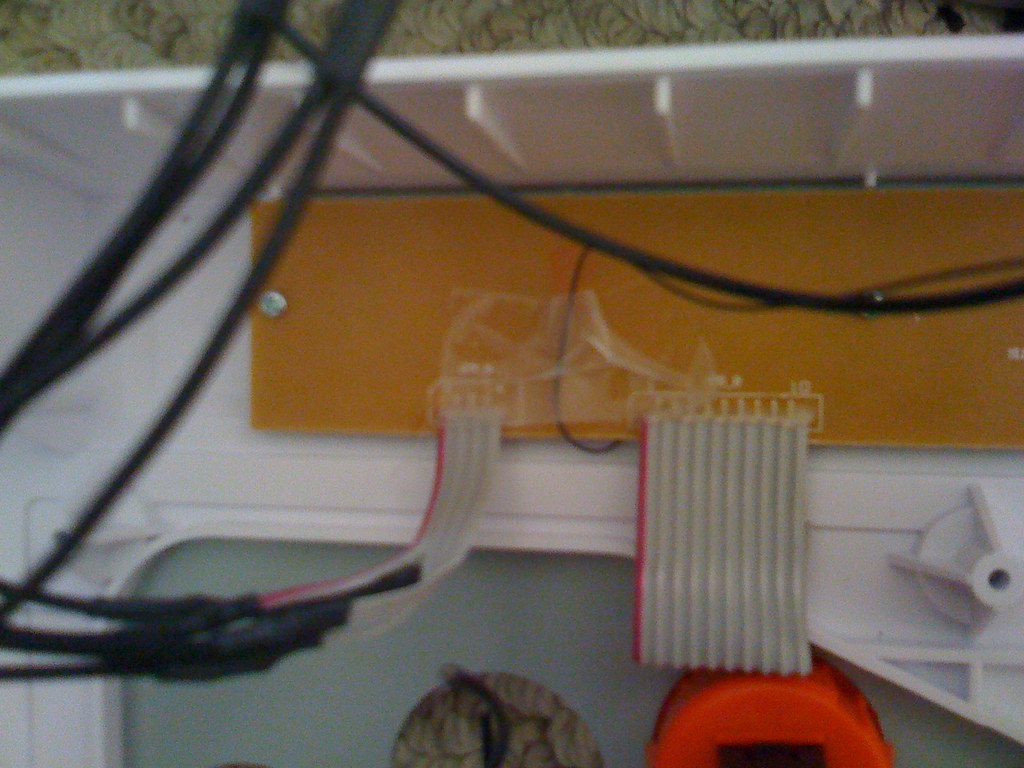
- I removed PCB where the Start/Home/Select buttons are mounted and run my own wires for Home (PS) button because sixaxis PCB is NOT common ground and PS button has its own ground.

- Next I assembled the JLF stick to the empty Wii Fighting stick case for fit check, then I realized that the JLF shaft is a bit too long, so I need to do something about it later on.

- With the JLF stick assembled and the base metal plate screwed back on, I wiggle the joystick to make circular scratch marks on the metal plate so I know where the stick is hitting the plate. Then I drilled a hole through the base metal plate using my 30 mm holesaw I bought (DeWalt brand)

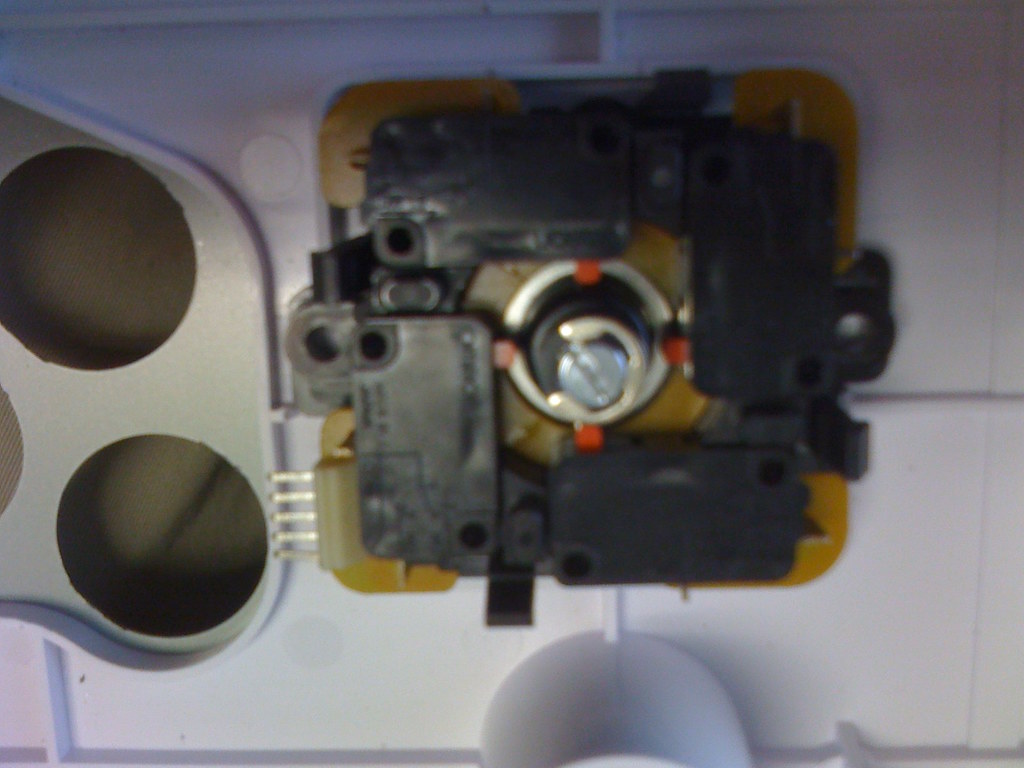
- Next I attach my SixAxis PCB with the SixAxis Adapter to the base metal plate of the Wii Fighting Stick. I attached them using combination of double sided tapes and super glue. I then tested my sixaxis PCB by connecting it to PC using USB to make sure my PCB is OK before going any further.
- After making sure the electronics are OK, I installed my Pink Sanwa Buttons and I started to wire up the sixaxis adapter. Let me say 1 word, the sixaxis adapter is a godsend, makes hacking sixaxis adapter so much easier. I make sure I made the wires long enough so I can open up the case with the base plate like a clam shell so in case I need to repair the stick later on I don’t have to worry about tearing out wires because they were too short.

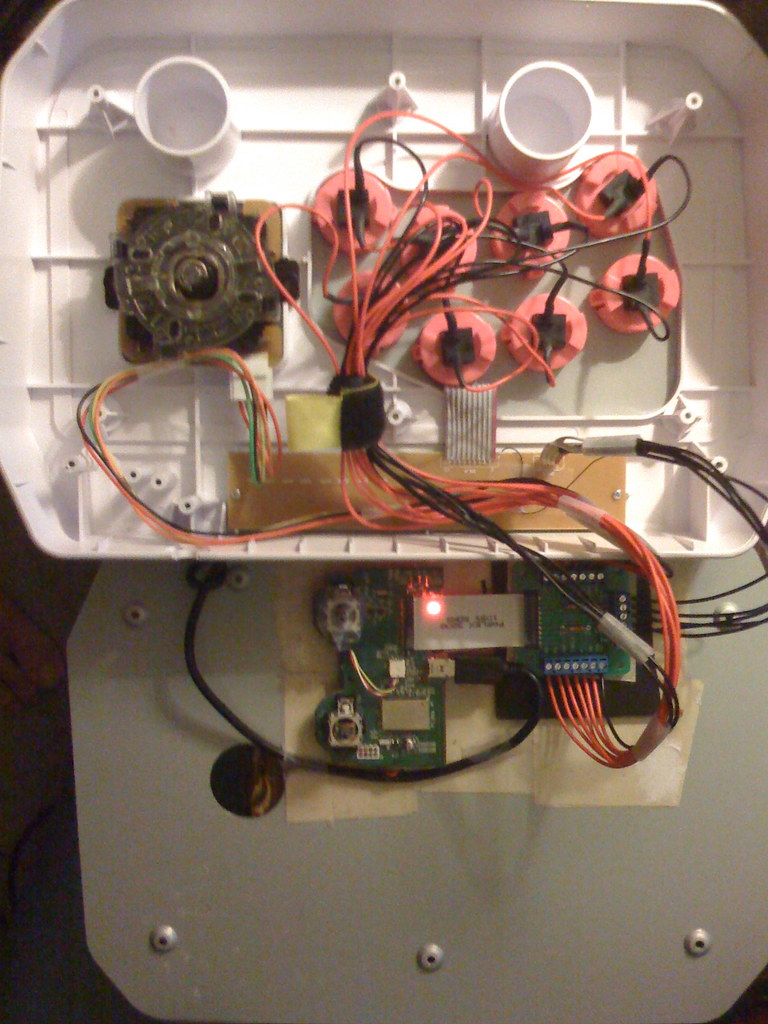

- Voila almost done. I still need to put in my Sanwa Octogate and perform the Sanwa Ultimate Mod to the Sanwa stick (still waiting for LizardLick’s shipment to arrive with my octogate). Here are the pictures of the stick completely assembled.

Updated
- Here’s the final photo of the insides with JLF octogate installed.

So now I have a custom stick with a working wireless PS button with all Japanese parts in a smaller form factor. I have already tested the stick in its current stage and everything is working perfectly.
I played hours of Street Fighter 4 with this puppy last night. It was quite satisfying with a wireless fighting stick in a compact format. I am a lap player, so this stick is perfect on my lap.
