JYS Arcade Fightstick (Nintendo Switch / PC) Thread

This is an arcade stick that comes from China and it probably goes by other names, but it says JYS on the box so I’m just going to call it that.


Name: JYS Arcade Fightstick Joystick

Price: ~$50

Size: 35 x 22 x 5.7 cm

Consoles: Nintendo Switch / PC

Layout: Vewlix

Material: Plastic

Cable: USB/USB Type C

Modding Difficulty: Moderate

Custom Artwork: Vinyl


Overview

I was able to pick one of these up for pretty cheap on eBay. This stick is kind of interesting and thought I would share some info since there isn’t a whole lot online.

It’s pretty much plug and play on both Nintendo Switch and PC. There’s a USB Type C cable so you can use this on portable mode without an adapter. I actually like this and kind of wish other Nintendo Switch sticks come with this moving forward. On PC it’s recognized as a Xbox 360 controller (x-input) so you shouldn’t have too many issues playing games on Steam.

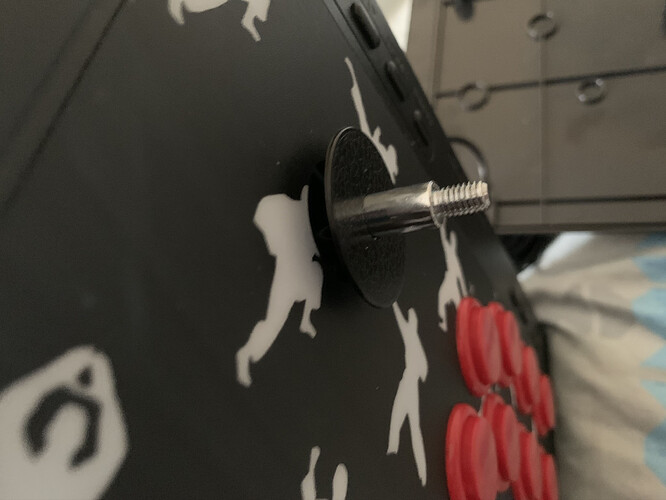
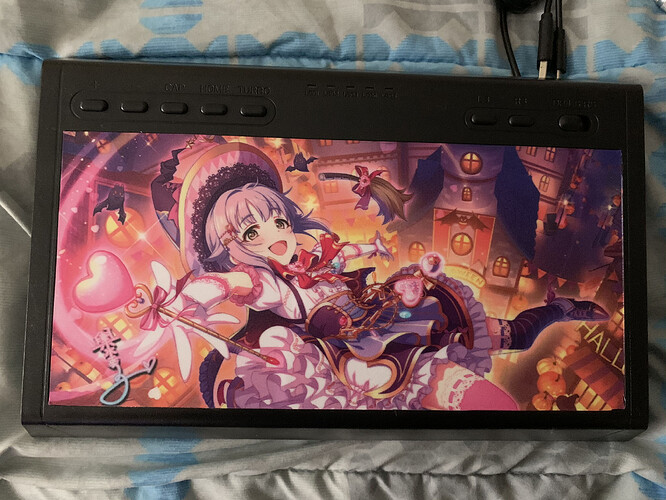
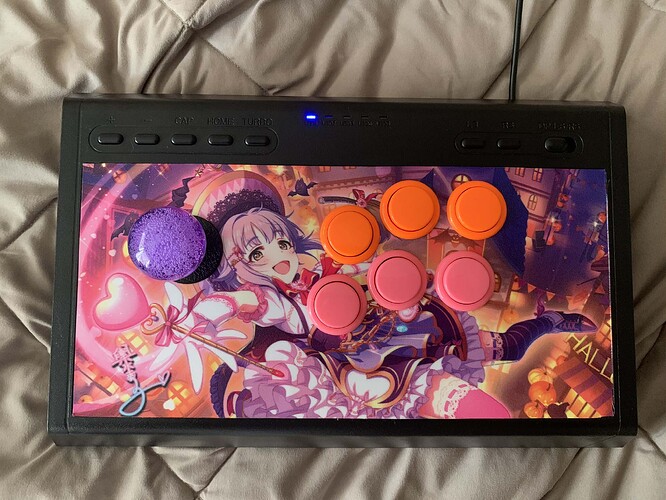
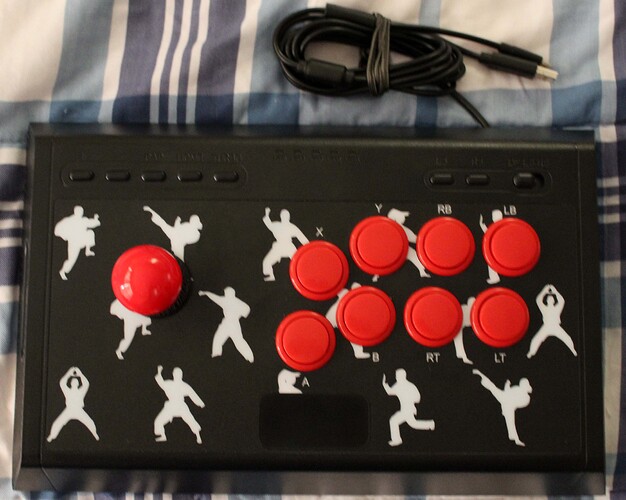
Here’s how it looks with it’s odd choice of artwork. The artwork feels like some matte type print. Joystick and buttons are kind of what you expect on a budget stick. You can play on them, but it’s something you’d want to upgrade. The ball top isn’t tightened so after playing for a bit it’ll come loose. Even if you don’t change out the parts at least tighten the ball top. I watched a YouTube video about this stick and apparently the stick was low for them although to be honest I didn’t really notice. Looking at other sticks I have it’s look to be the same height. Maybe it’s something they changed it in other version. You may notice that there’s an area where there’s no artwork, apparently it’s where a company would put their logo. I think it’s a pretty stupid placing and originally I thought it was going to be bothersome during play. However you don’t feel it too much when you’re playing. It’s not the same feeling as the artwork, but it isn’t bothersome. The stock photos of this stick make it seem like it has some noticeable border around it, but that really isn’t the case. Last thing to note is it’s using a Xbox button configuration instead of a Nintendo one. A is where B is and X is where Y is. Also it’s using RB/LB/RT/LT instead of R/L/ZR/LR. Not a huge issue, but it’s something to note.

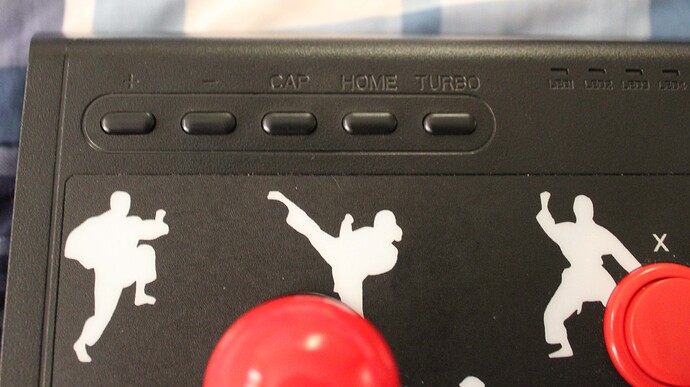
You have you’re standard buttons +, -, Capture, Home, and Turbo. There’s also player indication LEDs.

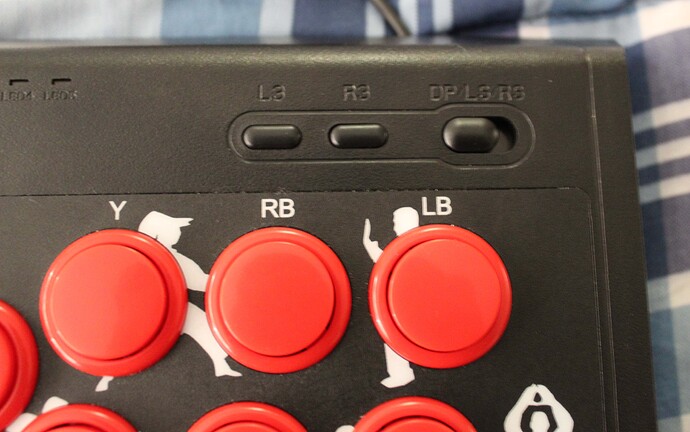
Also you have L3, R3, and a switch for D pad, Left Stick, and Right Stick.

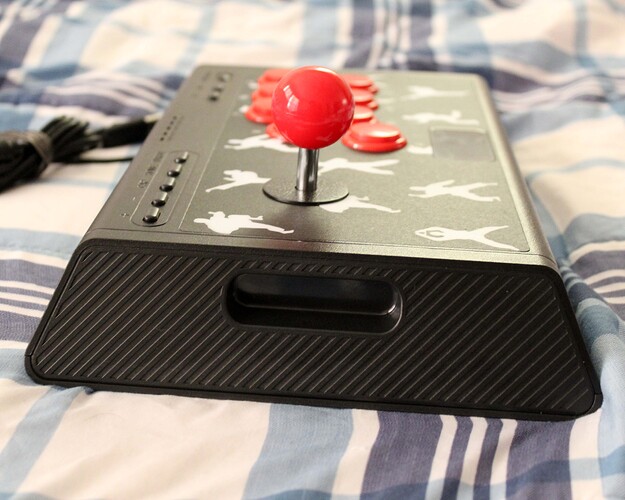
On the sides there’s a handle for better grabbing, but they’re pretty small and not deep so it doesn’t really help that much. Also since this stick isn’t too big and is really light you can just grab the whole stick on it’s side pretty easily. There isn’t a place to put the cable so it’ll just dangle freely.

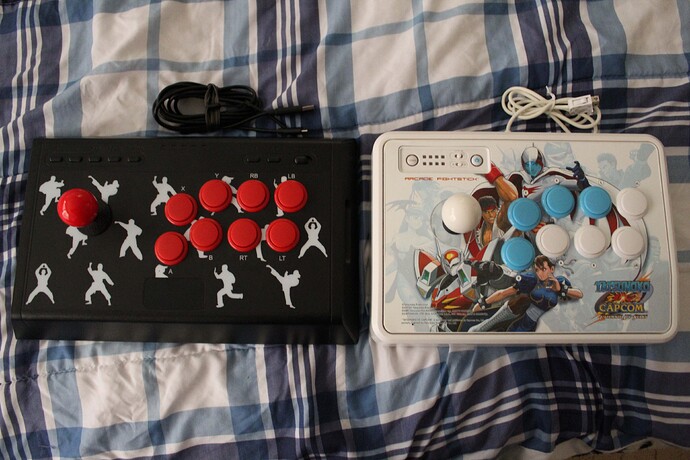
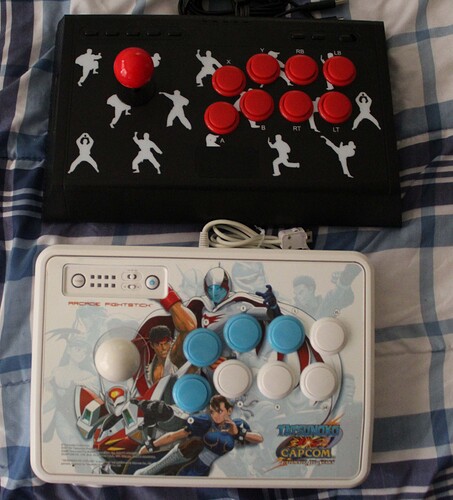
Here’s a size comparison with the Mad Catz TvC (SE) stick. Both are pretty similar in size although the TvC is twice as heavy.

JYS is longer so that’s pretty nice, however since it’s light it doesn’t stay on your lap as well as other sticks.

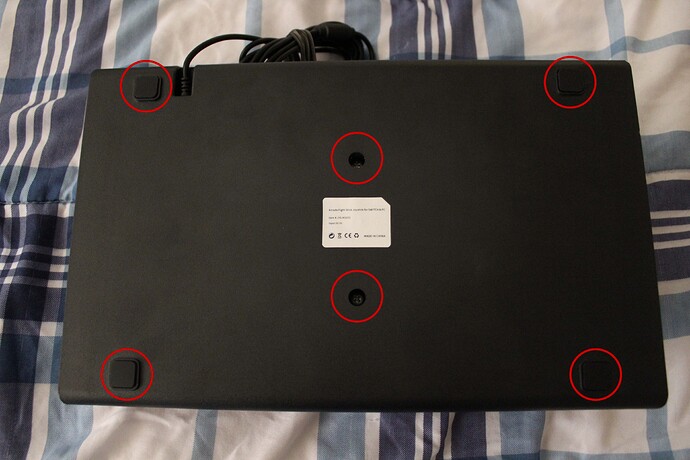
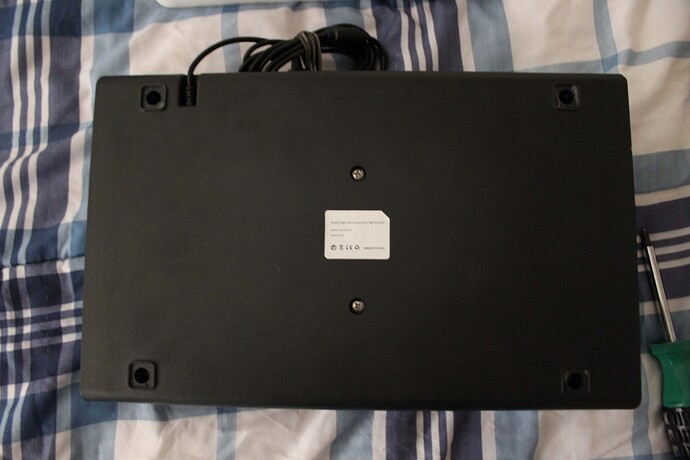
Here’s the back. I’m sure if you put some foam padding, it’ll stay snug on your lap. To open up this stick, you need to unscrew 6 screws. 2 are out in the open while the other 4 are hiding behind the feet. It’s pretty easy to take them off.

That’s how looks without the feet.

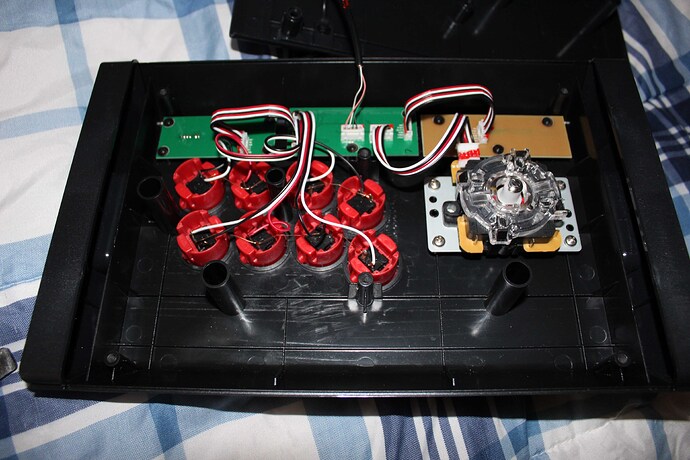
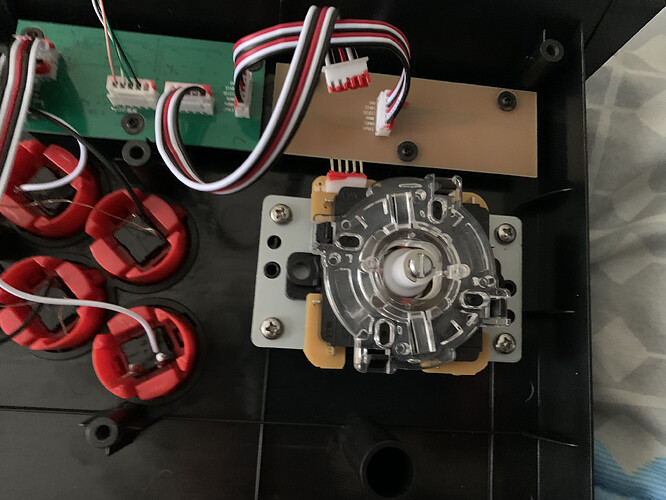
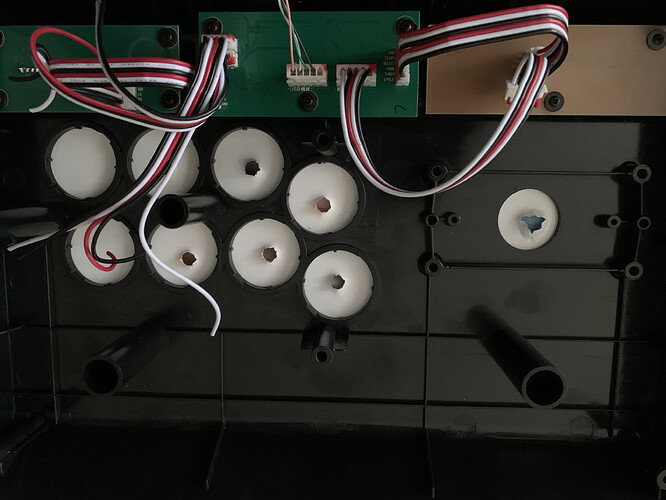
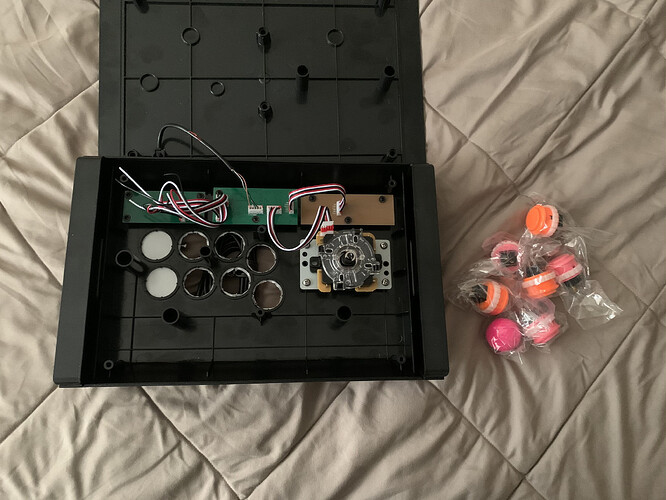
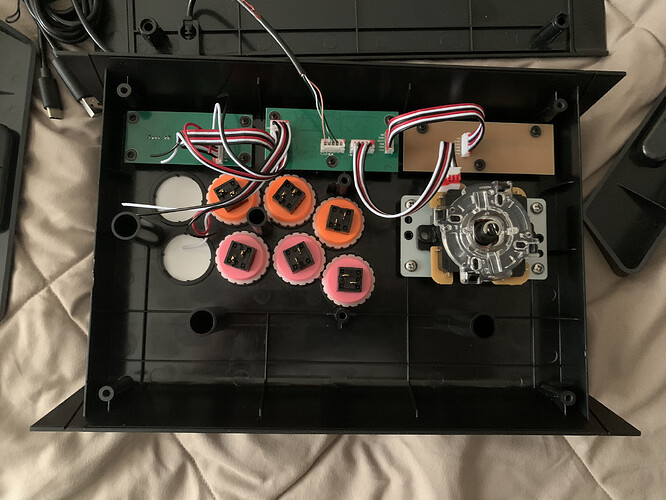
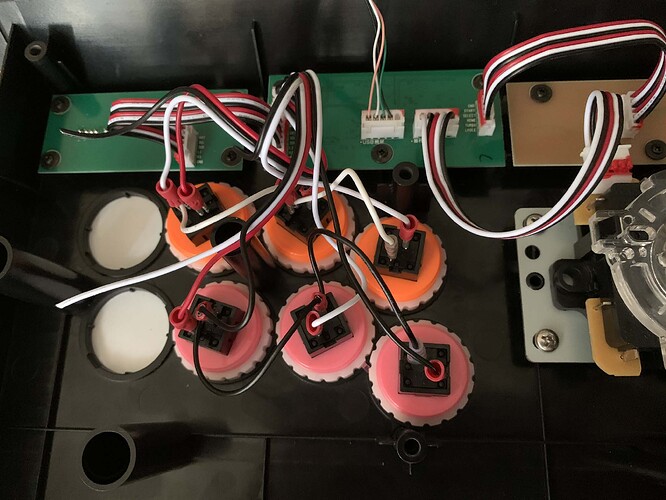
Finally here’s the guts of the stick. I was expecting the worst with buttons soldered to the pcb and the joystick to be one of those budget Hori sticks however, while the buttons are soldered it’s not to the PCB and the joystick is at least a JLF clone. Technically the buttons are soldered to the pcb although it’s via wire and not directly on the PCB. Pretty interesting way to do the ground wire, not great however. If you’re JYS fightstick does break then it’s most likely one of the ground wires breaking. The “A” button on my is broken. The joystick is Bao Long and I guess the buttons are from them too. The middle PCB is the main one with two daughter boards for the buttons on top.

That’s the overview, and I think it’s an okay stick for the most part. However when looking at other sticks for the price it’s kind of hard sell. This stick usually goes for ~$50 and another budget stick that’s in that range is the Mayflash F300. Which is easier to mod, more console compatibility, and looks better stock. Really the only thing this has going for is that it’s probably longer and has a cooler design (excluding the artwork), but other than that nothing else. I won’t go too into what parts can fit inside since I plan on doing that in the next post whenever I mod this stick. But looking at it, it seems to only support the JLF. Not with mounting, but more of height limitations.

Maybe this stick is worth picking up if you’re able to get it at a cheaper price like I did, but if you’re looking for a budget option for the Nintendo Switch then I’d go with the Mayflash F300 or pad hack a 3rd party Nintendo Switch controller.
2 Likes

How To Mod

Step 1: Disconnect the wire for the joystick.

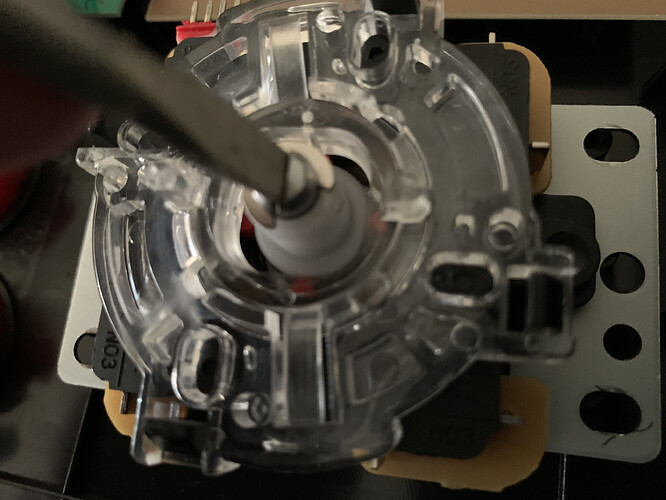
Step 2: Take out the ball top. Since most of these have a loose one, you’ll probably be able to do it easily.

If not then take a flat head screwdriver and put it into the slit and twist the ball top off.

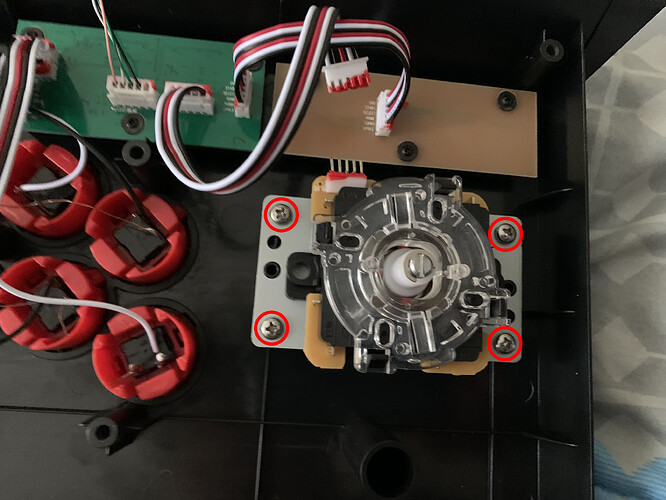
Step 3: Unscrew all 4 screws holding the joystick down. Then take out the joystick.

Step 4: Next is to cut the wire from the buttons. It’s a smart idea to take a picture or write down on a piece of paper where the wire goes. If you didn’t do that then here’s that info.

Top Row
X - Black
Y - White
RB - Red
LB - Black
Ground - White

Bottom Row
A - White
B - Black
RT - Red
LT - White
Ground - Black

If you plan on using this on the Nintendo Switch and want how the buttons are usually placed then you’ll need to swap X and Y and A and B, so it’ll look like

X - White
Y - Black

A - Black
B - White

The rest can be the same.

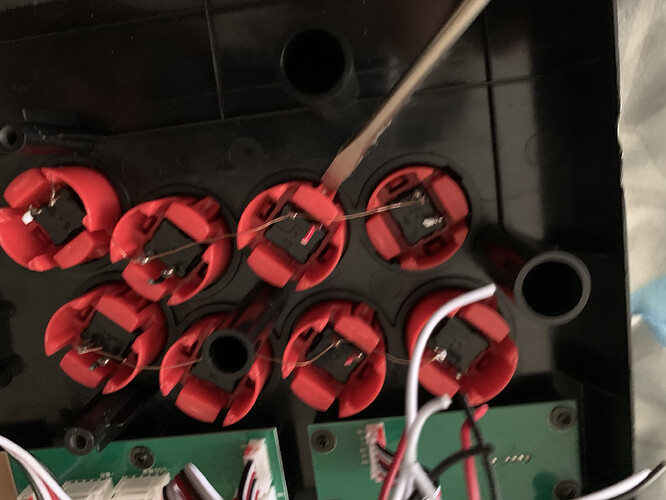
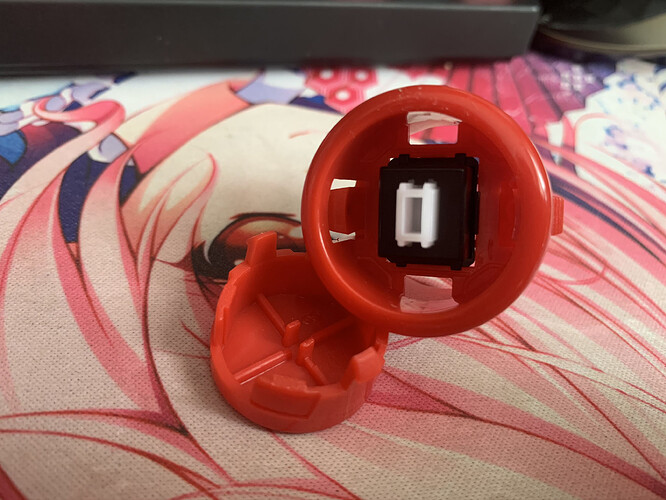
Step 5: Then take a flat head or your fingers and push the tabs on the side of the buttons and take them out.

The buttons can’t take a Sanwa micro switches so you’re out of luck if you wanted to do that. However the switches kind of look like Alps SKCL/SKCM switches so maybe you can change it out for them, but really you have to ask yourself, “is it really worth it?”.

Next few steps is about artwork so if you don’t care about that then just skip to Step 14.

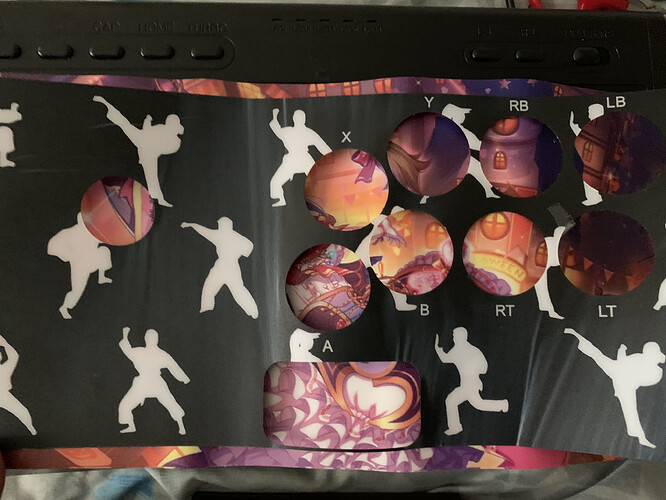
The stock artwork on the JYS Arcade Stick sucks so we’ll be changing it to some cute anime girl. Scale an image to around 5.5"x11.5" (6"x12" to be safe) and print it at either a printing store or online. Make sure it has an adhesive back and get a couple copies just in case you mess up with cutting.

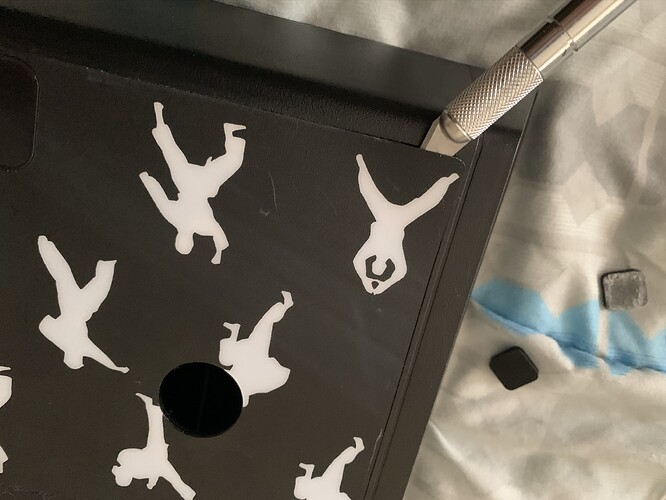
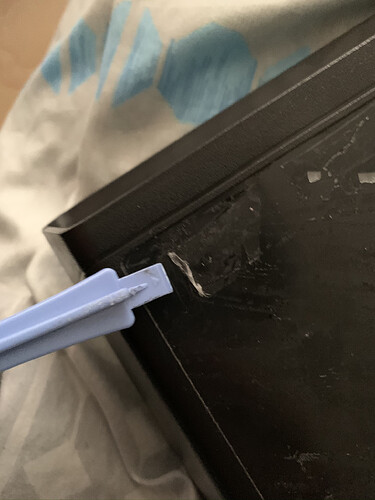
Step 6: Get an X-acto Knife or something similar and try to get under the artwork.

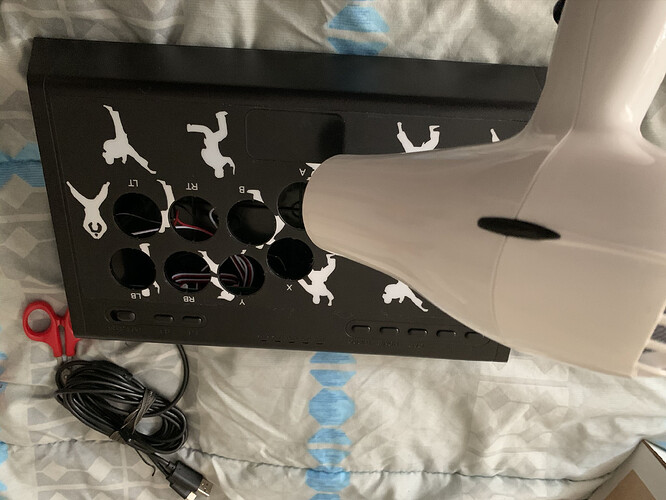
To make this easier you can use a heat gun or hairdryer to get the adhesive loose.

Step 7: Start peeling the artwork off. Try your best to keep it in one piece so you can use it as a template for cutting.

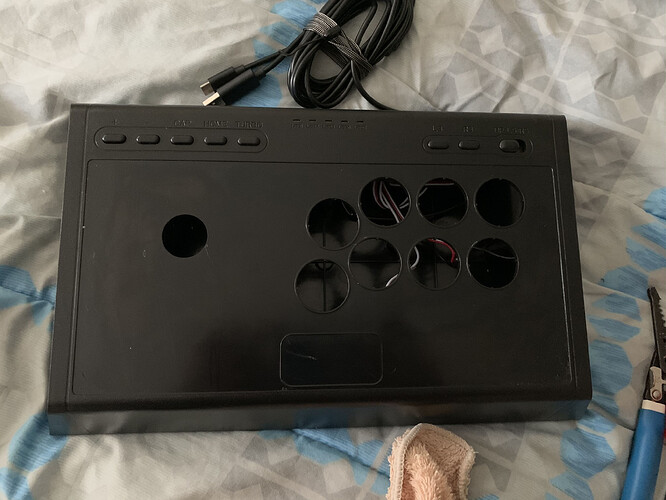
Step 8: Take off all the adhesive, you can.

Step 9: Put the original artwork over the new artwork and mark where you’ll be cutting

Step 10: Place the artwork over the control board. Use something flat to push the artwork into the corners.

Step 11: Then use an X-acto Knife or something similar and cut off the trim and do the same thing with the joystick and buttons.

Step 12: When it comes to the joystick, it’s a Sanwa JLF clone so it’ll fit Sanwa parts pretty well. Personally I just changed the actuator and it feels good.

Q: Can I fit a Korean Stick inside this case?

Kind of? As long as it’s in the style of a traditional Japanese joystick then it should mount perfectly fine however the joystick bottom kind of rubs on the plastic so if you really want to use a Korean joystick inside this stick then I guess just trim that area. I’m going to make a guess that this is the same with Seimitsu joysticks (mainly the LS-32).

Step 13: Put the buttons in. Personally I’m using Seimitsu screw in buttons. From putting buttons in I saw that snap in buttons are a little loose so if you want the most secure option then use screw in buttons. Although as you can see the photos it’s sort of a tight fit so you might not be able to use Sanwa’s screw in buttons since their nut is a little thick.

Now it’s time for wiring. I might not explain this well or if you learn better with video then I recommend watching this video.

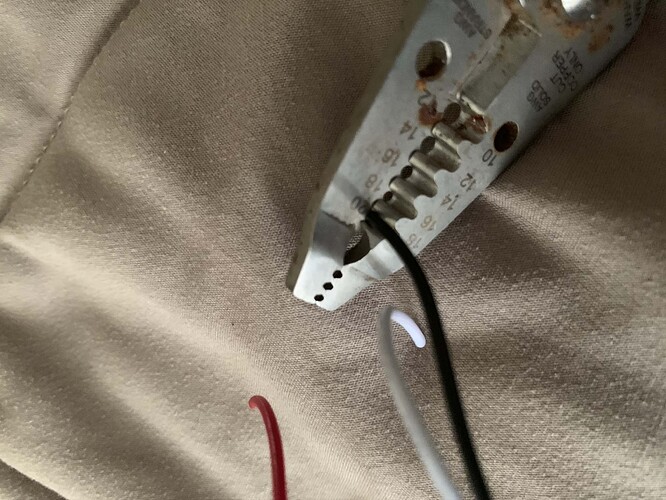
I highly recommend you use a crimper. I would, but I misplaced it so I’m just using a wire stripper. If a crimper is too much money for you then I at least recommend buying a wire stripper. It’ll make stripping the wires a hell of a lot easier.
You’ll need

22-18 .110 Quick Disconnects
22 or 18 AWG wiring

Step 14: Locate where the button wires come from, which is on top of the PCB.

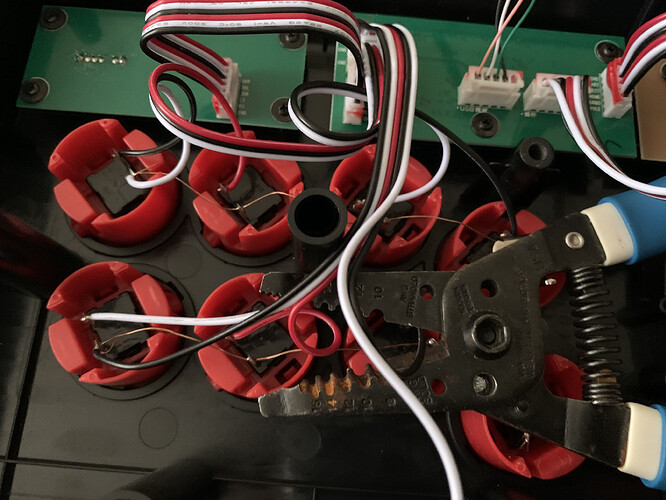
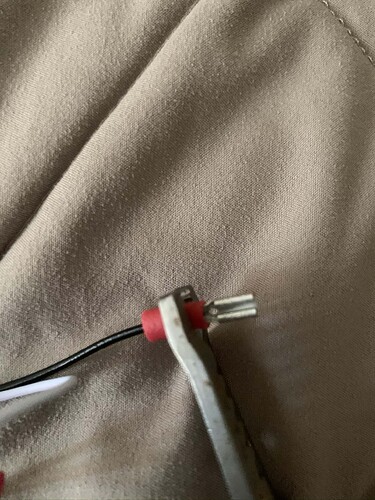
Step 15: Take out the connector from the board by moving it side to side. This will make the wires easier to work with. Try not to force it out due to a possibility of stripping the wires. If it’s really stuck in there then ignore this step and work with the wires inside the case or cute the red glue with an X-acto knife or something similar. That can help loosen it.

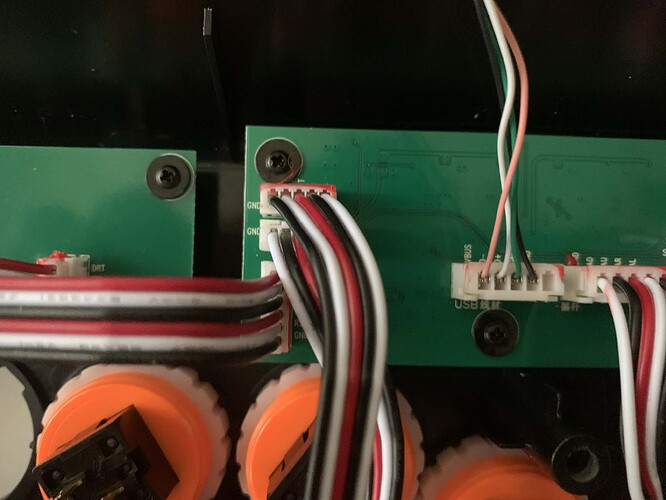
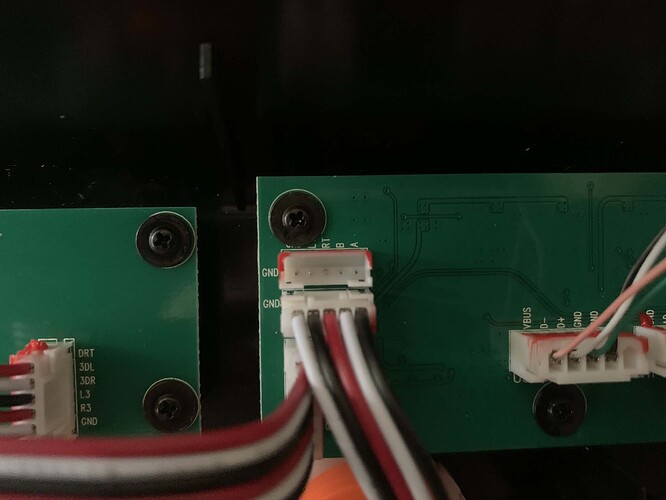
Top connector is for the bottom row (A, B, RT, LT)
Bottom connector is for the top row (X, Y, RB, LT)

While in the photo it shows me taking out the top connector, throughout this process I was working with the bottom connector.

Step 16: Indicate which one is the ground wire and leave it for now. Grab a non ground wire and strip it.

Note: For almost everything, the ground wire is usually the black wire however for this connector it’s the white wire.

Step 17: Put the wire inside a hole of the quick disconnect.

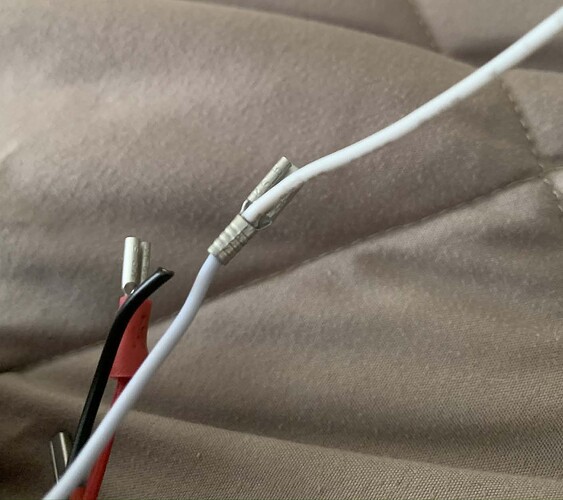
Step 18: Crimp the wire or squeeze it with whatever tool you’re using. To make sure it’s secure, tug the wire a little and if it doesn’t come out then it’ll be good to use.

Just use a crimper.

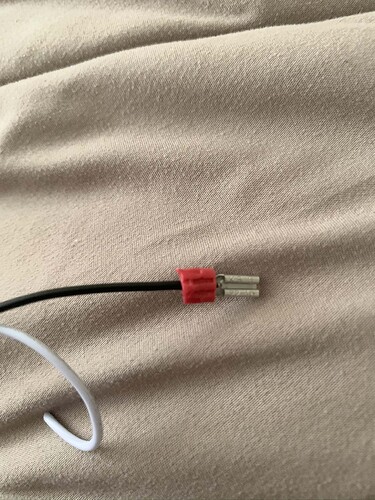
Step 19: Repeat steps 16-18 for either 3 or 4 more times to the other wires (that are NOT the ground wire).

Step 20: Now it’s time to make a daisy chain for the ground wire. Strip the ground wire.

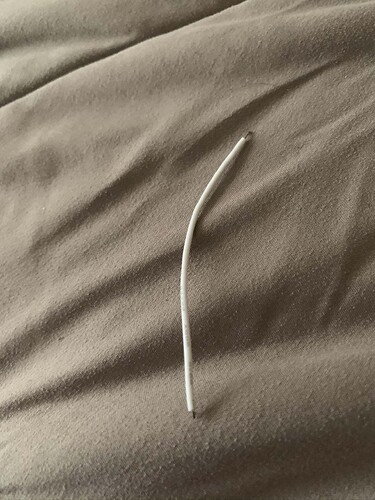
Step 21: Get another piece of wire (It’d be better if it was the same color) and cut a piece that’ll reach from one button to another. Make sure you give yourself some extra length in case you mess up with crimping or stripping. Better to give yourself more than less.

Step 22: Strip that wire on both sides.

Step 23: Put both the wires together and fit them inside the quick disconnect.

If both don’t fit inside the quick disconnect then do what I did and put one wire in the bottom and the other in the top. Like I did, it doesn’t look pretty, but it works.

Use a crimper.

Step 24: Repeat Steps 21-23 for how many buttons you plan on using the daisy chain for.

Step 25: Once you get to the last button, strip one side of the wire and put a quick disconnect on the other side.

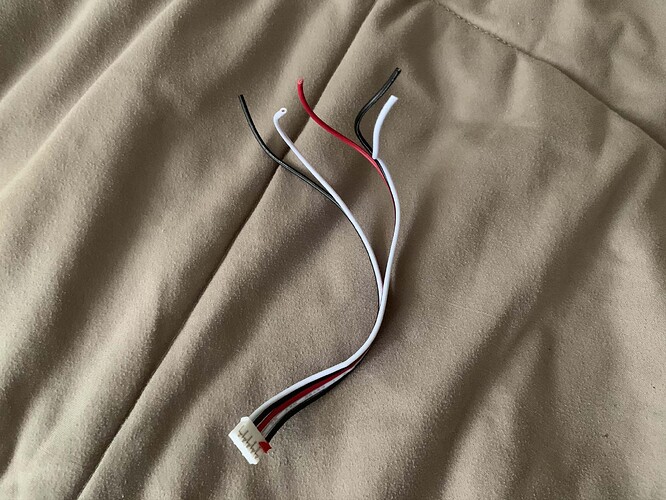
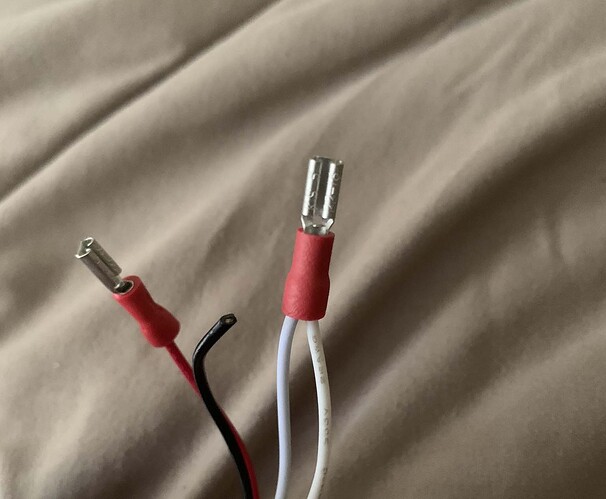
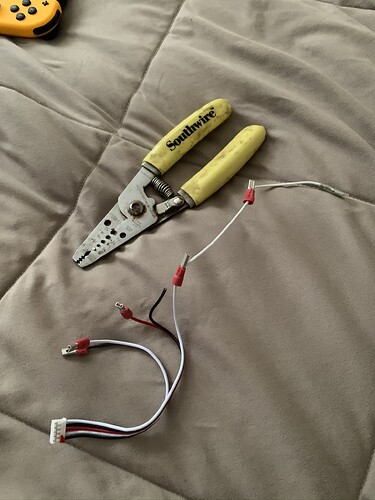
Here’s how it should look.

You might notice that I didn’t add a quick disconnect to one of the wires. Since I’m only using 6 buttons there really isn’t a reason to add a quick disconnect or strip the other wire. Just leave it as is.

Step 26: Connect the cable back to the PCB. Don’t worry about putting it in the wrong way since it can only go in one way. Connect all the quick disconnects to the buttons. Each button should have one ground wire (daisy chain) and another wire for which button they are.

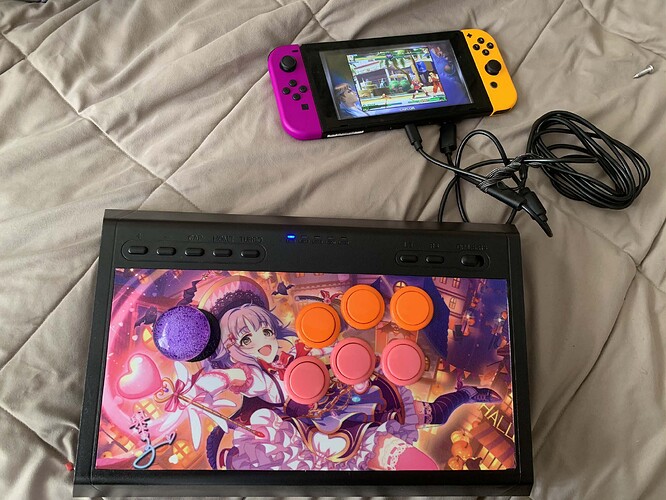
Step 27: Connect the stick to a Nintendo Switch or PC and test it out if it works.

If it works then congrats, you’re almost done. If not then do some troubleshooting. If there is an issue then it’s most likely that a crimp is bad.

Step 28: Repeat the previous steps for the other wire connector.

Q: Is there any alternative? To do instead of all that?

Yes there is

Alternative 1.) You can just strip the wires and then solder the exposed wire to the button prong. Like how the stock buttons were like. Why would you want to do this? I don’t know, but if you have a soldering iron then I guess you can do it that way.

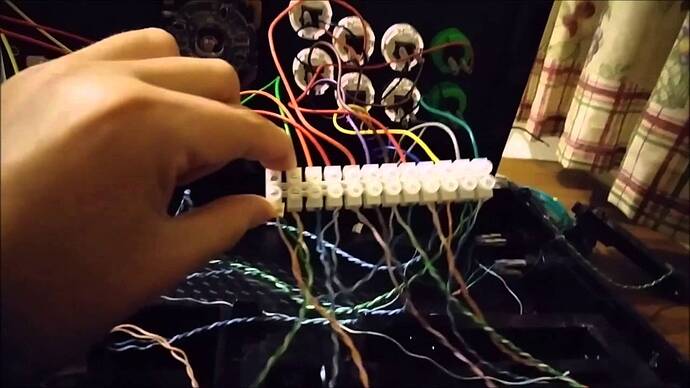
Alternative 2.) You can use AWG barrier strip and buy pre made wires with quick disconnects. Then strip the wire from the wire connector and screw it the barrier strip and then use the pre made wire quick disconnect and connect it to the buttons. Kind of like this


That’s probably the easiest way, but pretty messy.

Step 29: Check if everything works. If it does then you can do some wire management if you want. If it doesn’t then do some troubleshooting.

Step 30: Put the back panel back on.

Congrats you did it! That wasn’t too hard right? Like I said previously, if you’re looking for a cheap stick for the Nintendo Switch then I recommend buying the Mayflash F300 instead or save up some money and buy a Mayflash F500 or Hori RAP V. They’ll be way easier to customize. If you’re looking for a stick for PC then there’s better options on the used market for last generation sticks that work well on PC.

Anyways hopefully this was helpful, if you still have any questions then just leave it here and I’m sure someone will anwser it.

1 Like

Where did you get your art printed, out of curiosity?

Site called eSigns

https://www.esigns.com/floor-graphics/

6" x 12" Floor graphic. It’s okay printing quality, easy to cut, and has a nice feeling. Not sure on the longevity yet. Although since it’s suppose to be on the floor I’d assume it’ll be good for a while. For $5, not terrible. Shipping prices are kind of high since they only use FedEx, also not sure if they use the ideal way to ship prints since they wrap it around a tube, but it flatten out easy once I put it on the stick.

2 Likes