Awesome stick, but what are the wrinkes in the upper left hand corner?
Somewhat. I usually like this style because my other stick from TMO has the same type of design incorporated on it.
Whoops, it’s reflecting light out of the Plexi. :X
Yo networkingyuppy, That stick is sick. Where can I get a case like that. Your maple stick looks better in person. I gotta see that one in person too. We’ll be meeting up soon!
he got it from broken_english yo!
that looks great fellas nice sticks (no homo)
Yeah, the TMO maple stick is pretty cool, I’m never letting that one go. I had received the Balrog case about 2-3 weeks ago. I guess it was finally time to show this stick. The case was from England. It definitely cost me an arm and a leg. 
Ah cool, only reason I asked is due to me always trying to find a MAS stick, but settled on SFAC stick. Looks awesome man grats.
The detail on that stick is amazing.
Norris Arcade Sticks are big fans of Broken English. :woot:
I love my customs!
Original, handmade sticks for life!
You guys are also the best!
that’s a pretty ill stick!! mad props to broken_english. :tup:
That balrog stick looks pretty awesome, buttons look really far from the stick, seems like it would be awkward to play with.
yeah, I think Broken English posted just the case when he was done with it. All his work is so nice, the first time I saw one (I think the black one with chun art) I wanted one immediately… shipping from the UK is crazy expensive though!  Oh well, I’ll pull the trigger one day- contrats on an awesome stick!
Could you tell me where you got the blown up image for that one? I remember someone had a vectorized version of it a while back, but the vectorization process lowered the quality a lot…the text in the corner didn’t look good at all… is that just a better vectorized version?
haha much love for yuppy’s Broken stick.
PS. manman, you might wanna take off that image quote o.o
Finally got me a namco from meus
http://i838.photobucket.com/albums/zz305/fonzee14/CIMG0886.jpg
http://i838.photobucket.com/albums/zz305/fonzee14/CIMG0885.jpg
Just waiting on my converter so I can finally use it!
I believe d3v made me the template, I have it saved on my computer somewhere, I’m sure I could upload it somewhere (not sure though due to the size).
QCF/ecKsniNe dual mod
Hey guys.
This is sort of an unusual post for me, but here it goes.
I know what I am capable of doing with a premium case, however, I was curious to see just how much I could do with a really low budget case.
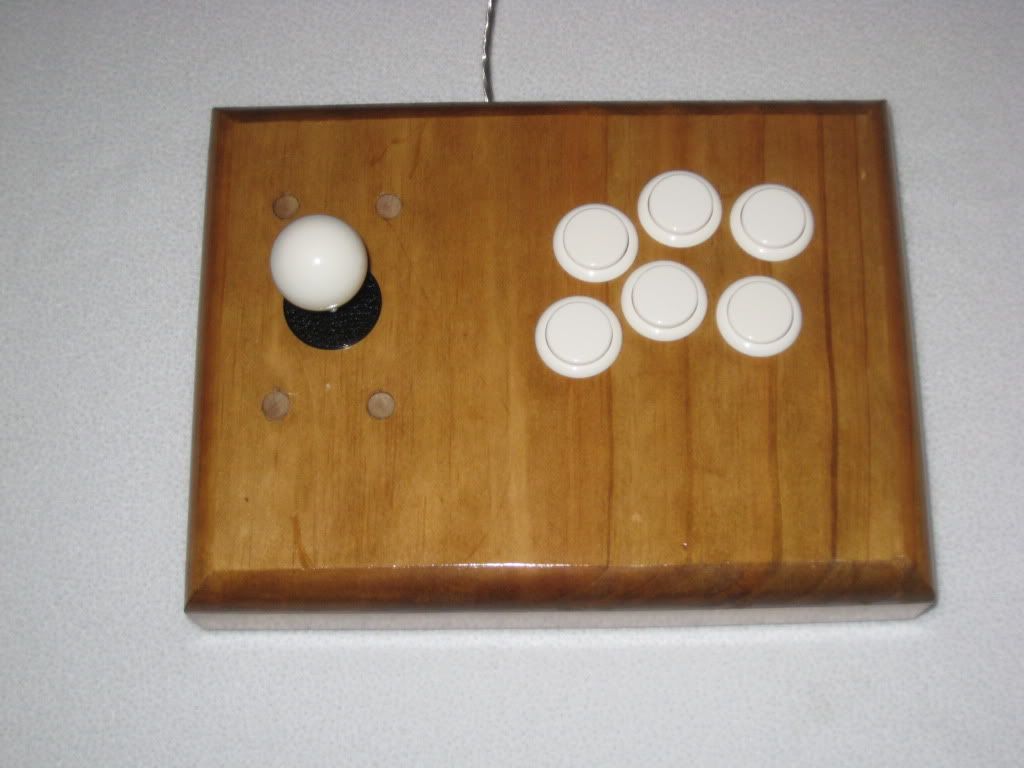
The case I decided on was a Pine sanwa case from QCF. The first thing I noticed about the case is that is smaller, and lighter than any of the cases I have ever worked with. There were also some small blemishes and gaps on the surface/construction. The finish is a little thin, and the case wasn’t sanded nearly as smooth as I usually do it. Having said that, for the price they are asking I think this is really a fine case. It’s sturdy and made out of solid wood. For a fraction of the price of a premium hardwood case, I think the QCF case is a serious contender for low budget cases, especially after some simple modifcations, like the ones I did on this case.
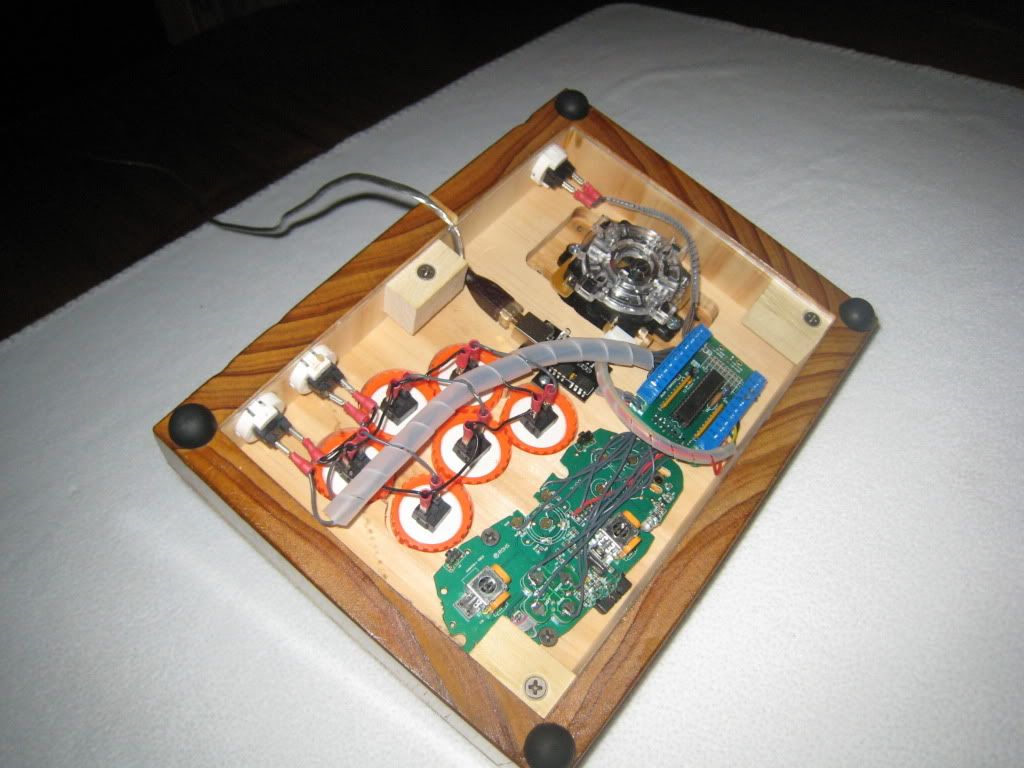
The case came with a hardwood bottom, which I decided to ditch and cut a polycarbonate plate for the bottom. In doing this, I also added a cord notch in the bottom middle of the case, this was necessary since this case uses 3 blocks instead of 4. I didn’t feel that the integrity of the bottom panel would be sufficient if the cord was yanked or jerked if it was coming out of the bottom with a notch in the plexi. I also ditched the included screws for the bottom panel and replaced with with 3/4 Tungsten screws for the plexi.
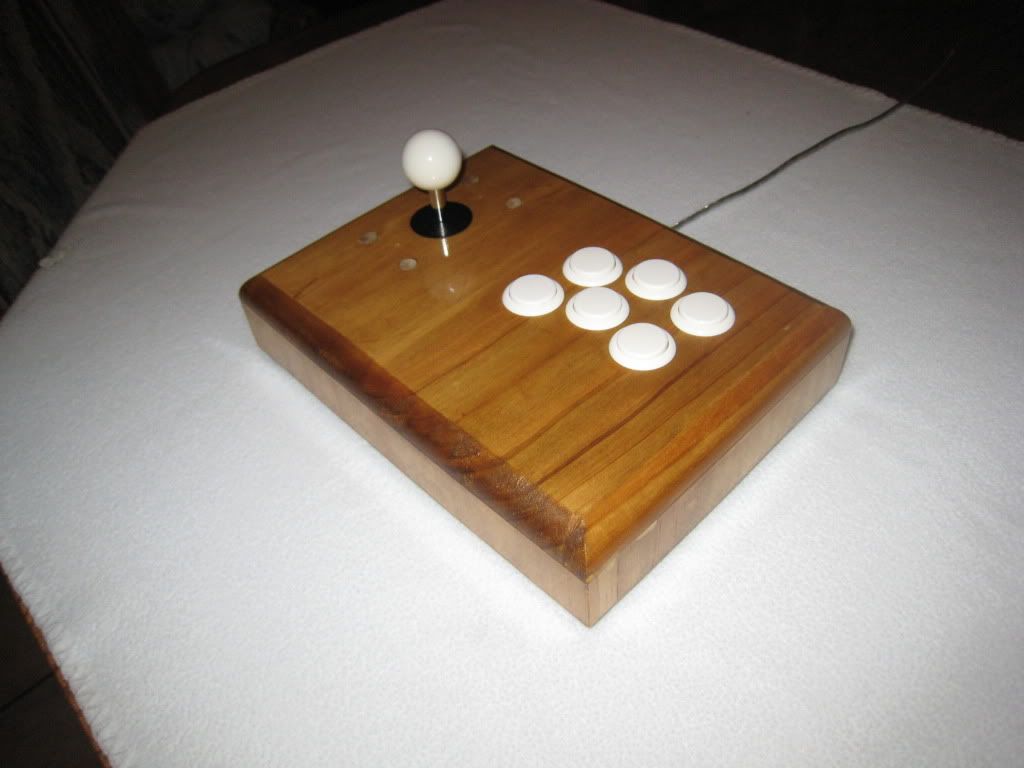
The next modification I felt would be good for the case was to ditch the visible top screws. I just don’t like how the case looks with flat-head screws showing on the top. I also wanted the top panel to be as flush as possible. I removed the JLF screws on the top panel, and plugged them with pine screw plugs. They aren’t a perfect match but I think they look better than screws. To mount the JLF without the original screws I simply removed the plate and mounted the stick from the bottom with 3/4 particle screws and a lock washer. The stick is very sturdy and solid with this mounting method.
The final enhancement I made to the case itself was intended for better table/lap play. I added four threaded ultra-grippy rubber feet to bottom 4 corners. Now the case can be set anywhere without concern of scratching it, and it doesn’t slide around at all on a table or desk.
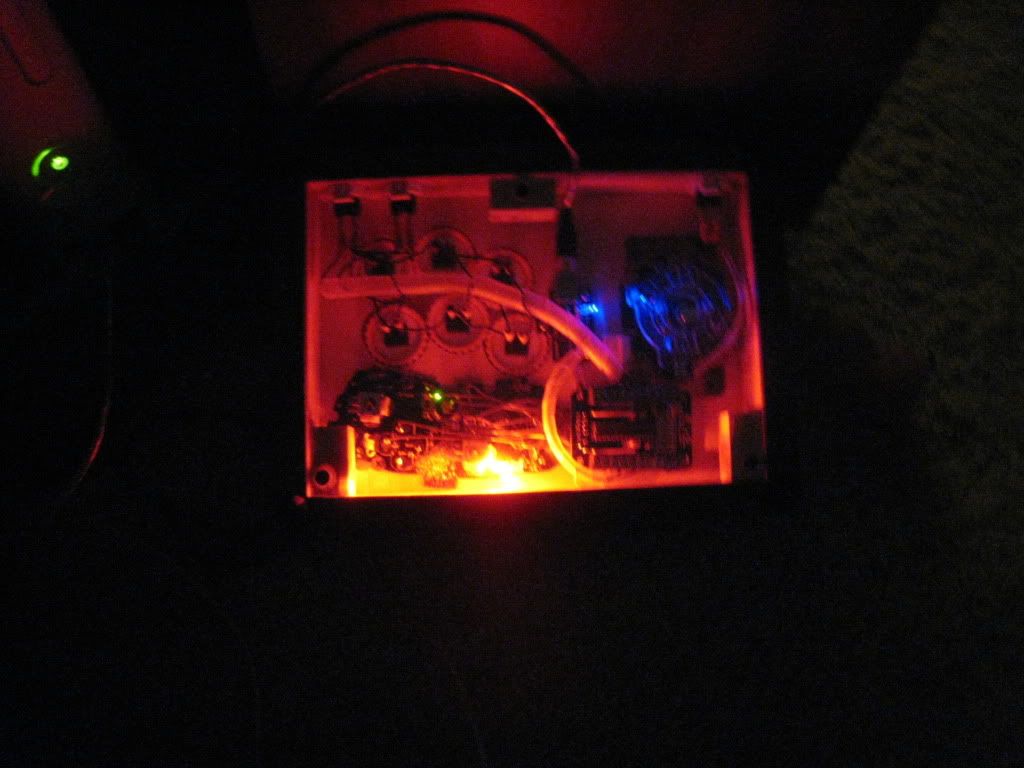
For the wiring, when I first looked at this thing I was really concerned whether or not I would be able to fit a dual mod and an imp inside. I figured I probably could but it might be hard to keep it looking clean. I sized a Cthulhu PS3/pc and an xbox 360 common ground pad next to eachother in the case to see how much room i had to work with. As you can see, it wasn’t a lot. The pad and the Cthulhu are wired so close together they are almost touching. I had just enough room to stick an imp between the buttons and stick. Surprisingly, I was able to get everything in, and wired and keep a really clean appearance. I spiral wrapped the whole thing and it came out really nice. The final touch was I added a UV/purple light to the vcc line that comes on if the stick is powered for either system. I also added bright red LED’s to the xbox rumble motors so the entire undercarriage flashes red if you get hit in SF4. 
So there it is, this is my pimped out QCF case stick. I will most likely put it up for sale in the trading post soon for a minimal cost.

Very nice. In your opinion, what would happen if you stripped that thing down to the base and started from scratch with the finish? I’ve been looking at those cases, wondering how much could be done with it. Most of it comes down to the quality of the wood, I know, but after getting your hands on it, is it something you could really work with?
Very awesome work. I’m amazed, and glad you had fun with the case. Interesting to know that you were one of the buyers on that first batch of finished cases.
Also, I’m a little sad to see no Garou av anymore.
nice work eck i have 1 of the slightly longer ones 8 button layout though i dislike the jlf screws on top as well
Well, you could. Honestly, the first thing I wanted to do when I got this case is strip/sand it down. Then reroute the whole thing, maybe either round it all or chamfer it all to make it look more smooth. Then of course I would refinish it. It can be done, but you do have to be careful with soft woods like poplar and pine though, as they tend to shred down easy. The other problem is that the case did have some gaps which wont come out no matter what you do. The reason I didn’t do any of those things is I didn’t want to really alter the case at its basic woodworking level. I wanted to keep it how it is for my test/post/review.
Thanks.
I am planning on having a new garou av made soon.
Thanks. Yeah, they are a bit of an eye/wrist-sore. But, not hard to plug like I did above. I can q-tip some poly onto the plugs too and make them look more like the rest of the box.