Hey everyone,
I’m new to this forum and want to ask some questions about Arcade Stick building that might not be advanced enough to make it into the Tech Talk, but might be too much to post in the “SRK Newbie Saikyo Dojo Arcade Stick FAQ (Read this before asking questions)” Thread.
I’m planning on building my own Stick, the actual building has to wait until somewhen in the summer, but things will be easier then if I already have final plans and templates (as I’m not experienced with that kind of work).
To give you a brief idea of the kind of stick I want to make I’ll leave some notes here:
(Note that my plans are in a very early stage)
Basics / miscellaneous:
This is going to be a 1-Player Stick.
As I’m only playing on my PC I don’t need PS3 / PS2 /X360 support, however, I guess it’d be a good idea to take an Xbox 360 controller PCB anyway, to rely on the support from “Games for Windows Live” and having the convenience of an USB Cord.
The Arcade Stick should have a detachable USB Cord, though shouldn?t be wireless.
The most part of the Enclosure will be made of MDF.
Layout:
I want every Pushbutton and Joystick on top of my Arcade Stick in the control panel. With six buttons in a standard Japanese layout, as start and guide buttons I want to use slightly smaller buttons in the upper left-hand corner.
Hardware:
Based on the information I?ve got from slagcoin I want to pick up the Sanwa JLF Joystick. As the difference between Seimitsu and Sanwa buttons doesn?t seem to be that crucial I want to pick up the 30mm Screw-in GNC buttons ? mainly for the modding purpose. As mentioned in the ?Layout? passage above, the upper left-handed corner pushbuttons will be smaller buttons ? maybe some Sanwa / Seimitsu Screw-in 24mm buttons, or those 28mm player imprint buttons.
Enclosure:
As for the enclosure, I?ve not set my mind for a specific case. I really like the look of those QANBA sticks, but they don?t seem to be slanted ? which is what I?m mainly looking for.
On the other hand I don?t even know how to build a slanted case ? a so calledidiot box (pretty devaluating name) seems to be much easier to plan and therefore to build.
1.) That idiot box is a box-in-a-box design, right?
So much for my brief plans, and it doesn?t seem like I could get a hold of heavy machinery ?no circular saw, no router and not even a multitool. Whatever, lets continue the questions:
2.) How do I get all those holes and cuts in the acrylic? I?ve seen someone trying it with a fret saw ? sawing for ten minutes with frequent pauses to prevent melting and not getting a centimetre further.
3.) Using this layering:
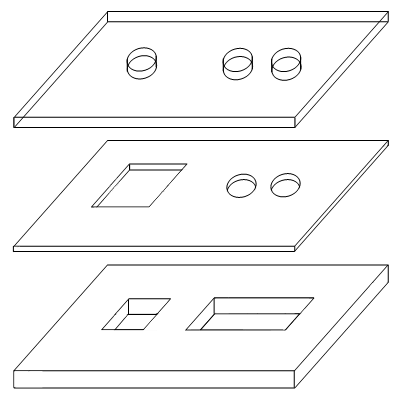
How thick should the bottommost layer be?
4.) How thick should the acrylic be?
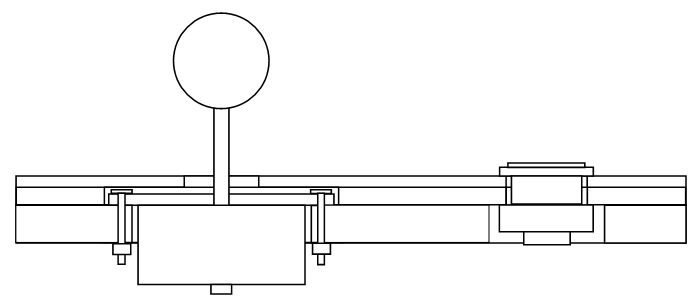
5.) Building a case like this:
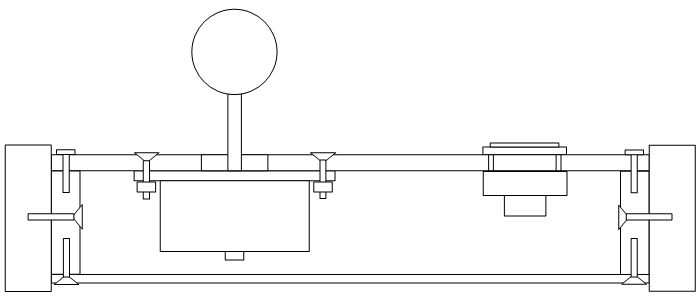
How do I slant it?
(I don’t want to build a Bumblebee either)
6.) If my PCB doesn?t have a common ground, can I grab anyone and use it for all the buttons?
7.) How do I get a sense for the general size?
a. How much room do I generally have to leave in every direction of the Pushbuttons on the control panel to keep it comfortable?
b. What are the most common dimensions?
8.) I can’t get a scale print of these layouts.
I guess I must have misunderstood the instructions. Let?s take for example the ?Standard Japanese arcade layout? with 300 PPI. This picture is 2621 pixel wide. So we do have to divide this by our PPI count, right? So 2621 / 300 = 8.74 inches; so that my German mind can visualize anything from that I have to multiply that with 2.54, this equals 22.19. And this again means that the printout must be ? sorry, I?ve got the wrong measuring tape (laid out 22.19 inches) … but then again do 8.74? from the joystick to the Pushbuttons at the far right (which there are 8 of) seem pretty short. Did I get it right?


 -> A=26 mm, B=31 mm
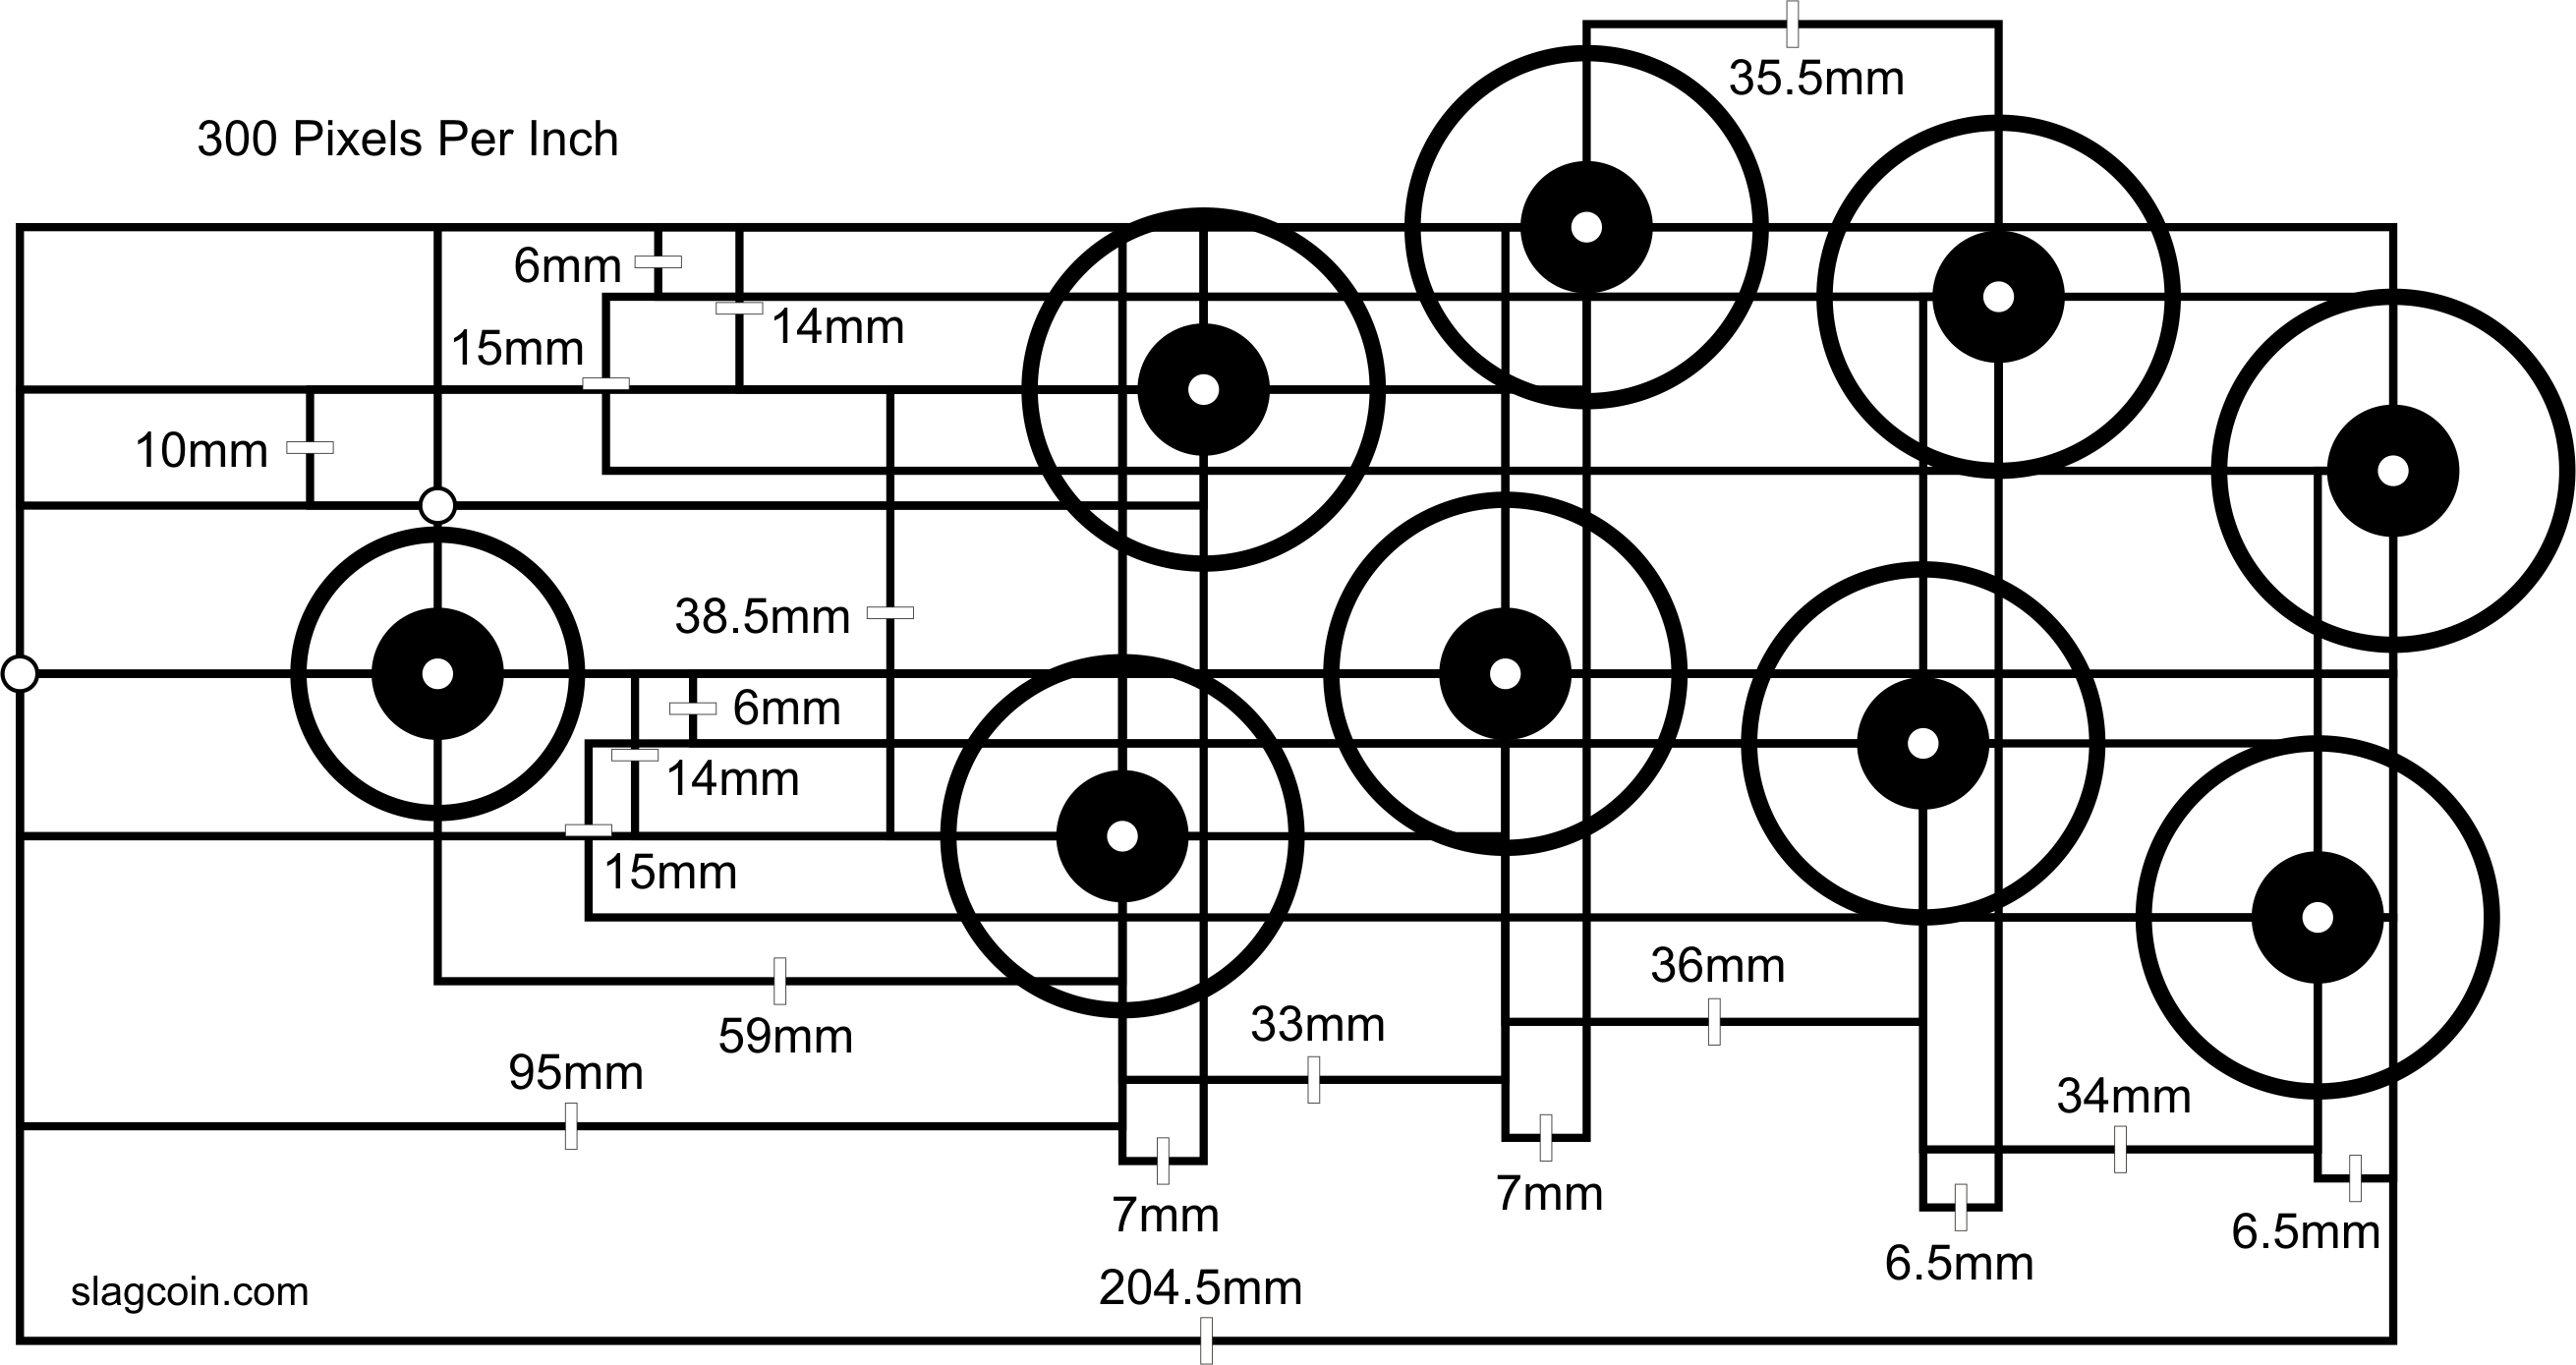