Alright, i’m in the process of buying buttons so that I can begin repair on my mayflash fightstick but being new to modding i’m kind of lost on what to expect when I buy these buttons. I suppose my biggest concern is not how to install them, as it seems fairly easy, but rather if they come with all the parts I need to begin installation. Like, do the appropriate wires come WITH the buttons, or do I need to buy the wiring seperately? And also, what if they look like this:
They look like they belong in a wall-socket, lol. Is this normal for pushbuttons or do I need to be aware of something else? Sorry if these questions are noobish or what have you, but hey…I gotta start somewhere, yeah? Thanks for the help, if I need to elaborate more I will do so, just let me know what you’re not sure about.
I’m not sure what you’re saying. I get that the buttons do not come with wires now, does this mean I need to buy new wires? And what is the “disconnect?” Like I said, i’m new to this so i’m not even familiar with all of the terms.
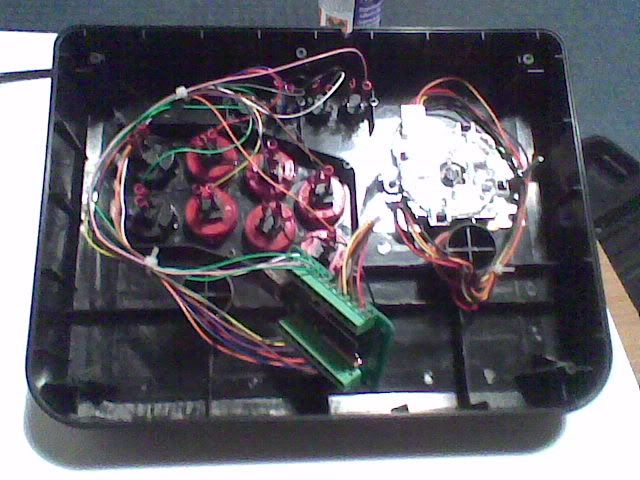
these are the disconnects he’s talking about. you’d crimp them (i solder also) to the ends of the wires and then plug them into the tabs on the bottom of the button. if you look at the pictures he posted you can see all the wires running into the bottom of the buttons have them on them
i THINK the mayflash buttons may be soldered directly to the pcb but once again. i’m not sure, if so then yes, you’d have to buy your own wire
The wire goes into a Quick Disconnect, the thing with the red sleeve on the pictures you see all over here.
The Quick Disconnect goes on the tabs of the micro switch.
The other end of the wire goes to the Printed Circuit Board.
Read all of slagcoin.com for a few hours and return to you original thread. Hold off on spending any money since you will need to spend more money on other tools required for this mod. You can’t simply buy buttons and hope they magically drop in this stick.
When I initially made my joystick (I’ve only made one), I too was confused on how the hell does one connect wires to the buttons - especially with quick disconnects.
Then I realized: all I needed was for the wires to be in contact with the quick connect!
To do it, you’ll need:
Wires (duh - I used cat5)
Quick Disconnects (QD) 0.110" (I used 0.125", but I used pliers so that it will fit)
Multimeter (for finding whether the connection is good)
Pliers (for crimping)
Cutters (for cutting wires/stripping wires) (yes, you can strip wires with a cutter)
You may want to do some practice runs first if this is your first time doing anything electrical (I thank my years in high school to prep me for this).
Strip the end of a wire
(Optional; I did this) Make a long loop with the stripped wire
Put it through the QD and ensure that the exposed wire is in contact with the metal nub(?). Mind you, as long as it’s in contact with any part of the metal on the QD, it’s good. But I use the nub to be safe
Use the pliers to crimp down the red part of the QD
Strip the other end of the wire and use the multimeter to see if the connection is good.
If you’re using the 0.125"QD, lightly crimp down on the QD where it would connect to the tab on the button.
Test to see if it fits.
Repeat 6 -> 7 until it fits.
If any of the steps are unclear, I’ll try to back it up with photos.