Yeah I decided to mod my HRAP V3 SA since it’s not worth anything for trade in here in Japan. And instead of buying a second stick it’s cheaper to just mod this one instead.
I want to drill 3 24mm holes either on the back or on the sides for:
Select/Share, Home, and of course, the fucking touchpad.
I plan on using a Brook Universal fightboard too and the end goal is to make this a seimitsu stick to complement my Noir Panel Sanwa TE2 (which I will need to also eventually get an EZmod and Brook UFB, fucking touchpad).
So any advice? I’ve seen Brook UFB mods in HRAP V3/XVs but they don’t bother with wiring the crappy Hori mini buttons, also that doesn’t solve touchpad. I thought about just stripping the ribbon cables for those but it looks like a waste of time and they look too fragile anyway.
I’ll need a 24mm hole saw for the drill, I know that much. And yeah I want to be as safe as possible when doing this drilling.
A hole saw might be tricky to drill into the back or sides, unless you find a way to solidly clamp down the casing.
Alternatively, the easiest and cleanest way I found to do this (did this on my TvC/Brawlsticks) is to use some sort of circle-drawing tool, and Dremel out the 24mm hole using a sanding/grinding bit.
As long as you go about it slowly, you have more control and less risk of your hole saw going haywire…
Yeah the thing is right now I can’t find anyone with tools to borrow from. And the only people I know with tools are back in Canada. I don’t want to break the bank for power tools here (I’m going to buy second hand with the bits likely being new).
I swear I hate that touchpad.
Edit: One of my friends just told me that I can rent tools from a home center, so I’ll try that.
I’d second the dremel idea, I did a similar thing with the top plexi on my sf15 stick and rounded the edges on my custom
Mark your lines, little bit of patience and should be right.
Oh also a drill and a hand file to make a starter hole
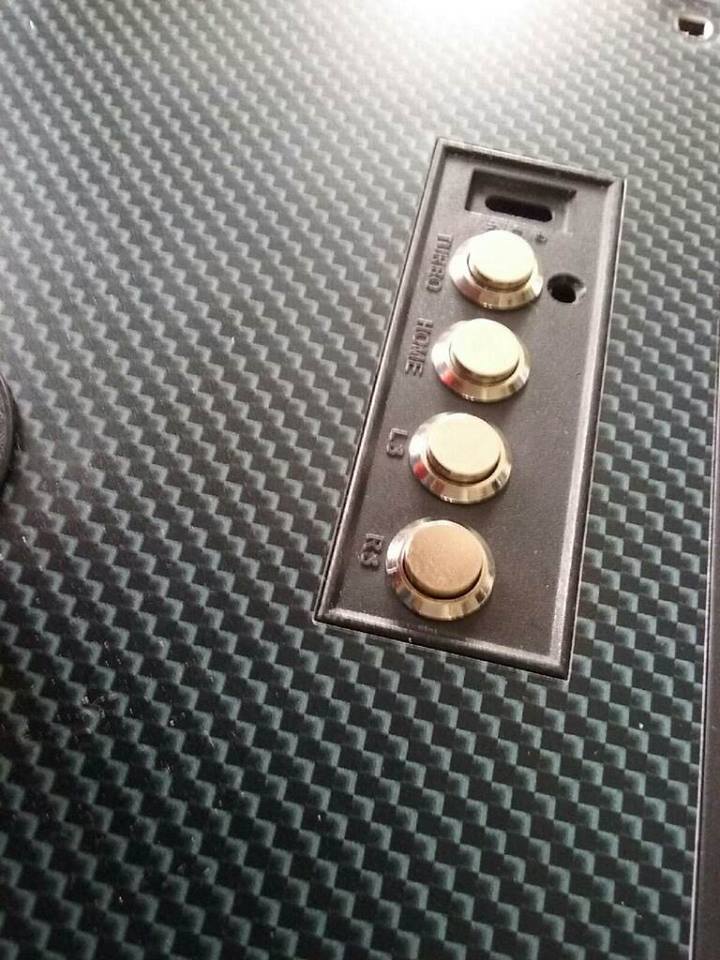
You can always find the contact points for the PS and Select buttons from the aux/turbo panel, and solder wires from that directly to the UFB.
You’d still be 1 button short for the Touchpad button, though.
Stupid touchpad button. If it wasn’t for the UFB needing “Select” for all the OTHER consoles it supports, you could wire your physical Select button to the touchpad function on the PCB, and skip out on “Share”. But you lose “Select” for all other platforms… :\
measure the mini button holes and instead install some mini buttons of your own. No drilling, if you need an extra button for the FTP, then add another mini button, keep it secret…keep it safe. I’m actually in the process of doing the same thing to a HRAP3 Turbo panel, I got these 10mm vandal momentary buttons for the job, I’ll post results real soon.
TECHNICALLY, if you really wanted to avoid drilling anything, you can wire up additional functions/buttons to the turbo sliders.
They wouldn’t be momentary pushbuttons, and to activate them you’d have to slide-to-turbo then slide-back-to-normal (otherwise the function would act as if the button was held down), but it might make for a cleaner, stealthier install?
You shouldn’t have any problems with that. You may need to install the stick with the SS plate “horizontally”, using the left/right mounting holes in the mounting bracket (as opposed to the JLF being mounted “vertically” using the top/bottom mounting holes in the bracket).
Also watch out for internal clearances: I don’t know for sure for an LS-32, but I had installed an LS-40 into a TES+, and one of the microswitch solder points on the LS-40 PCB was touching/digging into the stock TES+ PCB. This resulted in the “Left” direction being held down constantly. Had to grind down that through-hole solder point with a Dremel.
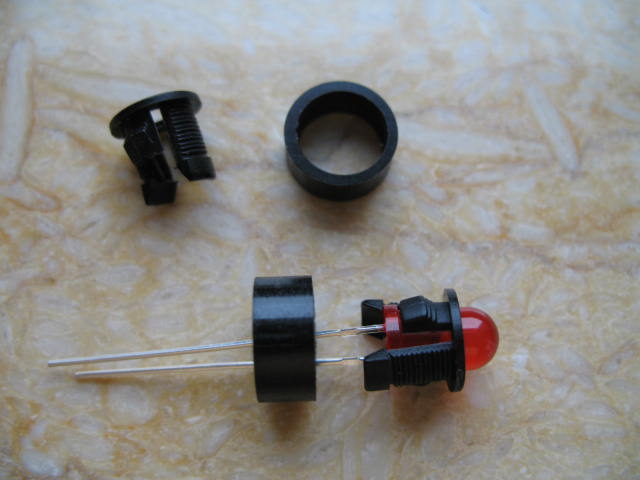
Yes that’s it! I think I may have to go with the glue due to the small hole in the Turbo panel and is also right against the turbo button space. I’ll install the button first so it’s fixed and then glue in the LED with hot-glue so it can be taken off easily if need be. The only downside is that I cannot take the button off without ungluing the LED but then again, once this is done it’s staying put. I believe I’m gonna be using a 3mm 5V LED. I’ll be doing this to 2 HRAP3s so one will be green like the original LED and the other will be white or blue at less I can find pink.