thats from the official pad hacking thread on this board, started by therealneogeo.
**i don’t know where the grounds would be on that, but i don’t know alot about pad hacking. all the tutorials i’ve seen include such a minimal amount of information, it’s like, if you don’t understand, it won’t help, and if you do understand, you won’t need the tutorial.
@Laurie47:
It’s good you have a place to do your woodworking, even though it’s not your own shop. Yeah, moving tools would get annoying to me…My table saw weighs 200lbs :wasted:
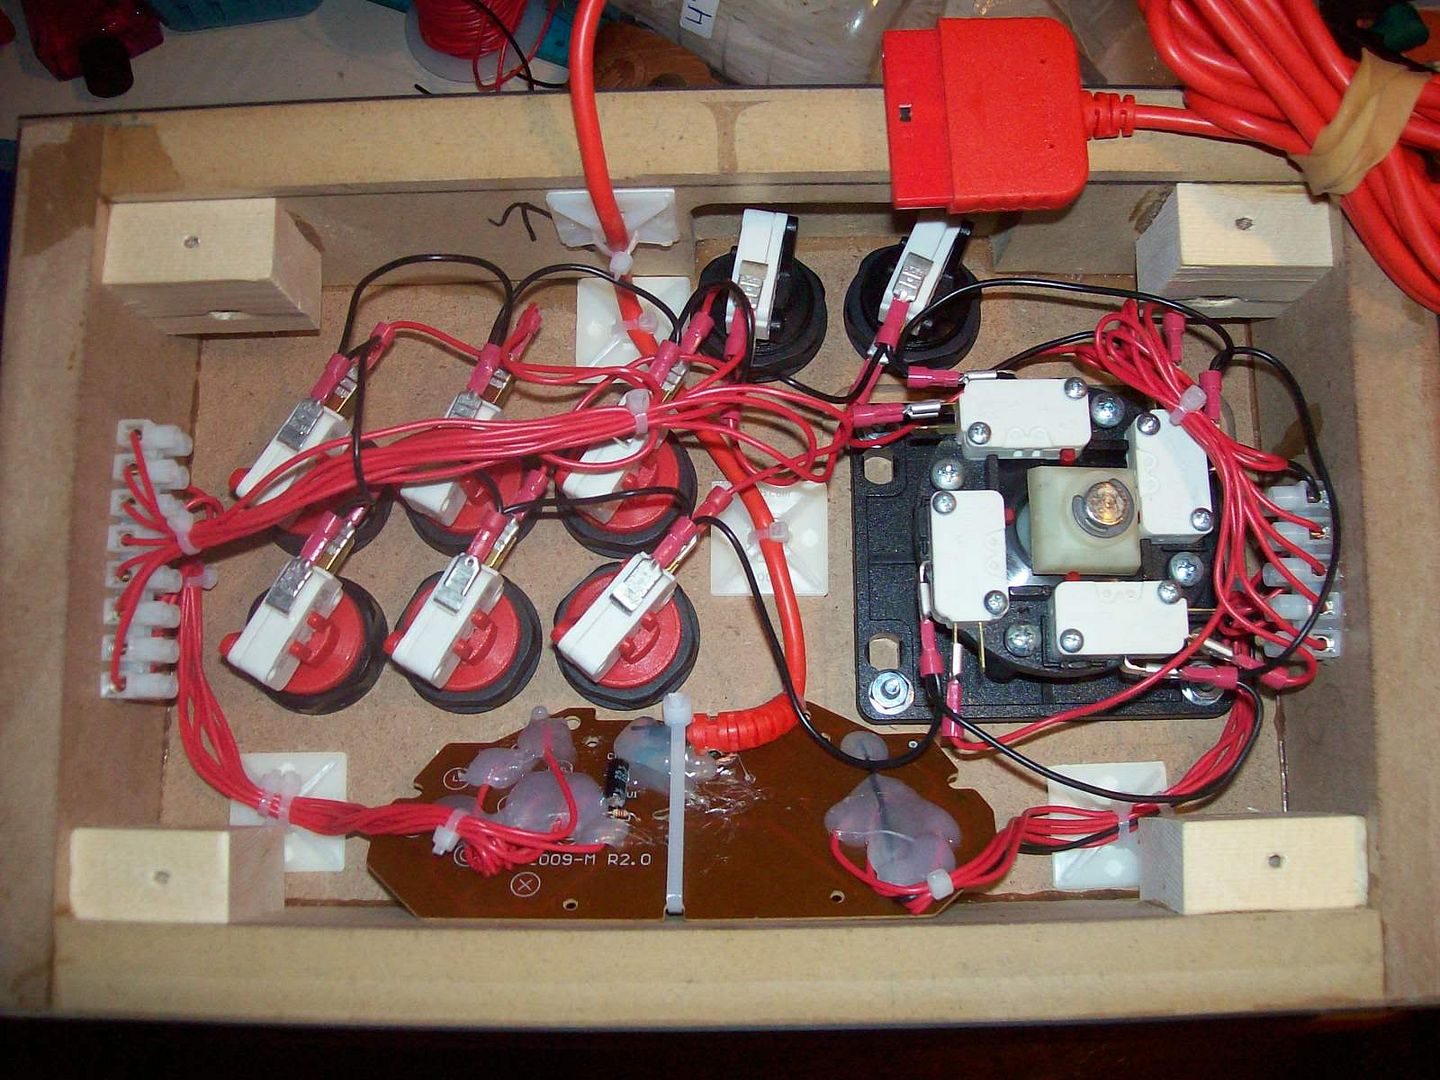
So today i’m gonna ask for 1 'inch Machine Screws, i also need to pick up those white "balancers"that are used to help hold/balance the screwed “circuit board” in place. I’ll show u a pick
look for the white things holding the screw, what are those called?
I’ll check for the exact item to look for at Home Depot. I still have the packages for the screws, nuts, washers and bolts downstairs in my shop. When I go down there later tonite I’ll grab em and post em for you.
yo, this is what yalls information has helped me do so far, i know its still not finished but i can’t beleive how much i’ve managed to get done with the information yall provided thanks.
I’m gonna add a nice set of varnish to the board, some T modling to the top board edge as well as the side boards.
Artwork & plexiglass will be added as well.
Tonight i will be soldering the wires to the Sega Dreamcast gamepad tonight, if yall have any other suggestions to add on please let me know.
50-Fiftytrap: Yeah its my first one, they say its always your worse looking one, but so far i’m happy with accomplishing what i’ve done so far. There is always room for lil things, but for now i just wanted to show everybody and idea of what unfinished stuff look like.
Payback: I got all my information about board sizes fromhttp://www.darkravenwind.com/cdvision/box.htm, i copied the Pro Stick Clone. Once you know which wood is what, understanding where you will be nailing it becames pretty easy.
I got my parts from a guy at a dead arcade, they get parts really really fast so it wasn’t a problem for me to buy off of them, paid $32 for 7 and cherry switches with a stick.
Wiring i picked up from Radioshacks’s “The Source”
It looks good to me. I hope my 1st one comes out like that I’ve been trying to gather info on how to build a good one, and find a really sexy looking box design. I think I’m gonna cheat and just get some box measurments and take them to home depo and let them build:lol:. I like how you can open it like a desk. Easy access to the inside if there’s ever a problem, and yea looks like you could put some games or something inside there when you traveling or something.
Well pesonally if i see a style i like i just go with it, and save myself the trouble of coming up with custom designs, thats just me anyways. I live in Canada, so alot of the extra things that i’m looking to add are a lil bit more expensive, but you should be able to find all supplies you need for a good deal, considering you live in the states.
Have you decided which game controller you’re going to use?
alright, i’m sure you will find all the information you need on the joystick thread, goodluck. So are you only building this just for sf anniversary edition, or for other games as well?
Well I’m gonna play GGXX:slash on it, but mainly for 3s. I’m building it because I have the old PS1 ( back when it 1st came out) Ascii arcade stick, and my micros are warn out on the stick so it’s time for a new one. I have a suck web cam, but maybe later I’ll put a pic of it on here so ppl can be like :wow: " you played w/that thing". :lol: It had a good run though.
Edit: I decided to not be lazy and put them up now.
I don’t really know if it’s sanwa. I’d have to open it up and look into it. It might be I’m not sure. It ain’t pretty but like I said it’s had it’s share of game play. So yea I need a new and much sexier stick :lol:.
I’m pretty pissed i was soldering my joystick and after all the work nothing is working. However for some weird reason if i hold fp then push any other button or direction it works just fine. I beleive once i get my fp button fixed everything will work in sequence but i’ve been doing it about 4 times and nothing has changed, i tried to double check if my quick connects were on properly and when i tried playing the stick over again, NOTHING WORKS, except assis 2(hk).
If everything works when you hold FP down then that means you’ve wired something incorrectly. I’m going to make one major assumption so correct me if I’m wrong.
You’re daisy-chaining grounds, correct?
If that is the case then you most likely wired the have incorrectly wired a GROUND wire to the FP in place of the LIVE wire (on the PCB). Additionally, the GROUND chain of wires is NOT soldered to the GROUND on the pad (I’m guessing you wired it to the FP actually).
My reasoning why it works when you hold down FP and input something else would be because there is GROUND connection to one of the microswitches (not the daisy-chained GROUNDS but the other one that’s supposed to be the LIVE). When you hold down the button, what it’s supposed to do is bridge the GROUND and the LIVE. Since no other buttons or directions work normally that means your daisy chains are not the GROUND or every single one of your other inputs are incorrectly soldered. The latter cannot be true since they do correctly register when you hold down FP. That means the only thing it could be is that the daisy chain is in fact NOT the GROUND.
The GROUND however is being provided by somewhere and since everything works with FP pressed that means the GROUND is coming from that button but not from the daisy chain since we’ve elimated that. That means that it’s coming from what you thought was the LIVE. When the button is pressed the two microswitches are bridged and the actual GROUND now connects with the daisy chain and sends the signal to all the other buttons and so obviously they now work.
So to sum up:
You didn’t solder your daisy-chain to the correct place on the PCB. I think you soldered it to whatever you designate as FP.
The FP LIVE is soldered incorrectly. It is soldered to the GROUND.
Basically swap those two places and you should be fine.

 .
.