Your second solution should work. That is the general way to drop the stick deeper into the box. I dont understand what you mean by the stick moving laterally a bit. I just tried it on my comp and there was no play in the stick.
I think you did the same thing but let me clarify: I took off the e-ring and pulled out the stick, slipped off the white collar, put the stick back in followed by the actuator and then the white collar, finally replace the e-ring. I did this and had no issues. The lateral play you are talking about is almost non-existant on my stick.
So you were talking about how you modded your sf:ae stick, there is a black plastic collar that old stick if you need to use a collar for spacing issues. Maybe a minimal amount of any collar will fix the play in the stick.
hey guys, i looked thru the thread, but i was trying to find pictures of custom sticks that have two pcbs connected on the inside of the stick housing. from what ive read a bridge would be the best way to do this? is that correct? i plan on using the xbox reflex stick pcb and either a madcatz or original dreamcast pcb. i have seen the project box versions for these pcbs but i think just the two pcbs in the stick will be fine. well i thought about doing a ps1 and getting converters, but its seems that it will be cheaper to hack the reflex stick since i can get it on ebay for only 16 bucks and i already have the dreamcast pads. and i wouldnt have to worry about input lag or anything that happens with the converters. is that right? i would only have to worry about the wiring of the pcbs together and getting both of them to work.
dial911 http://arkadesticks.com/pcbhelp.JPG
The black is the ground and red are button. If you look at your pcb (put it in your hand and look) you see that on it the ground is connected (the light green is connected to every ground point). If you understand me then the rest is really easy ^_^.
I’m with Maybe Memories. I need a full tutorial on how to make a MULTI-CONSOLE compatible joystick (PS2 and Xbox), and reading through sites like www.arcadecontrols.com has only left me more confused. I don’t know what buttons to buy, how to wire anything, or how to make it multi-console (I know how to build a case, and I know what type of joystick I need :)), let alone make it compatible with Xbox Live. May I please get some help besides “Read the Thread”?. I’ve started reading (I’m on page 7), but I seriously cannot read through 127 pages to find one post on how to make a stick multi-console, or one link to a full tutorial. Please help!
adjust your page settings to 40 posts per page to leasen your reading. I have 79 pages, and if you go in print friendly view, you’ll be able to see the whole thing and just scroll through. Maybe that will help, if not the almighty search, but even that becomes tidious.
How to go I to printer friendly view? Anyways, basically what I need to know is simply how to make a stick multi console, and how to wire it. Any help?
Durp: http://www.shoryuken.com/forums/archive/index.php/t-18815.html This is probably the printer-friendly version. Hope it’s what you’re looking for. I remember reading something on multi-system sticks somewhere in this monster. Look through the posts or search barrier strips in the archive [edit] The topic of why a barrier strip is useful came up and multi-console use was one of them. For wiring, look at the links on the first page.
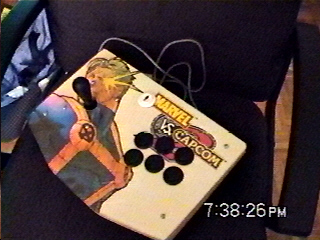
Does anyone know the diameter or size of the black disk around the joystick? Is there anyway I can make it smaller so it doesn’t cover my stick art?
You don’t really have to use it. A friend of mine made his artwork with Cable covering his stick and without that joystick ring so you can see the artwork more.
damn, whatever happened to the attach filel option? Anyway… I believe I do on my site, just let me find it and I will post the link. No. You do not need a button wrench.