The answer to your question is literally 2 posts above yours.
you may try
Manual Mode:
step 1 : Press button:
1P for PS3
2P for PS4
3P for Xbox 360
4P for Xbox One
1K for Wii U - Pokken Tournament
2K for Original Xbox
step 2 : While Pressing, connect fightstick to PC
Could an original DS4 touchpad be used with this board?
Very very happy with the ps3/ps4 fightboard. Works exactly how I wanted it to on PC (auto shows up as an xinput device).
Having touch pad input = select when using it on pc and ps3 is the best which makes it so I don’t even have to wire the “share” input.
My Hrap3 sa is ready to roll. Thanks Brook.
I just got two Brook fight boards in the mail. Brook w/ Audio and the regular Brook PS3/PS4 fighting board. I’m wondering, do I use the same update files for both? I assume they both need to be updated to the latest firmware since I just got them, but I’m having trouble finding info on updating the Brook w/ Audio.
http://www.brookaccessory.com/download/PS4/
Updated firmware only for PS3PS4 fighting board from what I can see here. I haven’t seen a firmware for the PS4+ audio fighting board.
@trillmaher
Brook PS4 fighting Board w/ Audio…
Never to update any file while getting
It can work well on PS4…
I don’t have to update the Brook w/ Audio?
you’d want to wire the share button if you want to update your pcb for ps4 firmware updates D:
Hi all, Ive just finished wiring with the Focus Attack ps3/4 board breakout board. Having a lot of issues getting pc to recognise. When i first set it up it I managed to update with brook updater from their site, all went fine and worked for maybe 3-4 matches then nothing it cut off. Now its not recognised and brings error ‘device descriptor request failed’. Ive tried all fixes from this webpage - http://troubleshooter.xyz/fix-usb-device-not-recognized-device-descriptor-request-failed/ as has seen that solve issues on here and elsewhere but no luck at all  Anyone can offer advice please? Pics of wires below. Thanks in advance
https://image.ibb.co/k7QmwF/ss.jpg
https://image.ibb.co/iRFKGF/ssc.jpg
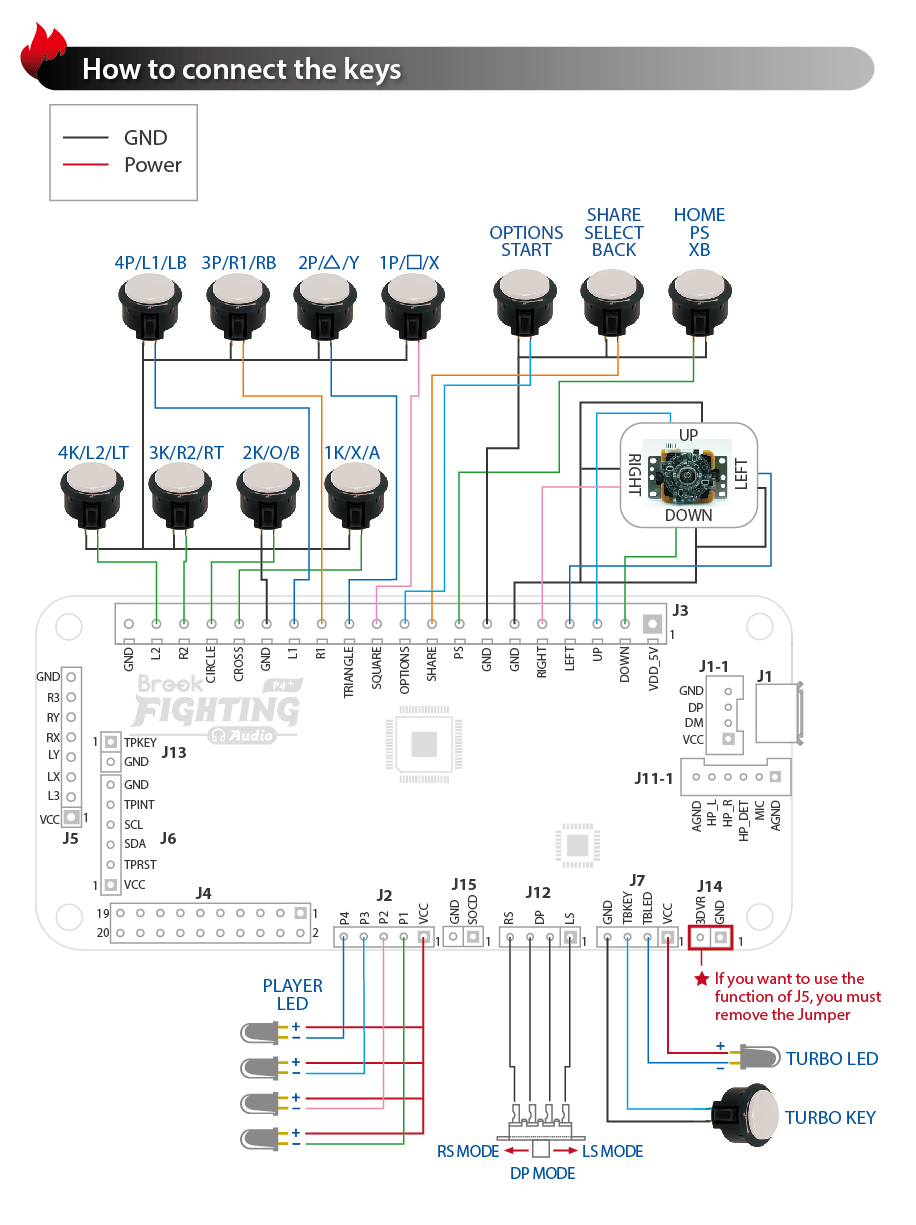
Hi I recenly bought a PS4+ Audio Fighting Board for a HitBox style stick and was wondering how to activate the SOCD cleaner. I had bought it because I have no soldering experience and was wondering if there was a solderless way of activating it. It says somethign about the J15 to activate SOCD but I’m not sure what that means exactly.
Thanks in advance.
@Afro I wonder if that was what the extra jumper in the bag with the breakout board was for. Try placing it over J15 to see if it works.
Thanks for the tip and the quick reply. This seems to work because default button assignement changes when I press a button and wire the stick.
But :
- neither the pc or raspberry wants to recognise 4P/4K. And if I wire the stick with 1P or 3P, It messes up with Start/select, and 3K works only while going as Xbox360.
http://image.noelshack.com/fichiers/2017/14/1491217825-boutons.png
This is to say that I don’t think it’s a wiring problem. Anyway I have a pre-installed PCB, I followed this picture si I’m not sure what could have gone wrong.
Also no matter what I input at startup, games recognise my stick as XboX, show me Xbox and not playstation buttons so It’s certainly a driver problem. I’v updated the firmware but I’m not sure about what to do next. Saddly I don’t have a playstation to try it on, only my pc.
Sorry if this is all a bit confused, it’s pretty hard for me to explain this in english.
Is there anyway to wire it up so I could use the headset jack on a 360 madcatz TE with the PS4 audio board?
Great …
Hi, new to the forum here, and just finished reading this thread. Lots of good info in here, but I’ve got a couple of questions for replacing the board in my custom stick (with regard to particular buttons and firmware updates, and LEDs).
1) Firmware updates: can Home/PS + Touchpad be a firmware update combination in a future firmware release?
I only have 3 “special” buttons on my stick (currently PS, Select, Start):

To update this for PS4, I was planning to wire the buttons like this (to support firmware updates):
PS -> Home
Select -> Share
Start -> Options
But if Home+Touchpad was an alternative button combo for firmware updates, I could make better use of the “special” buttons to support Touchpad button too:
PS -> Home
Select -> Touchpad
Start -> Options
Would Home+Touchpad to trigger firmware update mode be possible in a future firmware release? I realise this would require Home+Share to update the firmware the first time, but then future updates could be Home+Touchpad.
2) LEDs: Do the LEDs do anything other than Blue=player 1, Red=player 2, Green=player 3?
Do any of these LEDs illuminate for player 4? Do the LEDs light up for any other function? Does the Turbo LED serve any other purpose (like being a white LED?)
I’m wondering if getting an RGB LED is a good idea, and perhaps using the resulting 3 spare LEDs of my sticks for additional special buttons/LEDs, e.g. Turbo button, Turbo LED, etc.
3) This is what I think I have to do
I’m pretty happy that I “future-proofed” my sticks by making them ready to swap out the board:
http://i.imgur.com/2hETV5Y.jpg
So I’m just wondering whether or not to replace one of my LEDs with a momentary button switch for very occassionally use or exclusively used for firmware updates, like this:
LED1 -> Swap out for Blue
LED2 -> Leave as Red
LED3 -> Swap out for Green
LED4 -> Swap out for a momentary switch for Share
PS -> Home (PS4) / PS (PS3)
Select -> Touchpad (PS4) / Select (PS3)
Start -> Options (PS4) / Start (PS3)
After reading this entire thread, I think the above changes are the way to go, but was wondering if I’d missed any new functionality in firmware updates etc?
Oh yeah, are the buttons for XInput like the PS4+ board?
Ok?
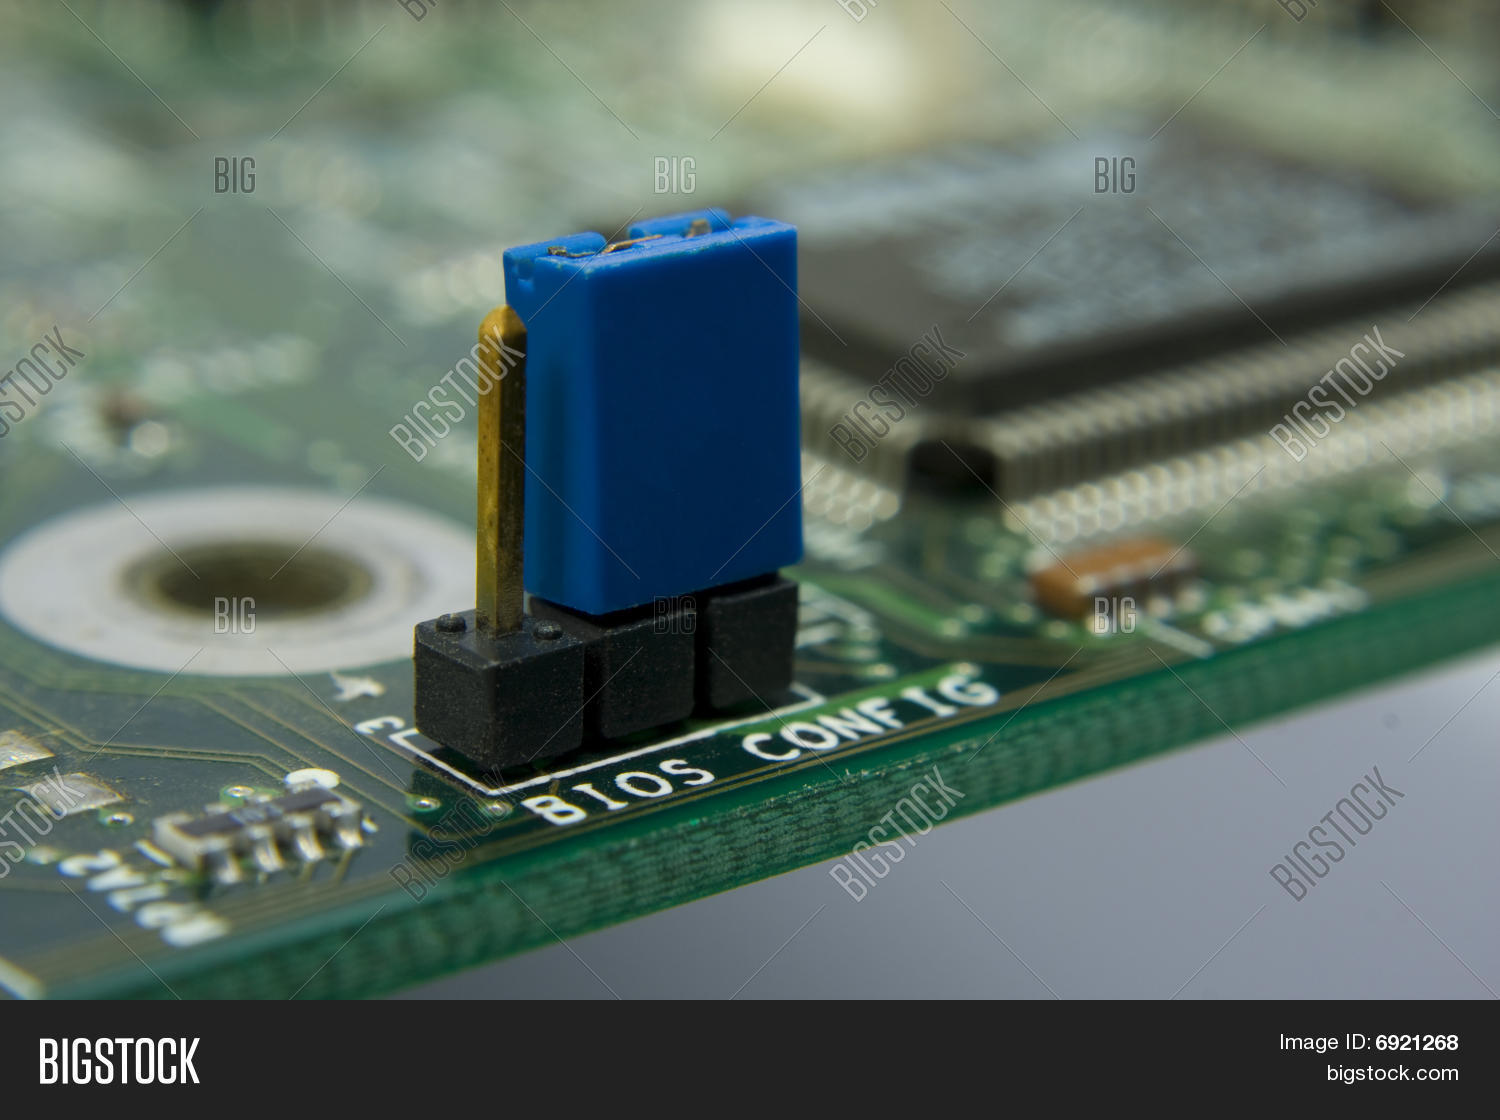
I’m assuming the connection in question is meant to be for a switch. If you want it on semi-permanently without soldering, just open up an old desktop computer you don’t use and pull out a jumper(http://static3.bigstockphoto.com/thumbs/2/9/6/large1500/6921268.jpg) and use it to connect the pins.