I was going to originally use the candy coat paint which has the metal flakes in it but decided to go with regular automotive lacquer. I remember Kray telling me he uses the normal lacquer. I’m not sure if the gun would get clogged or not but the best advice I can give it clean your gun every time you take a break longer than 5 minutes. I would recommend hitting a few coats and letting dry for 45mins-1 hour, and clean your gun while you wait. Also, use lacquer thinner and not regular paint thinner. As for the air compressor, I want to say it’s a 4 or 6 gallon. But I would recommend a bigger one than that. We are doing great with ours but it’s constantly running.
To be exact about the compressor it’s 2.5 horse power, 80 psi
Thanks for the tips, the info will come in handy!
Anytime
these things look sweet
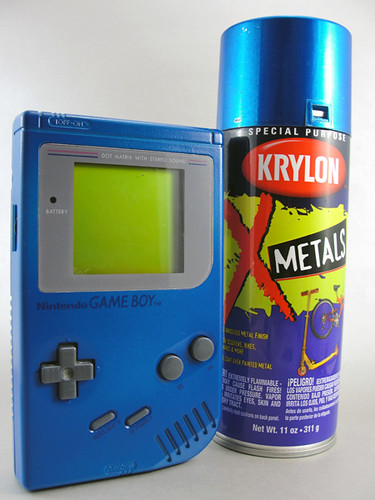
Its about six bucks a can at places like Lowes/Home Depot. The reason I found it was I have a friend who does repair and customization work on bicycles and skateboards, and he’s been using it to repaint trucks and fenders. Its meant to go over metallic but is actually a sort of dark lacquered color if you spray it over non metallics. Its also not opaque so you need to lay down primer before hand, but the advantage is that dark colored things that are below the paint (like say, stenciled on logos or button notations) will show through.
Here’s what about three or so coats over a bare non-primed original gameboy shell look like:
And here’s what the top of an engine block looks like, this would be the paint sprayed over either the bare metal or a metallic undercoat:
http://sphotos.ak.fbcdn.net/hphotos-ak-snc4/hs931.snc4/74435_463177797009_776117009_5360804_3069932_n.jpg
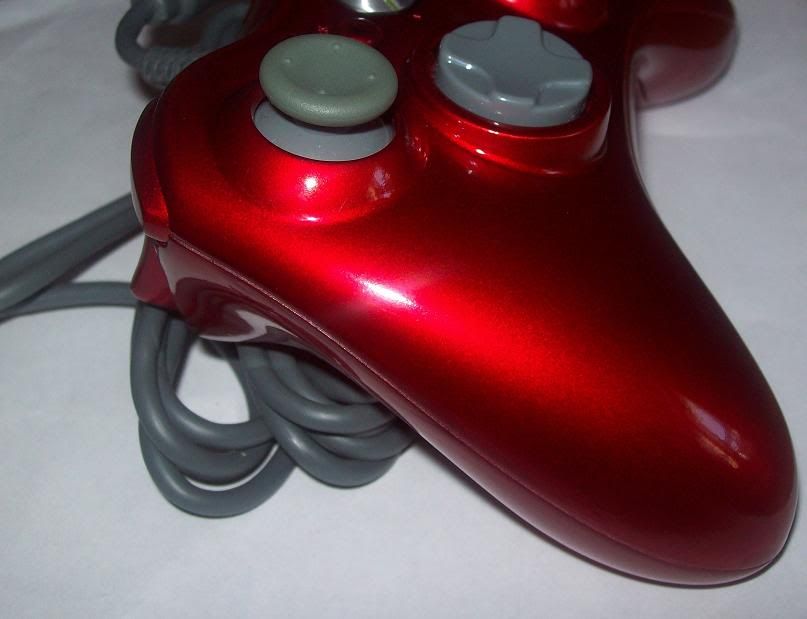
It layers really well too, here’s a Xbox 360 controller thats been primed silver and then covered with several coats (if I had to guess I’d say about six maybe):
The reason I recommended it here was that for about twenty bucks you could buy enough cans of it and some silver or white undercoat to do an entire Kraylix and it would look extremely snazzy. I for instance, plan on using it on my home made arcade cab I’ve been hacking together in my spare time.
What about sanding, before/after/in-between; grit. Your recommendations?
Looks great, what are the colors available? What primer did you use?
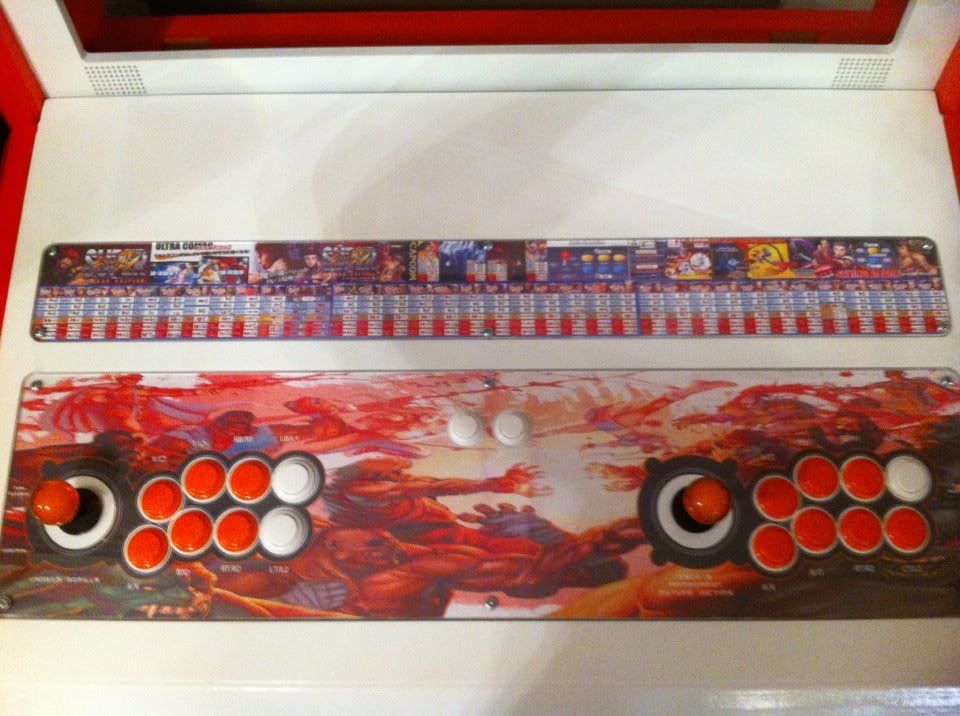
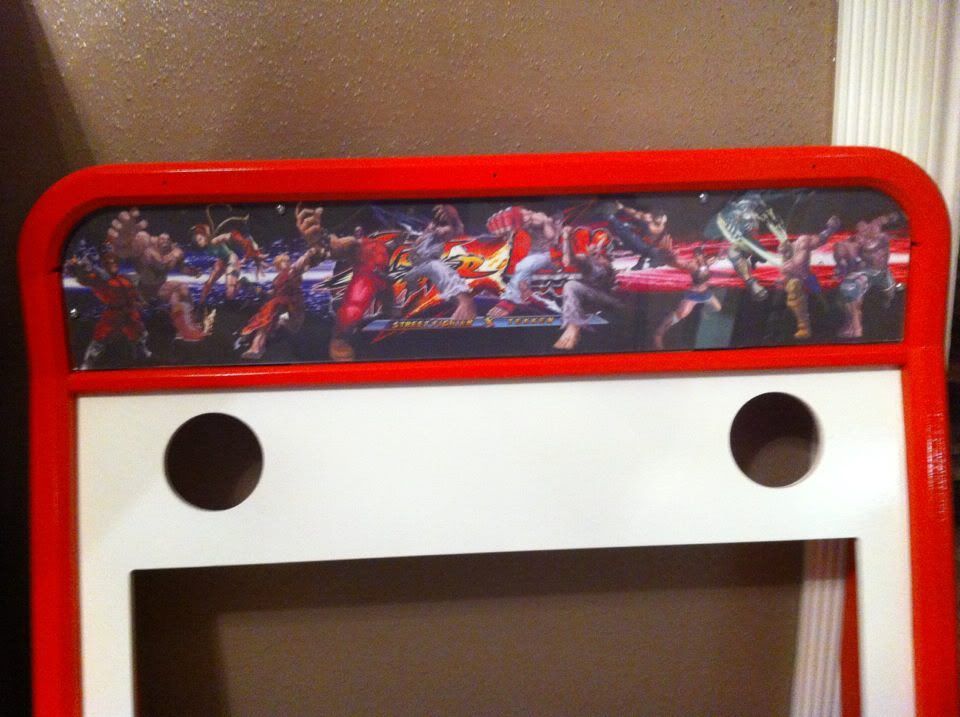
Alright guys, the cosmetics of the arcade are finally complete. Here are some pics showing the cabinet before wiring and tv. The 7th orange button on player 2 is replaced with a white button now, I forgot to take a picture but you can imagine lol. Tell me what you think

Got my fans and power supply installed yesterday. pics up soon. i got my pcb’s wired as well. focusattack has been out of 5 pin harness’ for the joysticks for about 2 weeks now so i found them on ebay for even cheaper with free shipping. too bad i didn’t notice they were in china until after i bought them lol. oh well, once i get those this week the arcade will finally be complete.
The torture of waiting for that last critical piece to complete the build! Good luck, looks sharp!
MY Kraylix will BLOW your Kraylix AWAY!!!
No words bubby pics and we’ll be the judge. Lol.
Pics just show the exterior, doesn’t show whats inside. I guarantee the components I’m using will surpass ALL others. I’ve read this all forum and no one is doing what I’m. LOL!
J/k. Although I hope you do have a surprise for us. =)
I’ve take it upon myself to add a mini keg in mine with the tap coming up the middle above the start buttons lol
no liquid is going ANYWHERE near my Kraylix!!! : P
Kray did say he didn’t know anyone doing what I am doing.
Alright man, just do some internal shots so we can see watcha got.
I don’t a place I can post them. I know that sounds like a cop out. I have them on FB but they don’t seem to link correctly.
Component list: Sony 3D LED TV, PS3, Monster Power Conditioner, Emotiva XDA-1, Hafler P3000, JL Audio speakers, Apogee cables, Sanwa Joysticks & buttons, Suzo Happ lighting kits & door, customer painted PS3 controllers, Linksys Gigabit switch, Silenx fans & PS360+ PCBs. 